Changing a Holding Tank Release Valve

Changing a Holding Tank Release Valve |
||
|---|---|---|
|
|
|
|
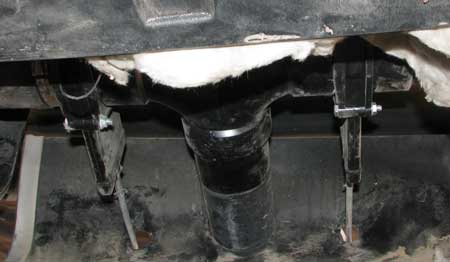
| Tuesday, April 20, 2010: Yikes, the black water holding tank valve is leaking, not from the pipe but through the valve so sewage is always sitting, waiting for me to open the cap ... ugh ... what a mess. Usually there is something blocking the valve, like tissue paper, from closing fully. I have flushed the tank five times with fresh water but it is still leaking. It's time to remove the valve to check for the obstruction or replace the valve. Fortunately, the valve is only $14 (probably cheaper in Quartzsite) and it looks easy enough to replace with only four bolts to remove. Fortunately, Carriage has an easy to remove cover over the valve assembly so I have easy access to the valves. In the photo above, the black water valve is on the right and gray water valve is on the left. There is insulation surrounding the valves so that must be pushed back to view the valves. | ||
|
||
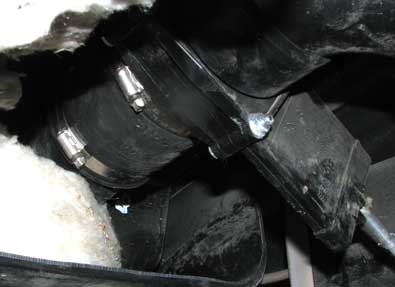
| To release the valve, there are four bolts surrounding the valve which attaches it to the two ABS fittings on either side of the ABS pipe. They are easy to release and pull free. But the pipe is very tight against the valve so Carriage used a rubber boot on the gray water side of the assemble. In the photo above you can see the rubber boot on the tank side of the gray water valve. Loosen the clamp to the far left. No need to loosen the clamp to the valve fitting. This allows the whole "Y" assembly to slide enough to the left to release the hold on the black water valve so I can slide it out between the two fittings. Carriage attaches about an 18 inch extension to the valve handle. I used vise grip pliers to unthread the extension. | ||
|
||
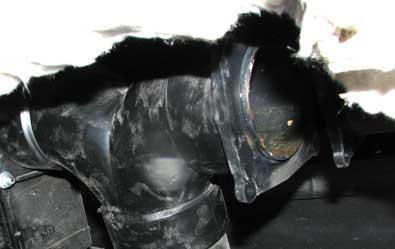
| The black water valve has been removed from the fittings in the photo above. I see no obstruction which might keep the old valve from working so decide to replace the valve. There is a rubble gasket on each side of the valve which must be seated properly so there are no problems. It seems like an easy task but I had to reinstall the valve three times before getting it right. The first time, the gasket buckled and kept the valve from closing. After reinstalling the second time, the valve worked fine but water was leaking from the connection and I did not want to over tighten the four bolts so I removed and reinstalled a third time. This third time, I put vaseline around the gasket hoping to seal the leak. On the third try, the valve worked and held water and there were no leaks around the edges of the valve. I had already unthreaded the handle installed on the new valve so just rethreaded the extension. The repair was complete. I replaced the insulation and reinstalled the cover. Now the black water valve is working again as it should. Oh! Don't forget to tighten the clamp around the rubber boot. | ||

|
Return to RV Trips | Copyright, 2010 by RVeCafe.com |
|---|