|
|
Changes to the Cameo
page 5 |

|
| February 27, 2008: One of the economy moves by Carriage for the manufacturing year of 2007 was to eliminate the shock absorbers. I talked to Carriage about this and was told MorRyde said they |
 |
|
| were not needed. MorRyde makes the suspension system for the Carriage Cameo. I called MorRyde twice and talked with two different engineers. Both backed up Carriage, "they are not needed". Yet on the 2006 model and earlier, the shocks are installed with the same suspension system. During our Arizona trip, I felt the trailer did some "dancing" on the rough roads which it would not have done with shocks. You will also see an animation of "The RE system in action" if you follow the MorRyde link above. In the animation, the suspension has shock absorbers. This convinced me that eliminating the shock absorbers was not done "because they were not needed" but to hold the price point down. I decided shocks really were needed. |
 |
If you recall, I built a Web page for our neighbor Glenn in trade for a stair. In addition to the stair, Glenn agreed to do the welding of the supports I needed for the top mount of the shocks. But Glenn had to borrow the welder from a friend. We soon learned that |
|
| we could not plug into the 220 volt plug at the RV park. Glenn is a Rube Goldberg expert, he shoved the wires into the plug while I taped them into place. We both stood back as Glenn flipped the switch on the welder. It worked! We had 220 volt power to the welder. I had already purchased the four upper mounts needed for the shocks from a welding supply. |
 |
|
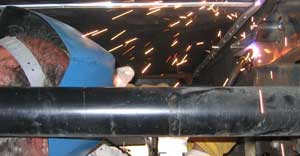 |
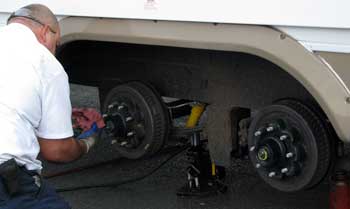
The only welding needed was the four top shock mounts. We carefully measured and Glenn put them in place after first grinding the paint off the frame to give raw steel. You can't weld to painted steel. You can click this photo to enlarge. |
|
| Once Glenn was done, I primed the raw steel with metal primer. The directions wanted the primer to dry for 48 hours. I then painted over the primer with flat black paint. I let it sit for 24 hours, then mounted the shocks. It was an |
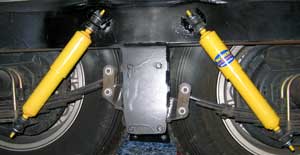 |
easy install except for squeezing under the trailer axles. The final mounting of the shocks took only 30 minutes. You can click this photo too if you wish a closer look at my new shocks. By the way, I got some help from the folks on the Carriage forum with this project. Joe sent me some photos of his pre-2007 model Cameo showing how the shocks were mounted. David actually sent me the Monroe model number (#555025) of the shocks and the cheapest place to order them. Thanks guys! |
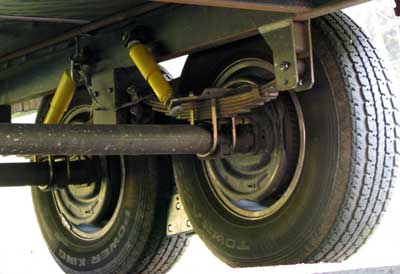 |
September, 2009: After traveling full time with the trailer, it became apparent that the truck bed of our Dodge tow vehicle was a bit too tall for the trailer. The trailer only measured about four inches lower in the back than it was in the front but even this little bit was causing problems with dragging the tail end especially |
|
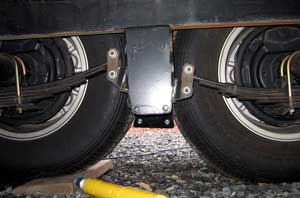
| in the more primitive locations we like to go. The final straw was the tearing off of the two drag wheels I had install a couple of years ago. These two wheels damaged the rear fiberglass cap when they were torn off. We "flipped the axles". You can see in the story above about installing the shocks that the axles were located above the leaf spring. When flipped, the axles are now located below the leaf spring. This increases the height of the trailer by 5 - 6 inches. The height increase was a little more than needed so I increased the height of the hitch in the bed of the trailer by one notch, about an inch. This has made the truck and trailer perfectly level when traveling. I've notice a big difference in the handling of the truck while towing. The truck and trailer seem much more stable, perhaps because this method of mounting the axles makes the spring stiffer. I am much more confident as the driver now because the trailer tows so much better. |
 |
November 8, 2008: It is time for the wheel bearings to be packed and brakes adjusted. I've learned the bearing pack should be done about once each year. I also had the wheel balanced at the same time. Our stop for this evening is at Seven Feathers RV Park where we enjoy the hot tub in Canyonville, Oregon. |
|
|
|
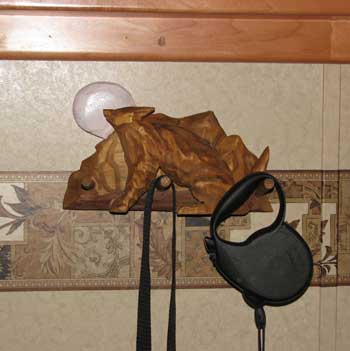
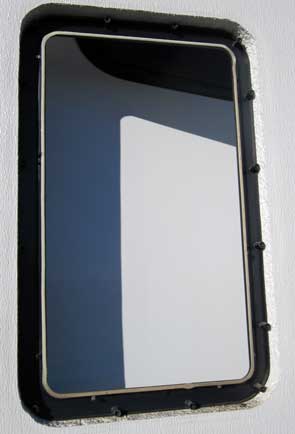
| April 22, 2009: Remember our friend Glenn Carter? Glenn is a professional woodcarver. I take care of his Web page so he made us a southwestern style coat rack which I mounted to the right of the entrance door. Gwen also requested a coyote dog leash rack. Glenn made a 3-D coyote howling at the moon. I mounted it to the left of the entrance door and under the entrance mirror. We love our new rack decor. |
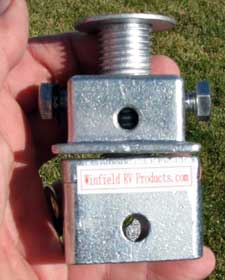
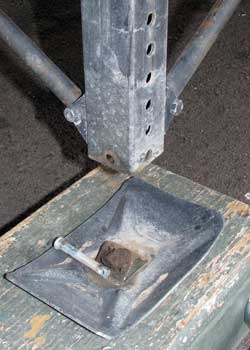
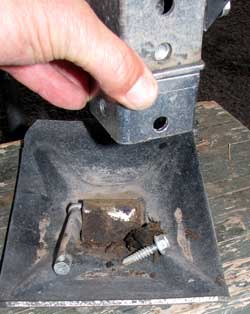
| Saturday, November 28, 2009: One $400 Cameo option I did not choose was separate motors and controls for each landing foot. Separate controls would allow an easy method to manage the two jacks on uneven ground. I was beginning to believe I had made a mistake until I found the Winfield Adjustable Fifth Wheel Landing Leg Foot. I'm often finding a parking location on uneven ground and then need to either dig out one foot or add additional boards to the other. With the adjustable foot, there is no need for the two motors and controls or for leveling boards. To install, the existing foot must be removed. It's easy to do by pulling the locking pin and mounting pin. |
 |
|
|
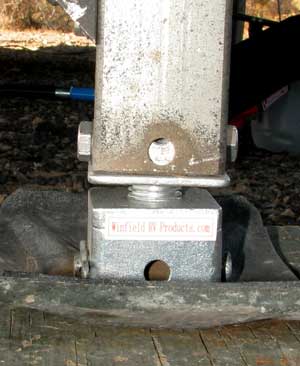 |
The adjustable foot is inserted into the leg and secured with two bolts. The foot is attached with the pin and locked with the locking pin.
To use the adjustable foot, bring the non-adjustable landing jack down first and lock the leg. I usually run it down a little more to be sure it is tight against the block. Then bring the adjustable leg down. You will likely have to lock it in place with space above the block. Turn the foot to thread it down against the block until it is tight. In a sense, you have the ability to make one leg longer or shorter than the other to match uneven ground. |
|
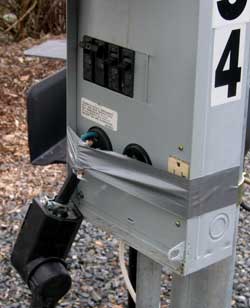
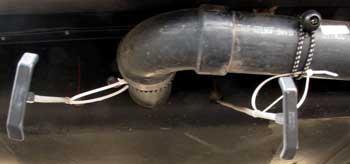
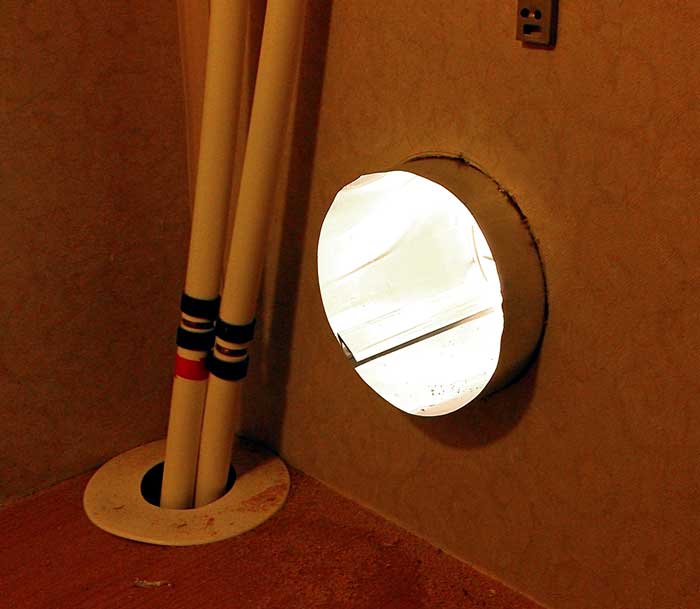
| March 10, 2010: With the Cameo model, Carriage has the holding tank valve handles dangling in the open from the holding tank case. This last move I noticed a two foot section of one of the handles sitting |
 |
|
| on the ground. It had unthreaded from the rod connecting it to the valve. I was lucky I wasn't moving or the handle would have been lost. I used two zip ties for each handle and a ball-bungee tie to secure the handles to the exposed sewer pipe. A small zip tie around the handle rod secures a larger zip tie. The ball-bungee catches the larger zip tie loop holding it to the sewer pipe. |
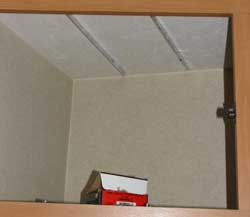 |
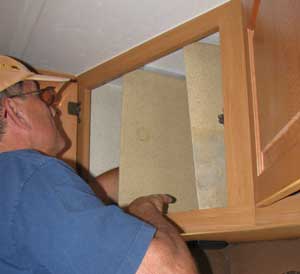
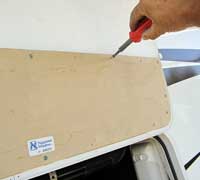
Thursday, April 1, 2010: Gwen wanted dividers installed in one of the rear cabinets. She wants this to help keep maps, games and books in place while we are traveling. The rear of the trailer gets bumped around quit a bit which shuffles everything in the rear cabinets. Hopefully, vertical dividers will help keep everything in order. |
|
| I chose 3/4" aluminum angle iron to support the dividers. I drilled holes in the angle iron to install screws both for connecting the angle iron to the trailer and to the dividers. I'm checking the fit on the right. I cut a semi circle from the dividers to better see what's stored in each cubby hole. Gwen also wanted a retainer board installed |
 |
|
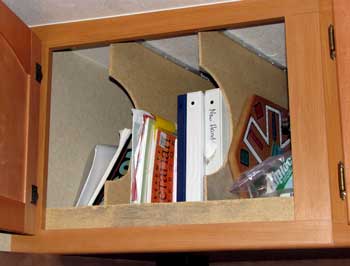 |
so when the door is first opened, items don't fly out. I used 1/4" particle board which I would not have chosen but this was given to me. |
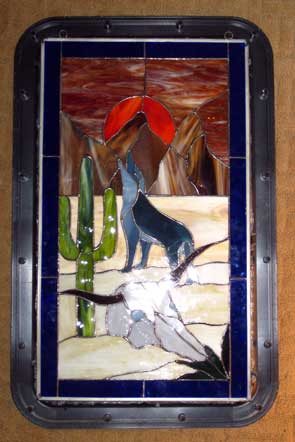
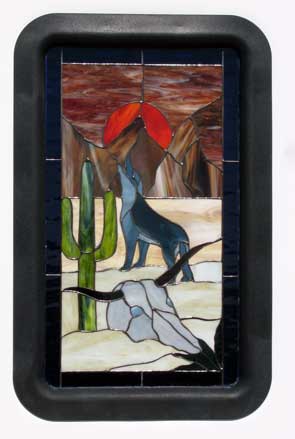
|
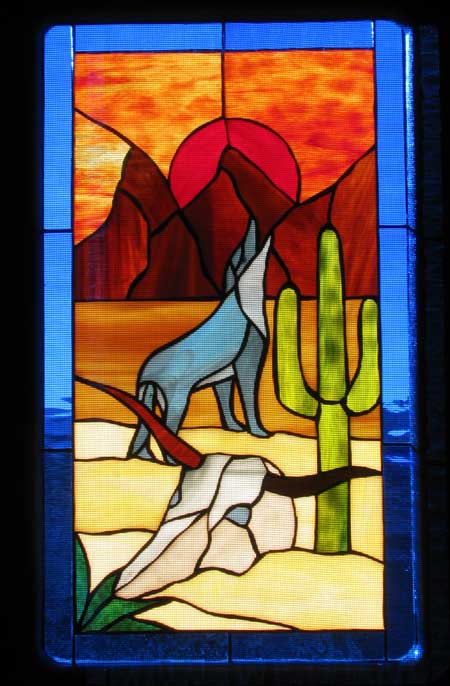
| Friday, January 21, 2011: We visited Algodones, Mexico where the rule is to bargain for price. We wanted a replacement stained glass window for our door. We found the dealer and he refused to tell us the price for the window until we chose the one we wanted. After making the choice, he said, "$160". "But we have friends who got the windor for $40" we replied. He showed us a plastic window for the $40 price then offered to sell us the one we wanted for $75. "We'll think about it" we replied and began to walk away. The price came down. "We have a dental appointment shortly, we'll come back after the appointment" we replied. "I'll wrap in cardboard", he said, "to protect it." "We'll come back after the appointment", we said. "Take it right now for $40." he said. "Done." I said. He wrapped it and I gave him a $5 tip. |
|
| The original window is easy to remove from the frame, just loosen the screws on the frame from the inside. No silicone was used in the original mounting of the glass. I put a bead of silicone around the frame then set the stained glass in the silicone. I also put silicone around the entire frame still in the door then pressed the two halves of the frame together and reset the screws. |
|
The new window is wonderful from the inside with the sun on the door side of the trailer. Colored light is reflected around the inside of the trailer coming from the window. We are very happy with the purchase. I will have to say, this in NOT tempered glass as was the original so will not meet RV trailer code. It could also happen that the stain glass will come apart as we travel just because of the nature of the construction. Be we have friends with a similar stained glass in their door and they've not had problems. We have kept the original tempered glass in case there is a problem. |
 |
|
|
|
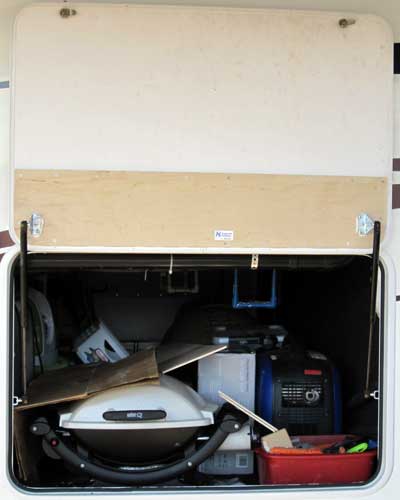
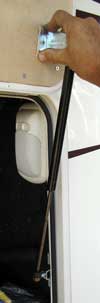
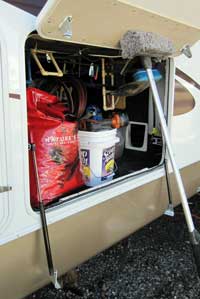
| Thursday, July 7, 2011: While visiting the Carriage Factory last month I noticed the new feature of piston arms supporting the storage doors. A very nice additional feature. I decided to buy the arms at the parts department while still in Millersburg. They supplied me with two 60 lb pistons for each door and charged $70. At the time I thought the 60 lb rating was far more than needed. My first attempt at installation proved the plastic back of the door would not hold the screws against the pressure of the arm. I called the factory to learn how to make the installation and was told the NEW doors are solid core rather than plastic and foam filled like my doors. They did not offer any mounting advice. I purchased 1/4" birch plywood and construction grade cement. I screwed and glued the panels to the storage doors then screwed and glued the door brackets to the door. I let the glue cure for 24 hours. After installing the pistons to the brackets I was convinced the two 60 lb pistons were OVERKILL for these doors. Apparently the new solid core doors are much heavier. My estimate is 30 lb pistons would work just fine. The pistons eliminate the need for the little plastic catches that break all the time. |
|
|
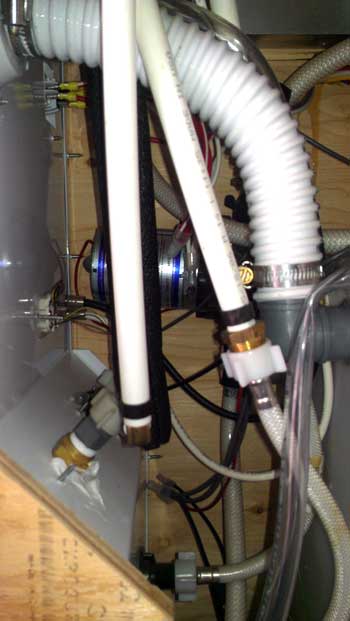
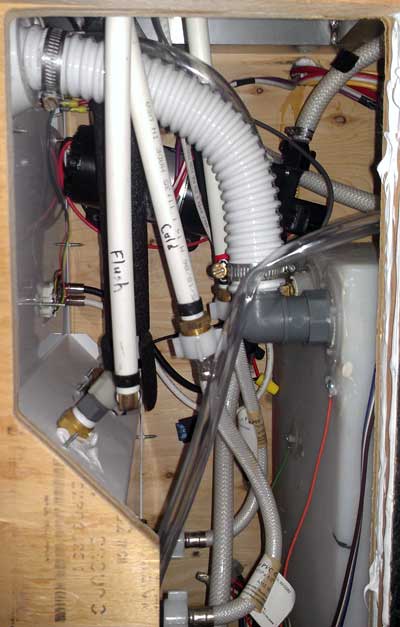
| Saturday, June 30, 2012: Last fall, when camped in Verdi, Nevada, the outside temperature dropped to 15 degrees, enough to temporarily freeze the water in the freshwater pump. When water was demanded from the pump, the shaft began to spin without moving the pump. Although it worked afterwards, it would run without stopping much of the time. For that reason the pump needed to be changed. The original pump on the left was considered "entry level" according to the RV store. It certainly made a lot of noise. The new pump is twice the size and twice the price of a replacement pump. But much smoother and more powerful. It is the Shurflo 4048 and much better than the original. When you look at the photos you understand that I had to disconnect the connecting tubes and pipes for access to the pump. I labeled everything to be sure it was replaced in the correct location. It works great and is quiet. |
|
|
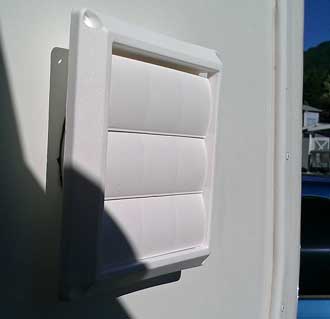
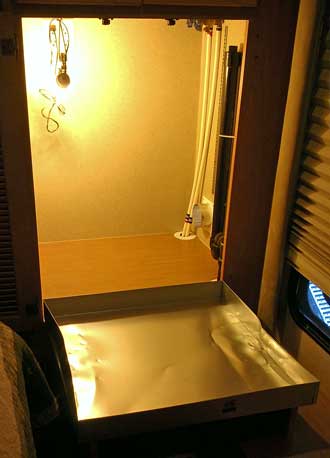
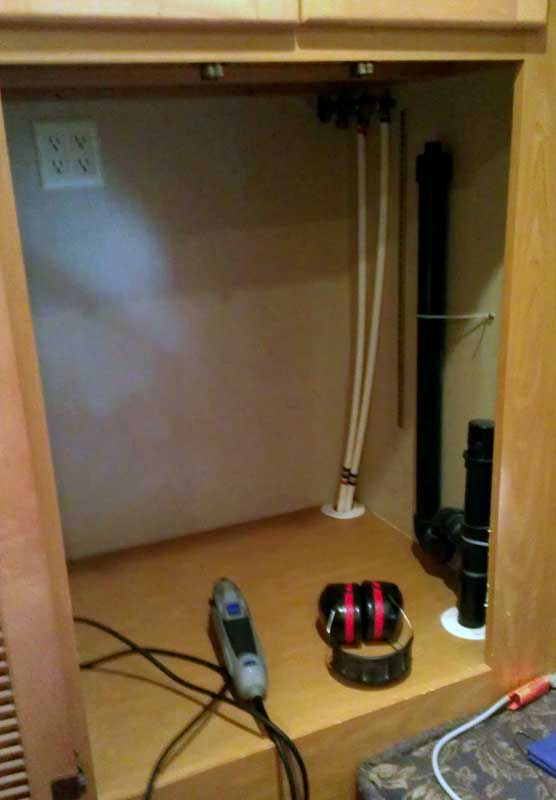
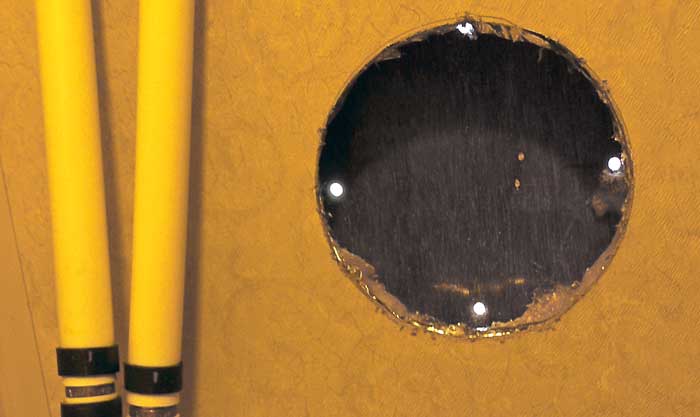
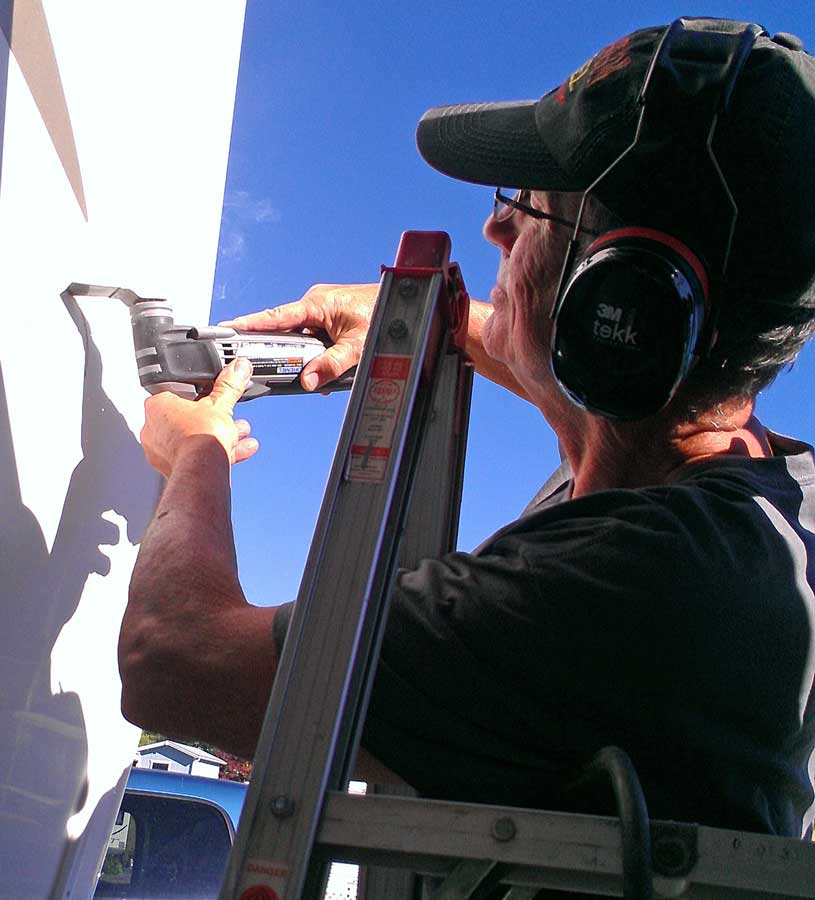
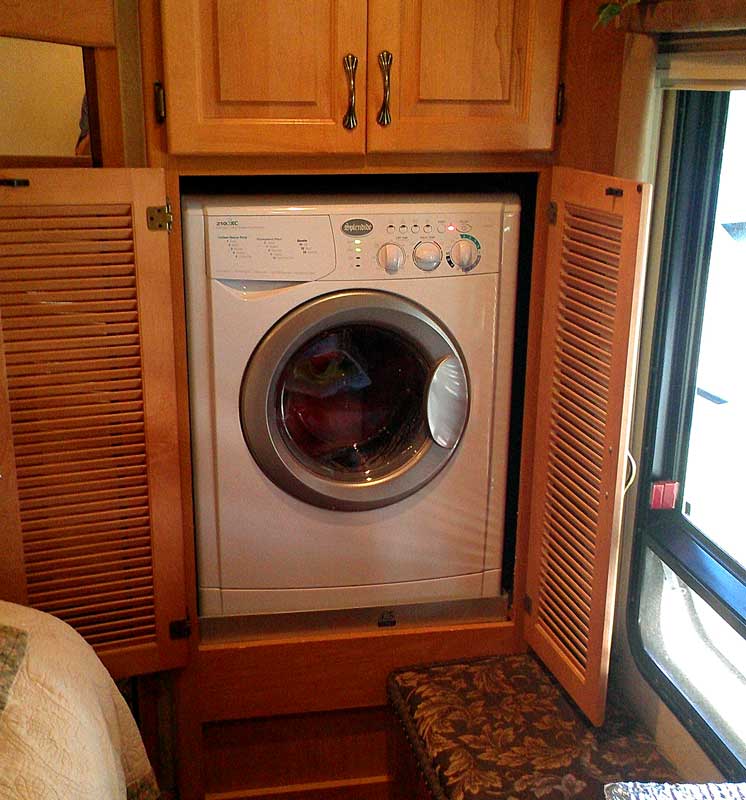
| Monday, July 15, 2013: Fortunately, back in 2007 when we had the Cameo built for us we were thinking ahead enough to have the fifth wheel pre-plumbed for a washer/dryer. We didn't want to carry the extra weight while traveling but now, the Cameo will remain stationery and the washer came to the top of Gwen's priority list. It takes a special unit to fit this small opening and to be able to both wash and dry in the same unit. We purchased the Splendide 2100XC which is distributed here in Clackamas, Oregon. The only work I needed to do was to install a vent for the dryer. I used my multitool to do it. Click each of the photos for additional views. I wanted to be able to set the |
 |
 |
|
| washer into a tray in case it leaked. I learned none was made to fit this small opening so I searched Roseburg for alternatives to having one custom made. After several failed attempts, I ended up at a ranch supply store. A clerk showed me a "rabbit dropping pan" which measured exactly 24" square. That would fit the washer perfectly. He had an un-dented model for $30 and a dented model for $10, I took the dented model and pounded out the dents with a block of wood and hammer. I built a sliding support for the tray outside the washer cabinet, slid the washer from the bed onto the tray, then pushed the rabbit tray and washer into the opening. It worked perfectly. I connected water hoses, vent hose and electric plug before sliding the washer in place but learned the shelf above the washer compartment was removable for access to the back of the washer. I removed the shelf to make final adjustments. I haven't installed a drain from the tray to the outside yet. I figured we would notice water in the try and could stop the cycle before water over-topped the try. After using the washer several times. I think it's less likely we will discover water because we set the wash then leave it alone and sometimes leave the trailer for a walk outside. I'm putting a drain onto my "to-do" list. We love our new washer/dryer. Washing clothes at a laundromat is one of the huge negatives to RV living and this solves that inconvenience. |
|
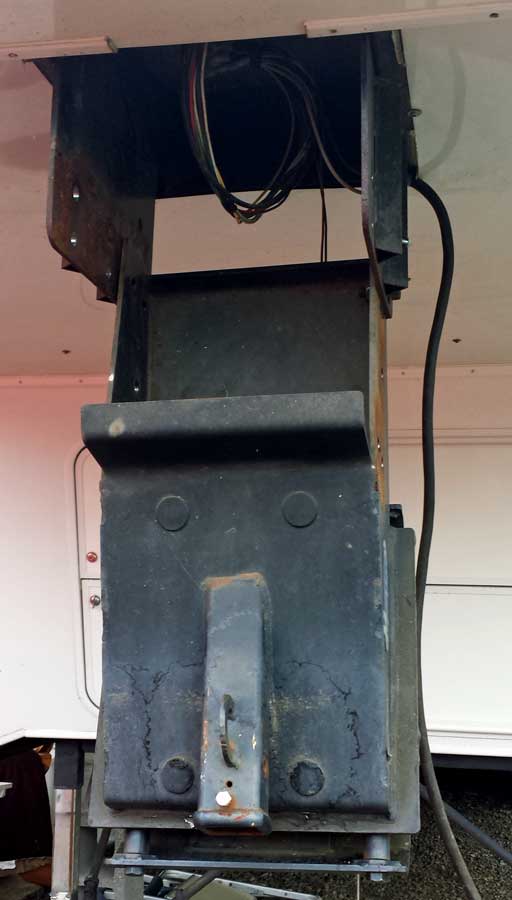
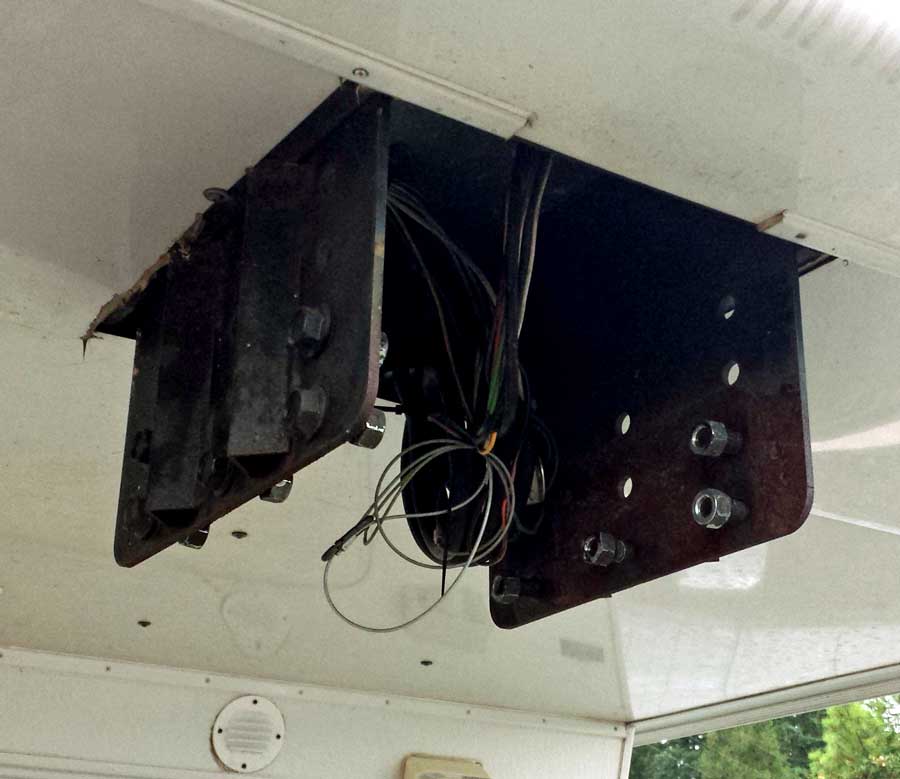
| Saturday, July 11, 2015: We have parked the Cameo permanently (or at least for a long time). The hitch is in the way and we hope to get a skirt around the trailer and the hitch would be in the way of that too. It is attached with ten large bolts so it took an hour to release all of them. It is very heavy so I have no idea how I would ever reinstall it. Gwen was also anxious to remove the hitch because she has walked into it more than once. So now the hitch is stored under the trailer and we are ready for a skirt. |
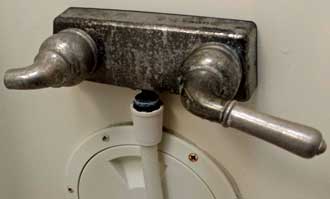 |
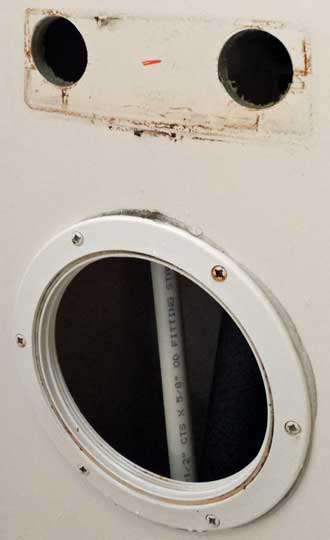
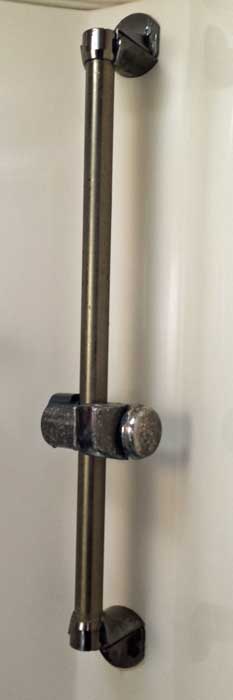
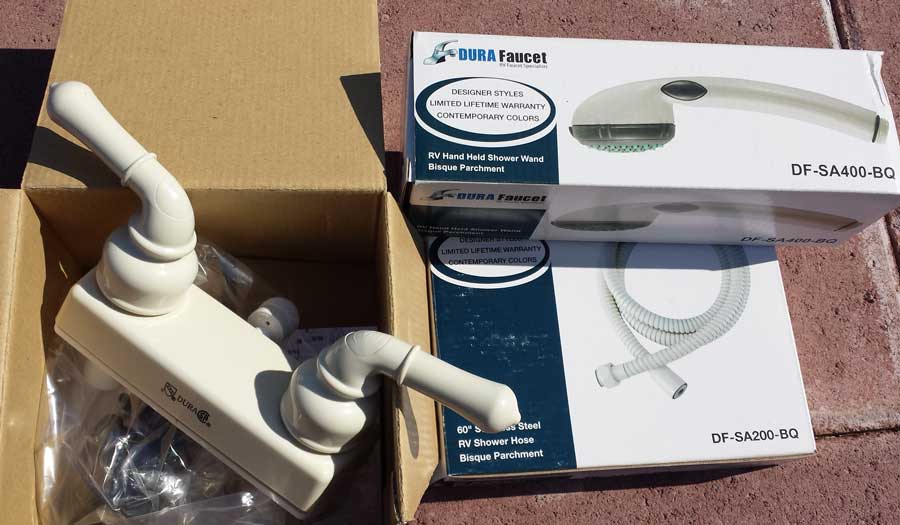
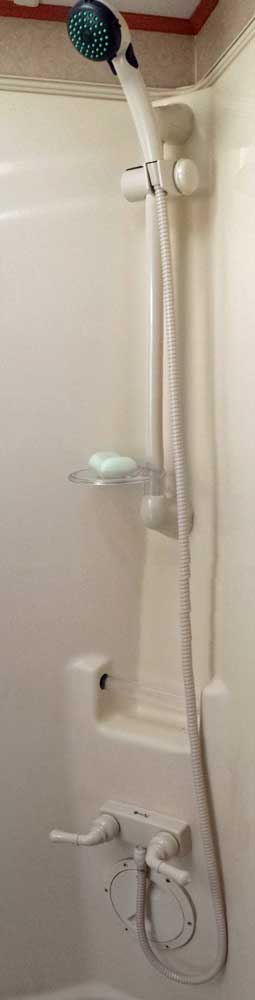
Thursday, August 20, 2015: It's time to change the plumbing in the shower. The old plumbing is irreparably tarnished and the left handle is broken. I learned the brand name of this hardware is "Dura" so carefully chose replacement Dura hardware from Amazon in Gwen's choice of color. The shower head riser bar also must be replaced. We like the riser bar so much, we are installing one in the Lazy Daze. Access to the plumbing is through a circular, rotating door. All fittings are hand tight so relatively easy to replace the old hardware. After cleaning the fiberglass shower walls, I installed new hardware, a different color from the original. |
 |
|
|
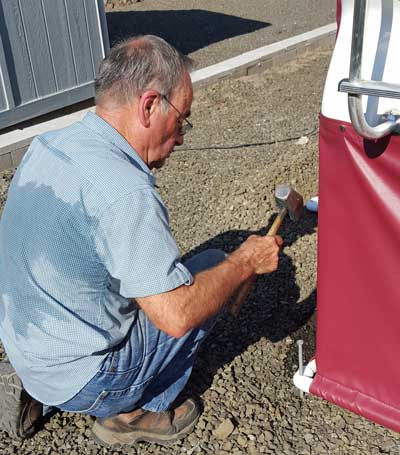
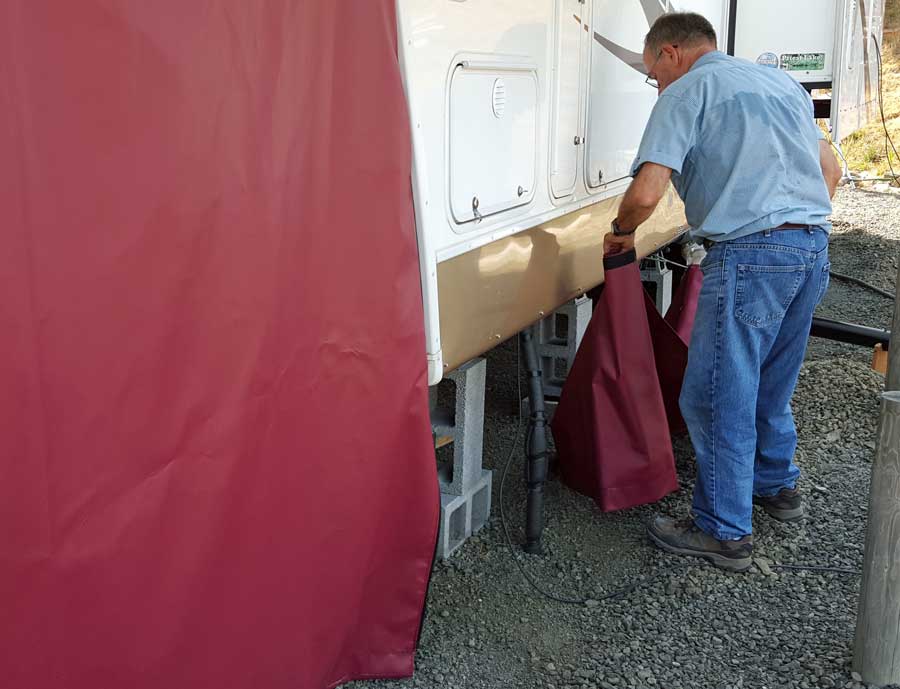
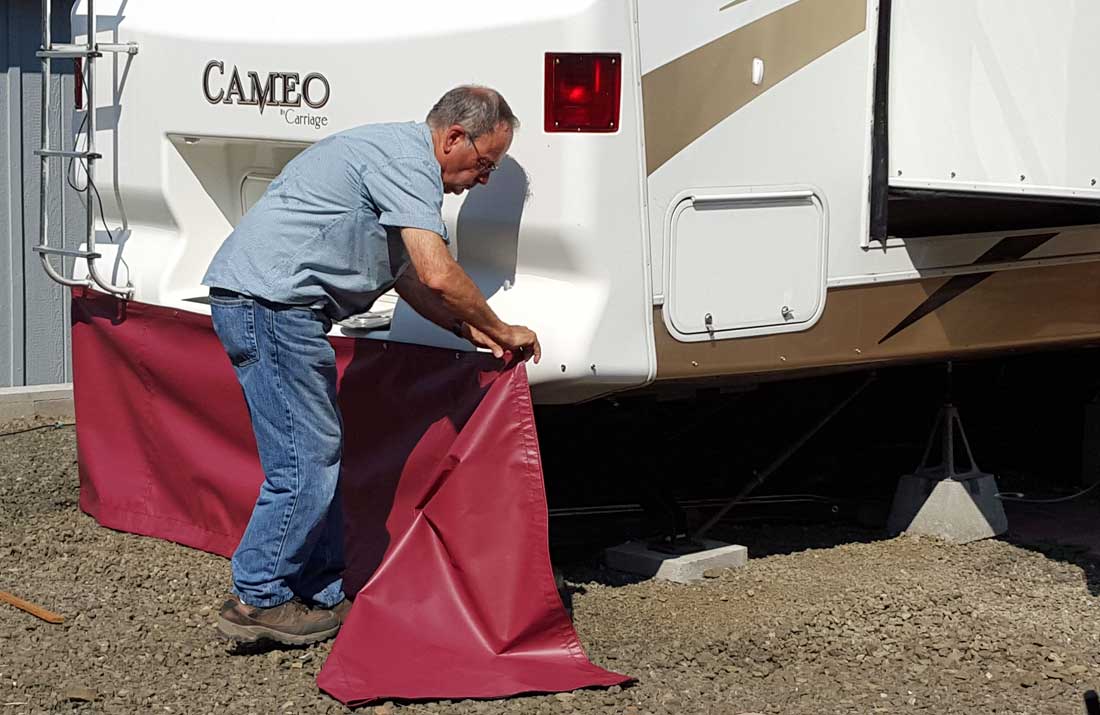
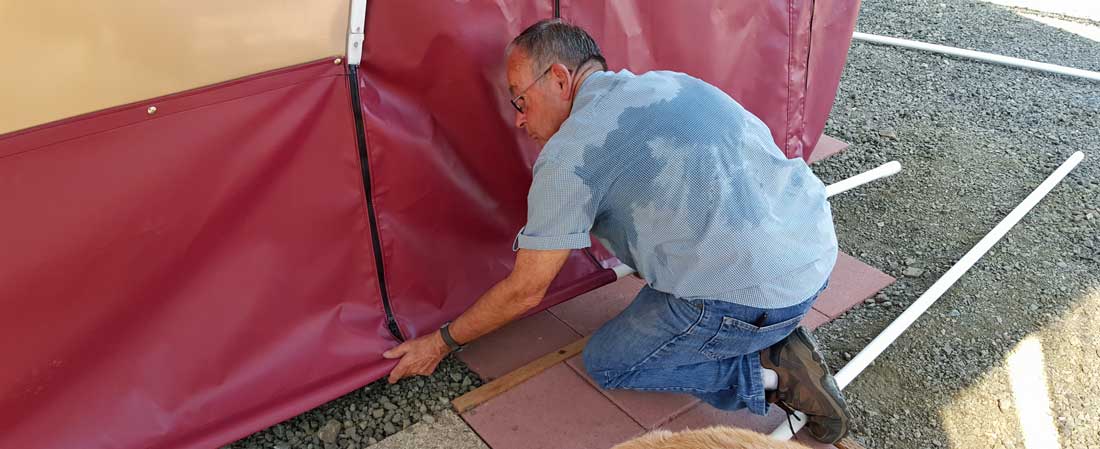
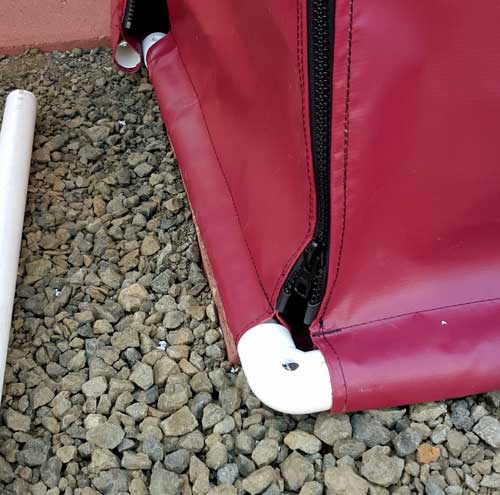
Friday, September 11, 2015: Many of the rigs in Timber Valley have vinyl skirts at the bottom of the rig. This makes for a cleaner look, provides for extra storage space and helps with heating and cooling. We decided to add the skirts for all those reasons and because we know this will be our permanent home for much of the future. The company which has custom built most of the skirts is an awning and upholstery company in Roseburg, The Johnwell Company. Jim is the owner of the Johnwell Company. He explained that the majority of his business is to build custom covers for boats. I looked at all the rigs in the park with Jim's covers so I knew he was the expert. The skirt fits all the corners and attachments to the Cameo. Even the holding tank valves have grommets in the skirt to they are easy to operate. The skirt circles the entire rig and creates a nice room under the fifth wheel overhang up front. The entrance to this room is a zippered door. Schedule 40 PVC is slid through pockets at the base then anchored to the ground using large spikes. We are pleased with the final assembly. Click each photo for additional views. |
|
|
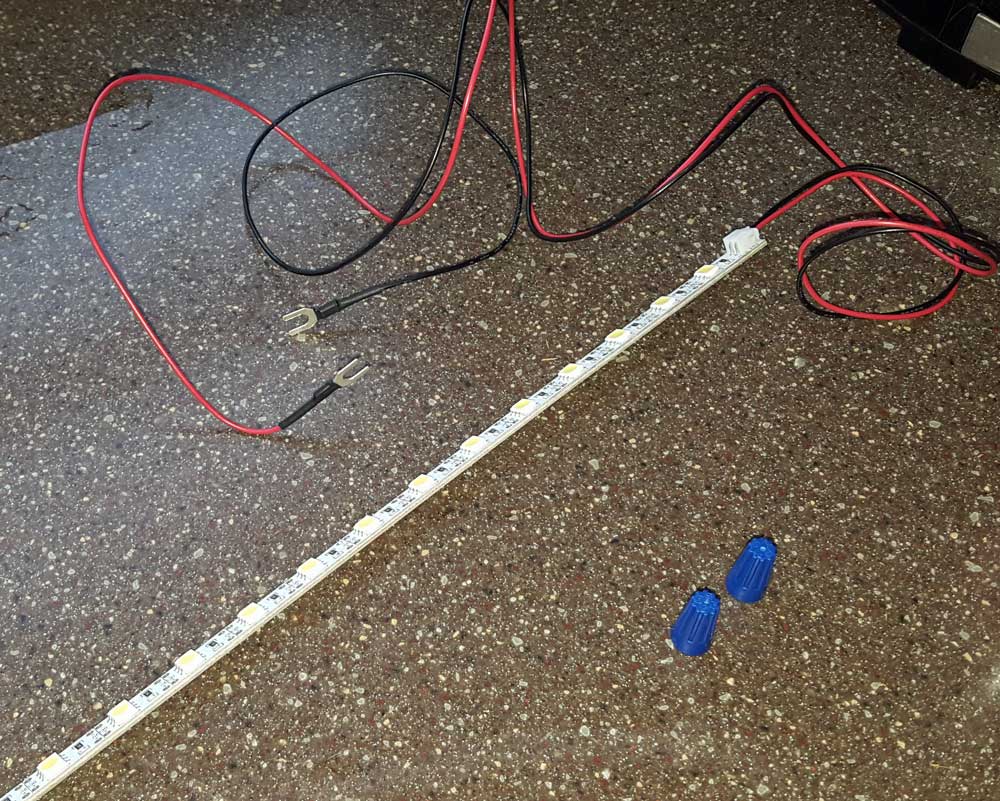
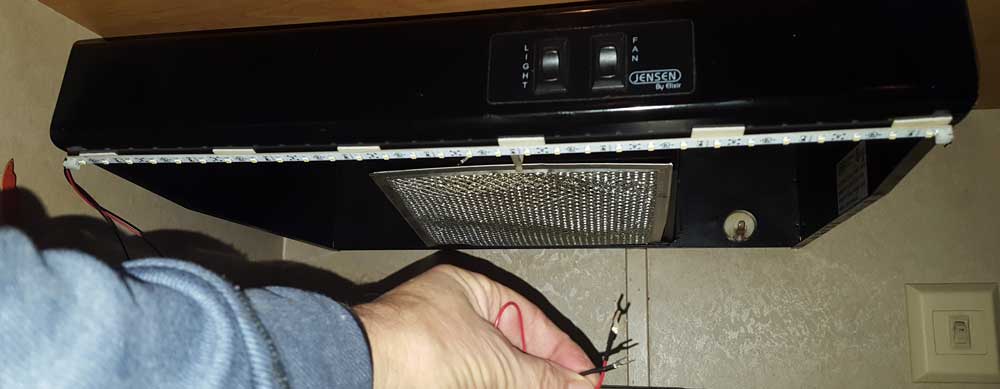
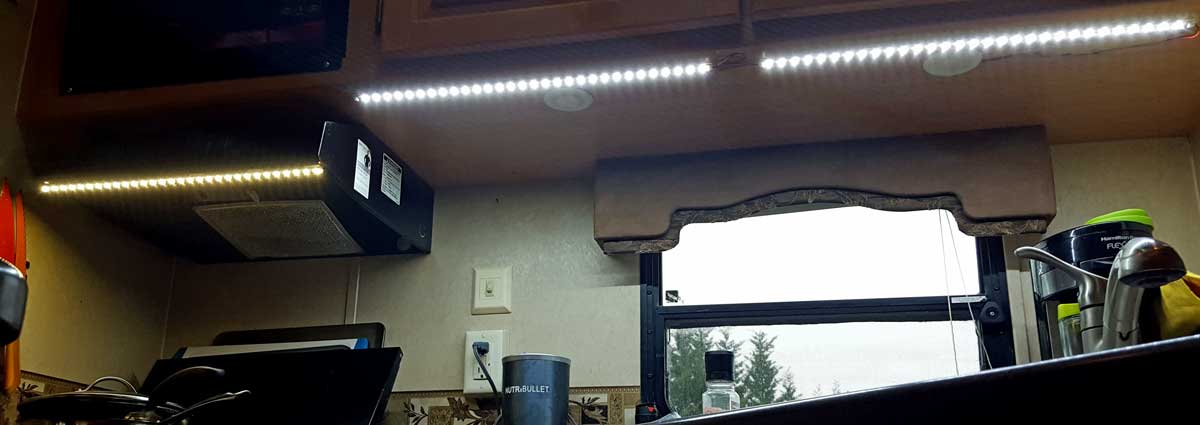
| Wednesday, February 1, 2017: Gwen has been spoiled with the LED kitchen lighting I installed into Miss Dory and the Lazy Daze kitchens. She requested the same LED strip lighting in our fifth wheel kitchen. I already had one strip on hand so ordered two more with the wiring. All arrived yesterday so I installed today. I removed the worthless over-stove light, connected to the wires then mounted one strip on the edge of the stove hood with a switch on the hood. The halogen light fixtures above the counter top and sink are easily removed because they have two spring loaded mounting wires. I removed the fixture closest to the sink, clipped the power wires, attached the strip power wires and mounted two strips under the overhead cabinets. I replaced the original light fixture so there would not be a hole in the underside of the cabinets. Now there is three times the light in the kitchen. Click the photos for additional views. |

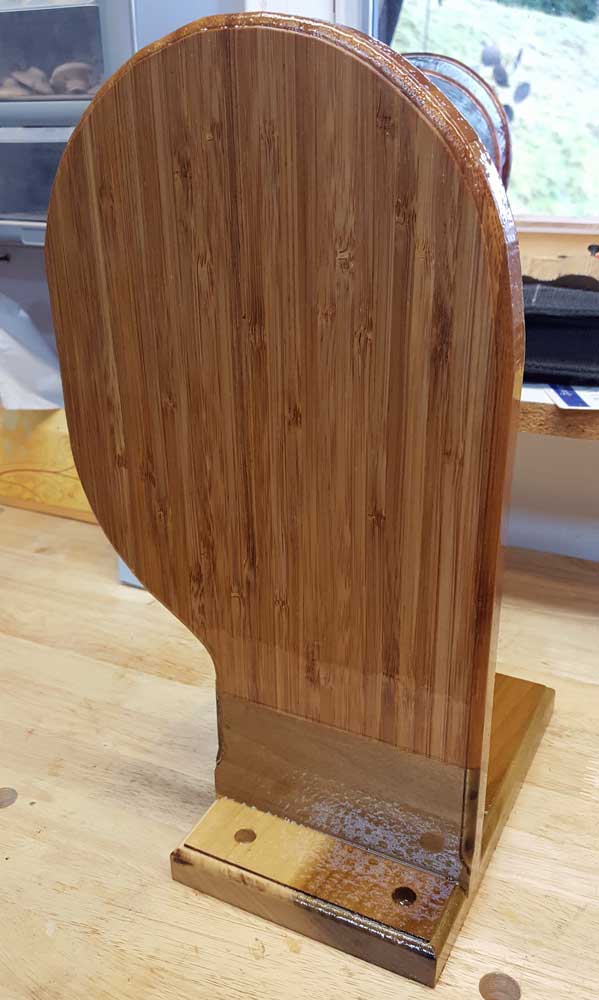
Monday, February 6, 2016: A few weeks ago I built a coffee pot shelf for Dave and Brook in their new travel trailer. I decided we could use a coffee pot shelf too. The tall coffee pot I use will just fit high enough so the toaster can sit under the coffee pot. I built Dave and Brooks shelf of a piece of bamboo I happen to have on hand. No more bamboo but I did have this special piece of Redwood. Click the photo to see how the coffee pot fit on the shelf. |
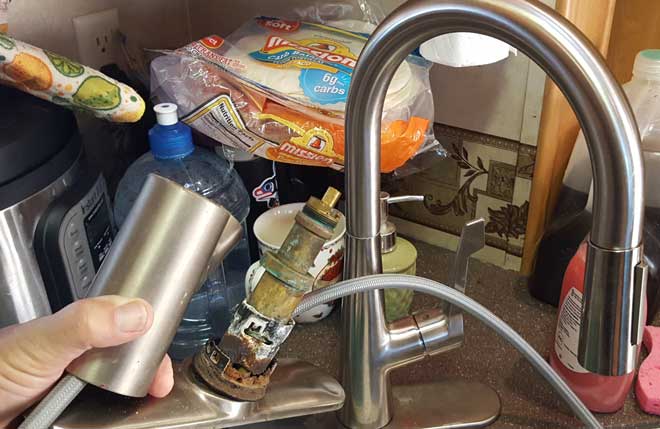
Sunday, June 17, 2018: Eleven years ago I installed a nice single handled kitchen faucet. It has been causing some problems lately so Gwen requested a new faucet. I found this nice tall faucet at Costco and Gwen approved of it. It took about 2.5 hours to remove the old faucet and another 2.5 hours to install the new one. It was much easier to install the new one but I had to search for and find water fitting adaptors since the new did not fit the incoming water lines. We both like this style faucet much better than the old style. |
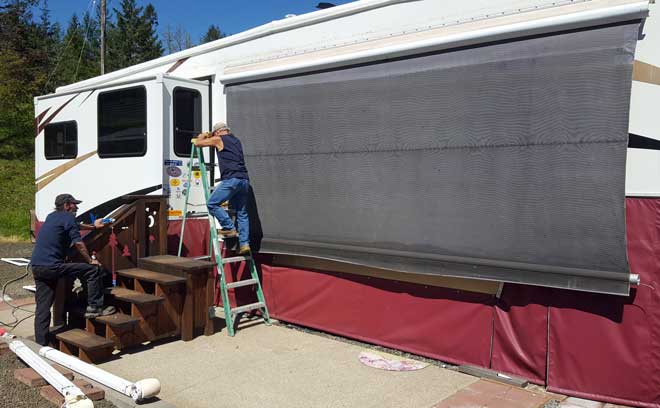
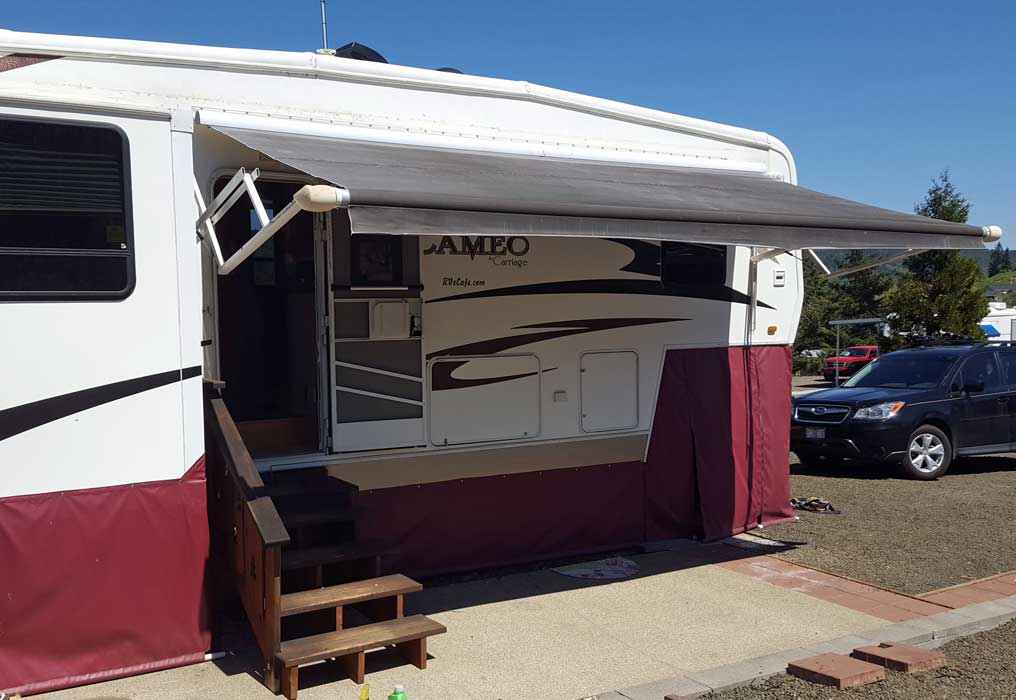
Tuesday, April 30, 2019: Three years ago I hired Ivan and Steve to install a permanent aluminum awning onto the Cameo. They had to remove the retractable awning to do that. Since Gwen sold the aluminum awning because we are selling the Cameo, I hired Ivan and Steve to reinstall the retractable awning. I helped a little bit but let them do most of the work. I was glad to learn that the electrical connection which opens and closes the awning still works. The awning is still usable after 12 years. Click the photo for the extended awning. |
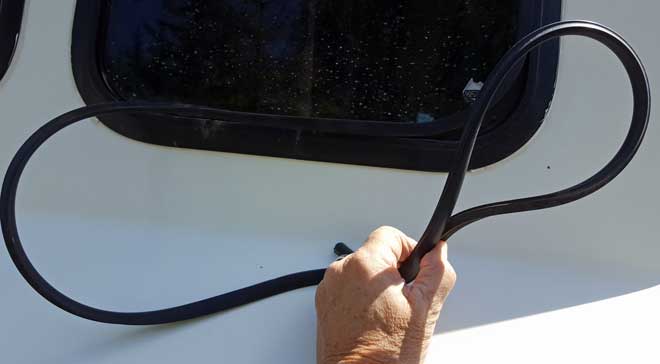 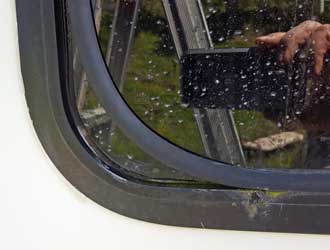 |
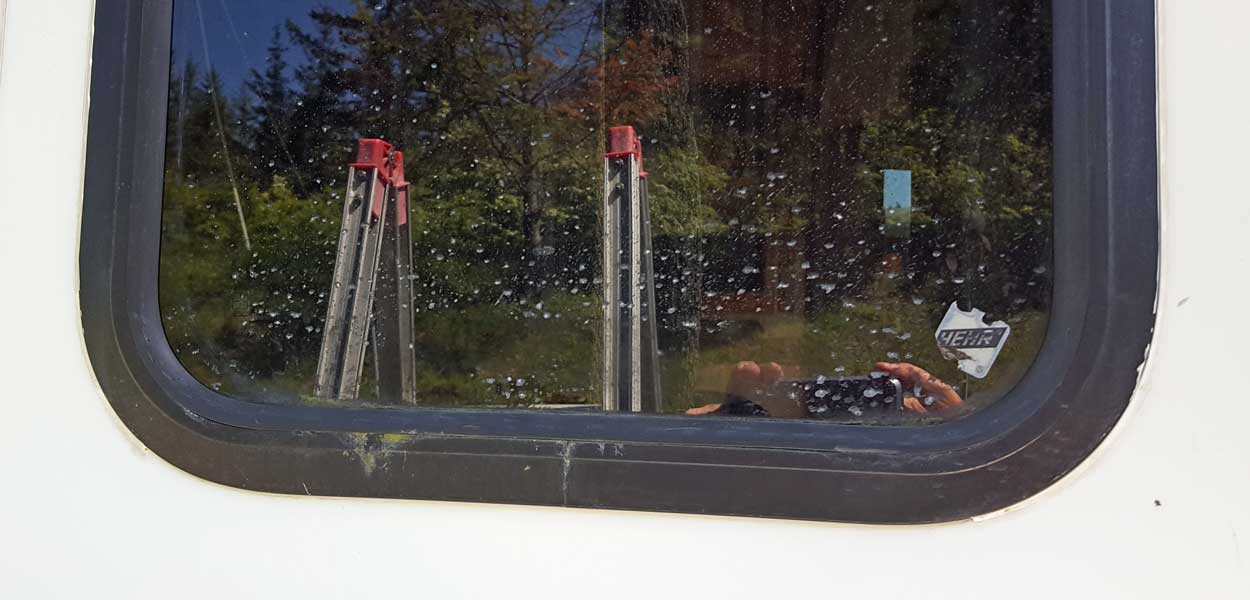
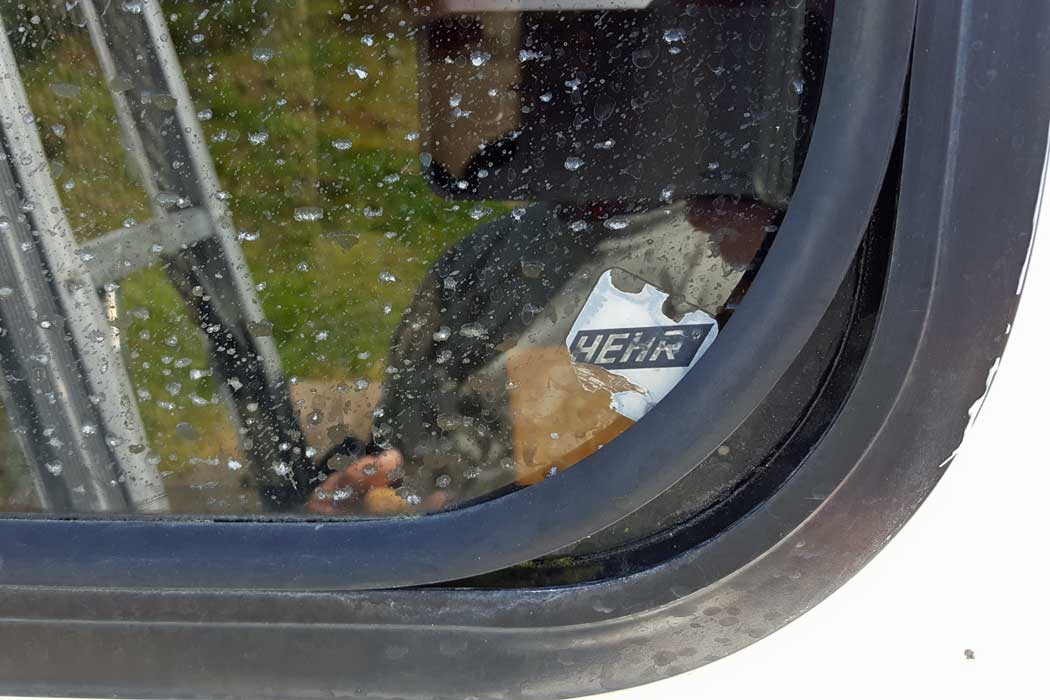
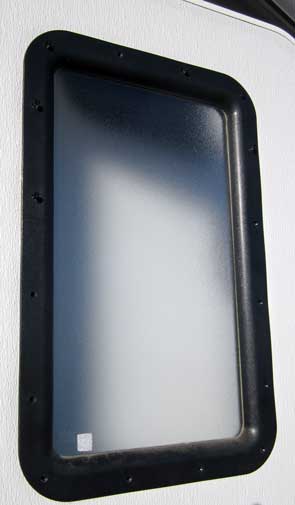
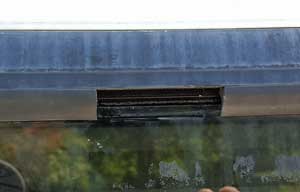  Thursday, May 2, 2019: Another repair needed, the rubber retainer for the back three windows has shrunk. As it shrinks it has pulled away from the bottom corners in all three windows. Actually not too bad for being 12 years old. I pulled the rubber, from the groove in the window frame, to the furthest corner gap. Then I reseated the rubber into the retaining groove back to the top. Of course this left a larger gap in the rubber seal at the top. The original gap is shown at the left with the new gap shown at the right. Of course, the right thing to do would be to replace this 12 year old rubber with new (move flexible) rubber but I'm conserving money for this sale. Click on the two top photos for more views. Thursday, May 2, 2019: Another repair needed, the rubber retainer for the back three windows has shrunk. As it shrinks it has pulled away from the bottom corners in all three windows. Actually not too bad for being 12 years old. I pulled the rubber, from the groove in the window frame, to the furthest corner gap. Then I reseated the rubber into the retaining groove back to the top. Of course this left a larger gap in the rubber seal at the top. The original gap is shown at the left with the new gap shown at the right. Of course, the right thing to do would be to replace this 12 year old rubber with new (move flexible) rubber but I'm conserving money for this sale. Click on the two top photos for more views. |
| |
| Return to Page 4 |
|
|
|
|
|

