
D o l p h i n 6342 LX
"Miss Dory"
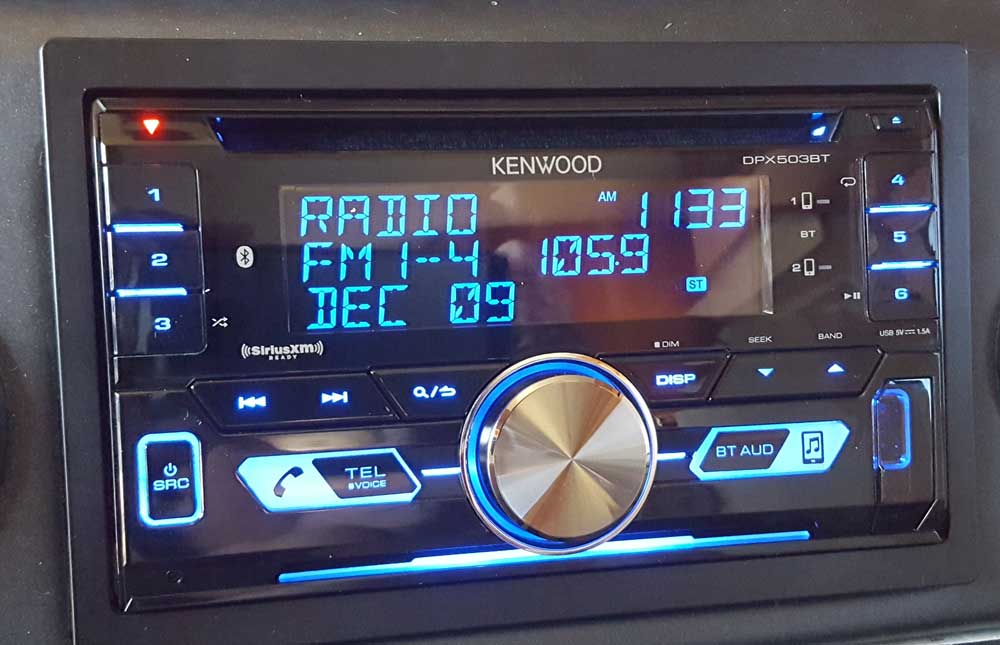
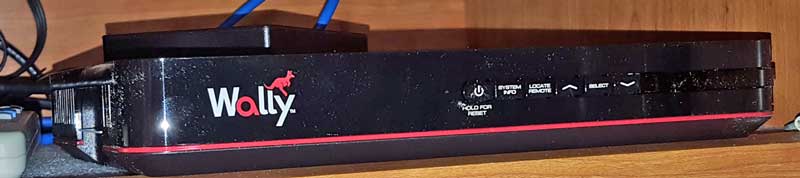
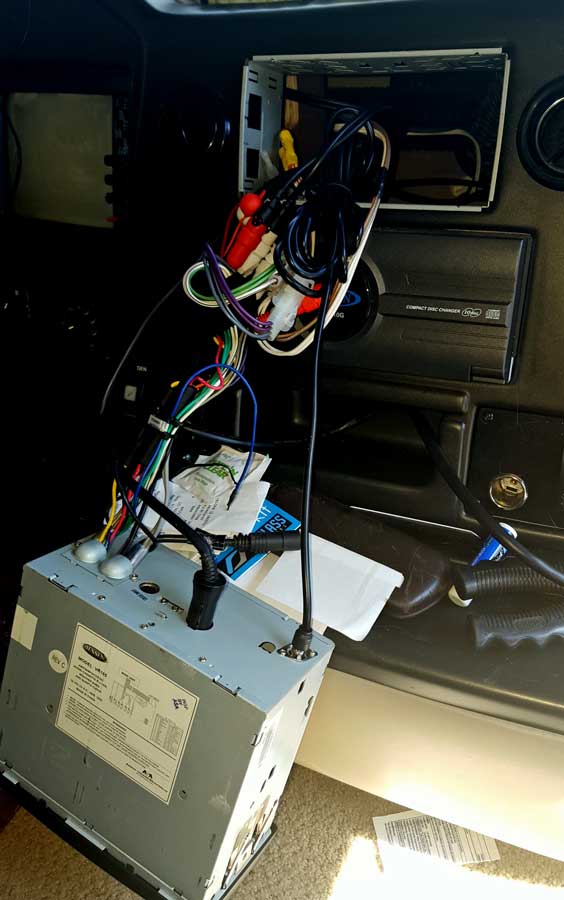
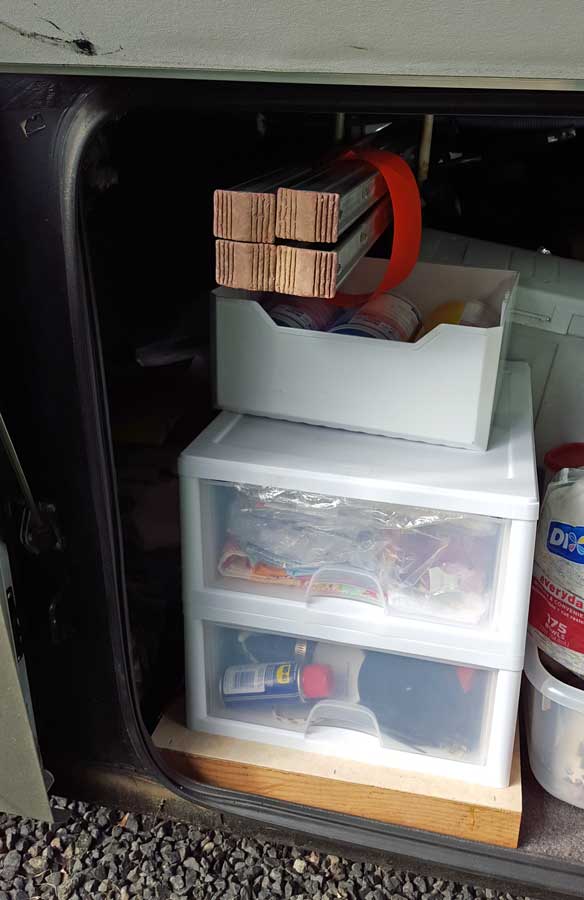
Sunday, December 9, 2018: When leaving Sutherlin for our winter trip south we noticed that the Kenwood radio we had install 14 months ago was not working. Of course had we known this earlier I would have driven to Pro Car Stereo and asked for a repair. Instead, I had to call them and ask for advice. "It's a fuse" they told me. So I checked the fuse and found no problems. The red light was coming on indicating the radio was getting power but no reception of any kind. This radio cost $289 installed. It is a model 502, I found a model 503 on Amazon for $117 delivered so I decided to order this radio hoping the connection in the rear would not have to be changed. We are selling Miss Dory and I don't want to have to tell the buyer, "By the way, the radio doesn't work". The model 503 arrived and you guessed it, a different plug in the back. Eleven wires need new butt connection. Yes, I did it and the new radio works. I set the time and date, tuned it to a classical radio station then turned it off. Moral of the story: install the damn radio yourself and safe $172. Click the photo to see the model 503.
 |
 |
 |
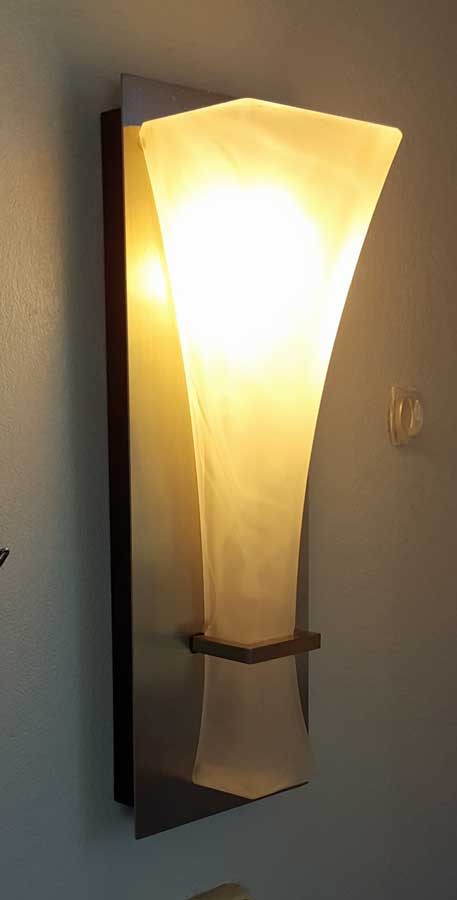
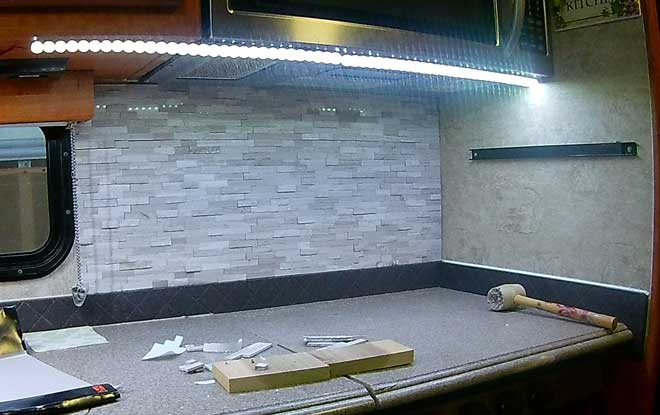
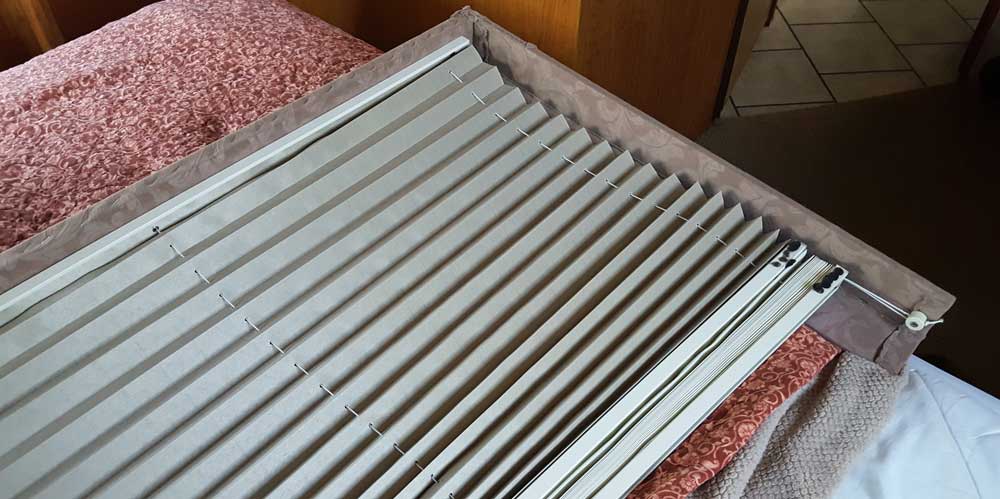
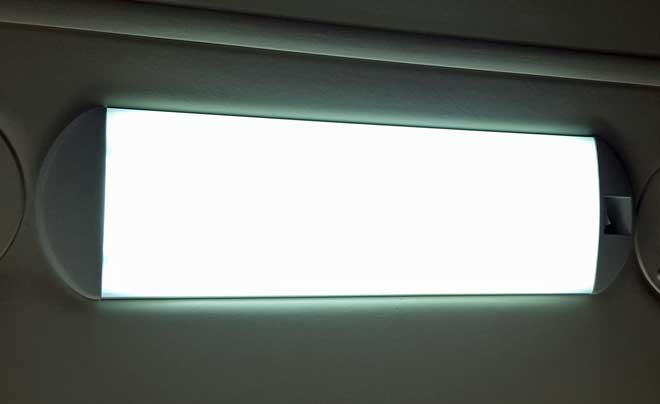
Saturday, November 10, 2018: Still working on preparing Miss Dory for sale. Since I removed our reading lamps, I'm replacing them with those from Mz Ruby. They add some class to Miss Dory. I installed three lamps after patching all the holes we made hanging photos and coat hooks. I also painted the walls which had been missed in a previous painting. Click the photo for a lighted view.
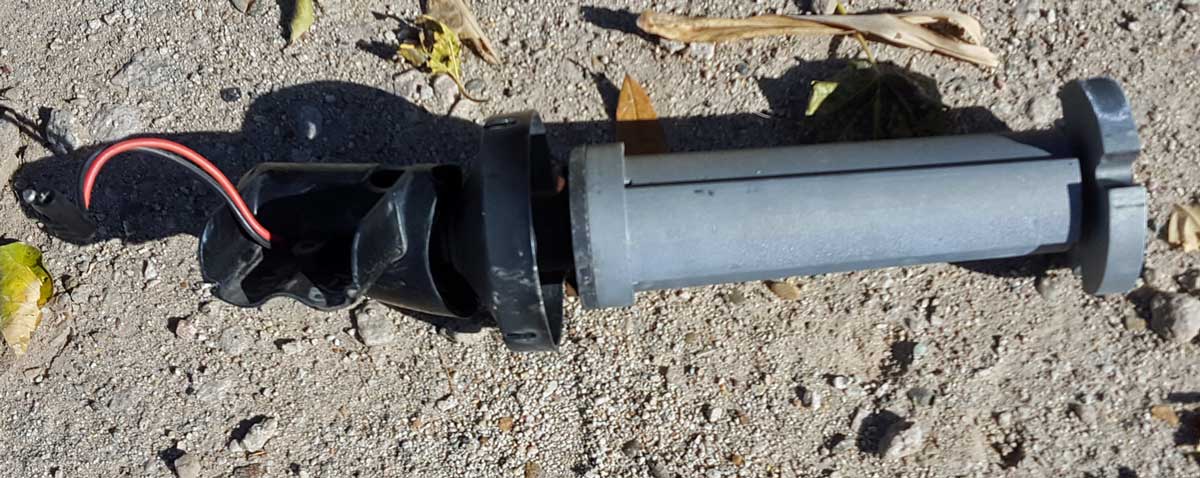
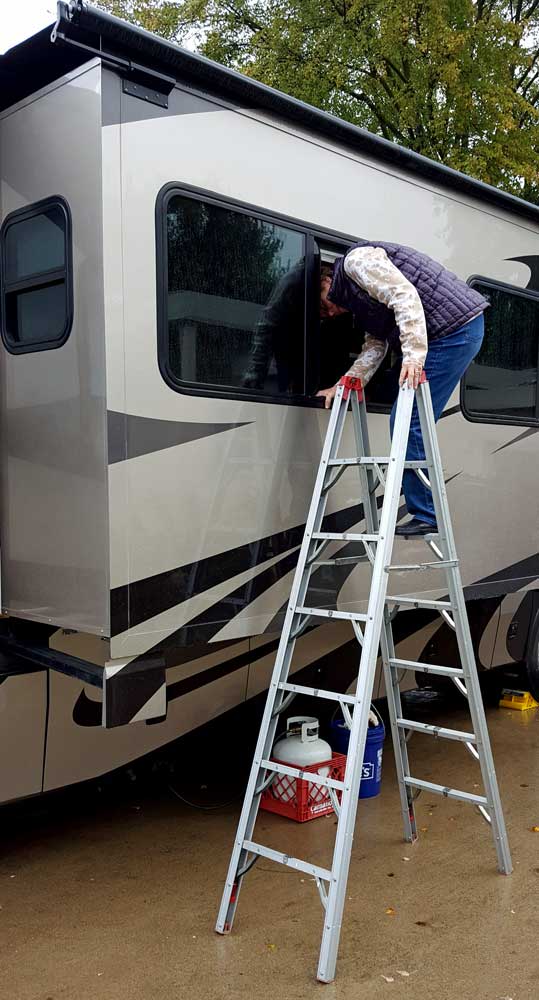
Friday, November 9, 2018: This is Jesse and Bill. They are replacing the motor on Miss Dory's awning. It would work only intermittently so time to make a change. Three years ago I purchased an extended warranty. It was expensive and I've had no reason to use it until today. This repair was nearly $1,000 but all I had to pay was my deductible, $200. The motor alone was $517. I'm still not at a break even point on the extended warranty but happy to get some benefit. Now, after watching Jesse and Bill do this, could I do it? Yes, with the right tools it was a quick and easy job. However, the cost of the motor would not make a do-it-yourself project practical. Click the photo to see the old motor.
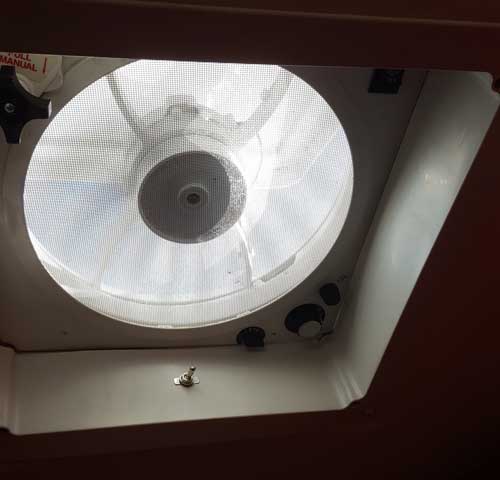
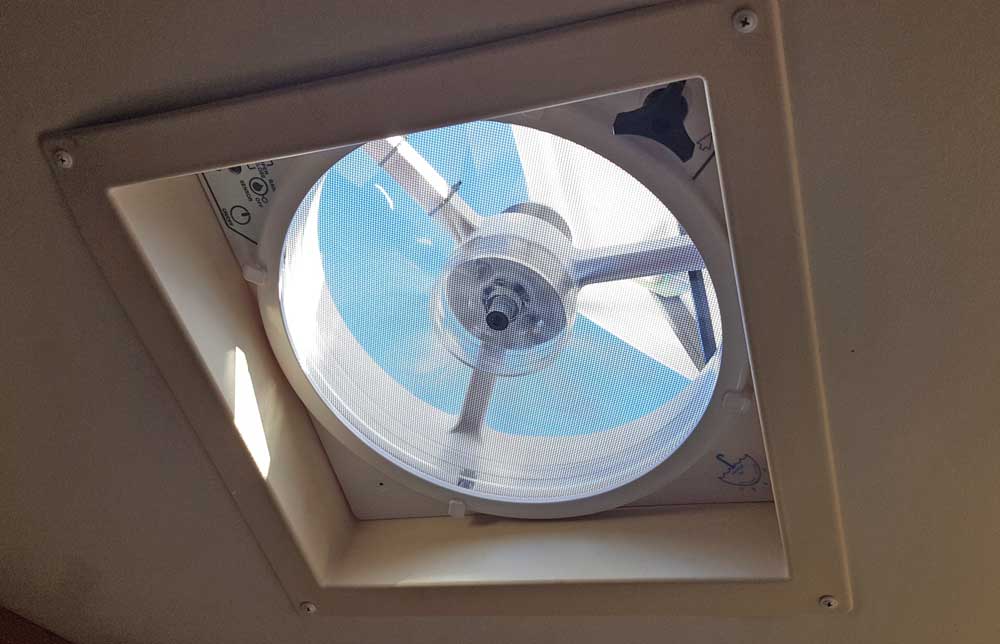
Thursday, November 8, 2018: I reported earlier removing the remote controlled variable speed fan from Miss Dory and installing into Mz Ruby. Today, it took most of the day to install the original fan from Mz Ruby into Miss Dory. It was much more difficult than the fan installed into Mz Ruby. The problem was, instead of one set of wires to the fan, the Fantastic Fan from Mz Ruby had two sets of wire. One set supplied always-on power while the other set sent to a switch to complete the circuit. Miss Dory has only one set of wires which switches the power on/off. So to get this Fantastic Fan working I need an always-on source of power plus a switch to connect the circuit. The power source is not a problem, just leave the switch in the on position. To solve the problem of a switch, I installed a simple toggle switch, not as handy as a wall switch but easily reached overhead. It works great.
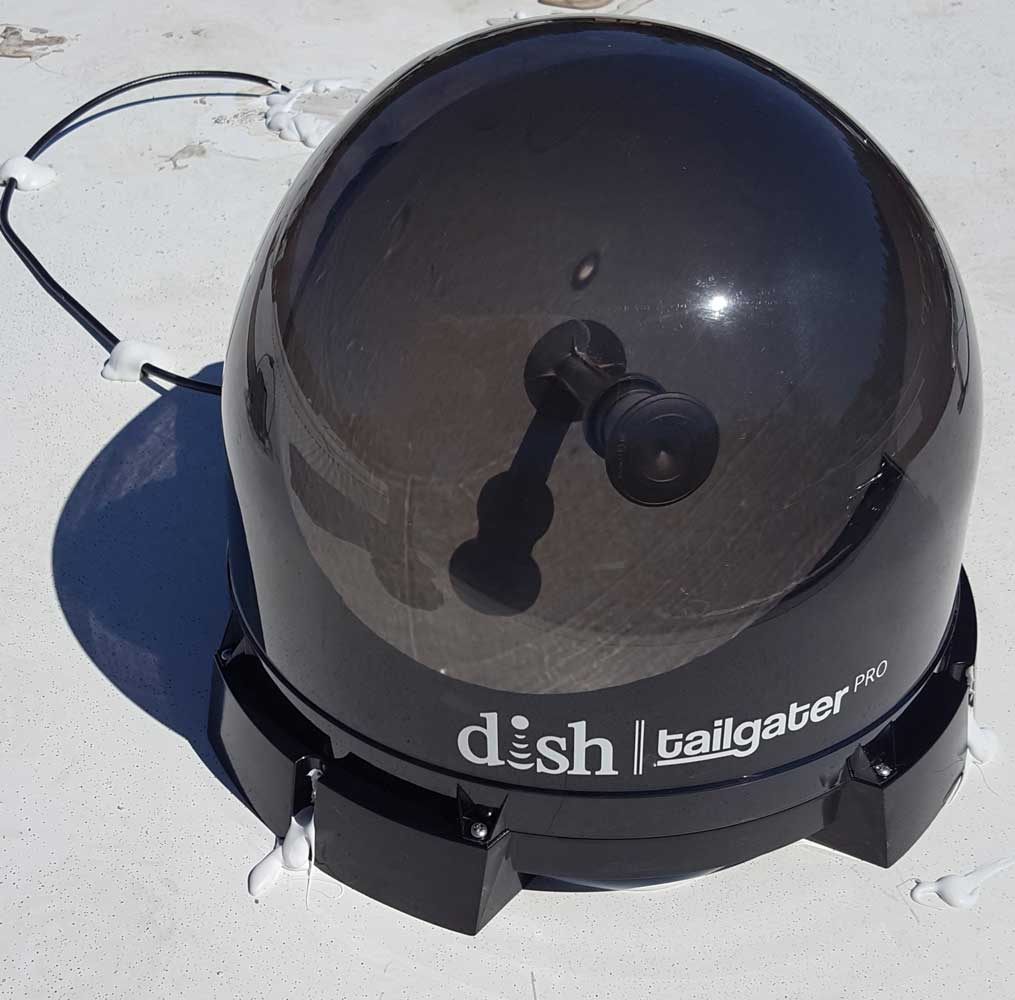
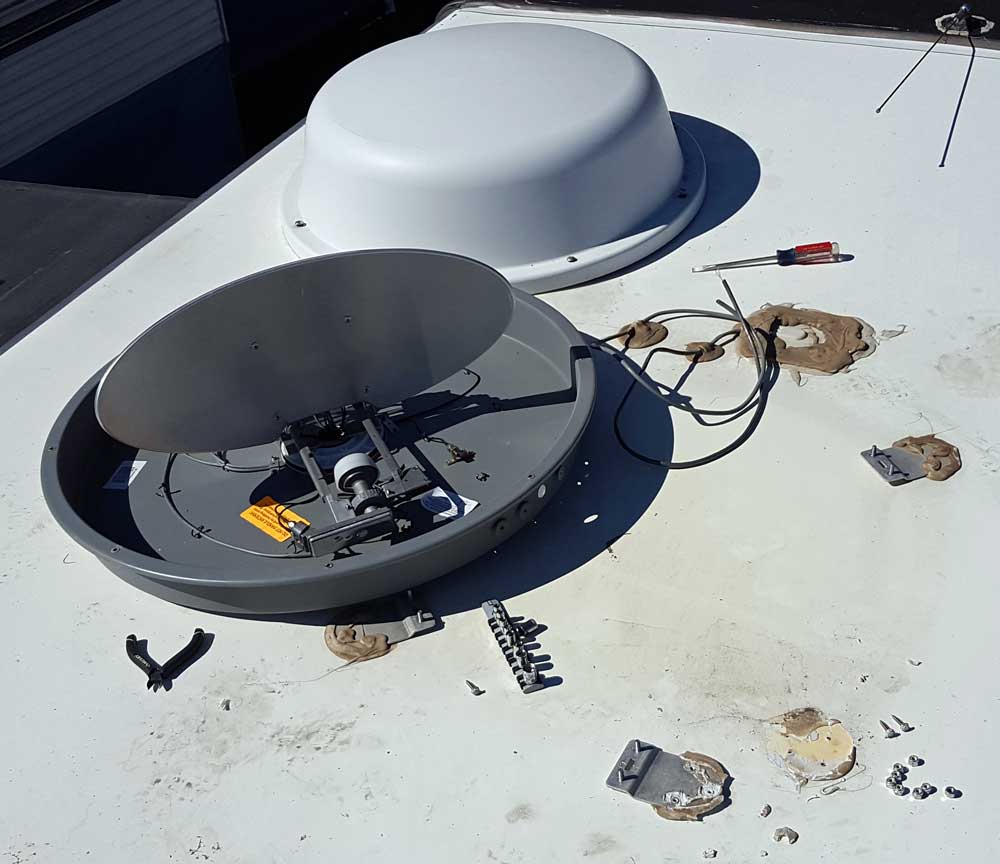
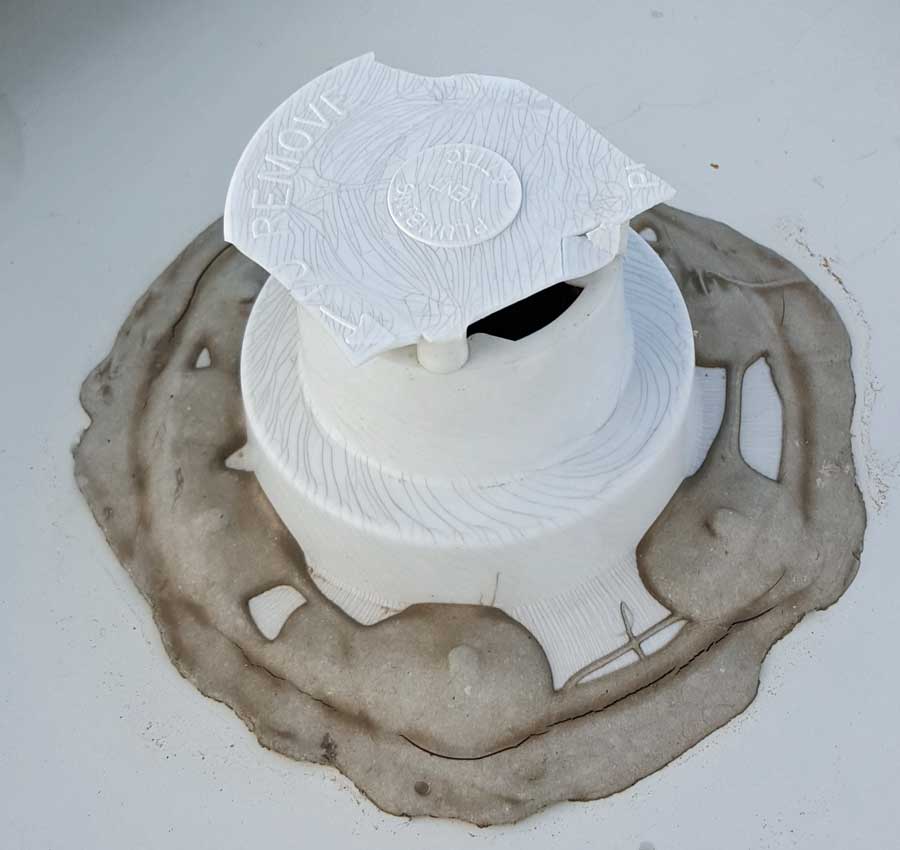
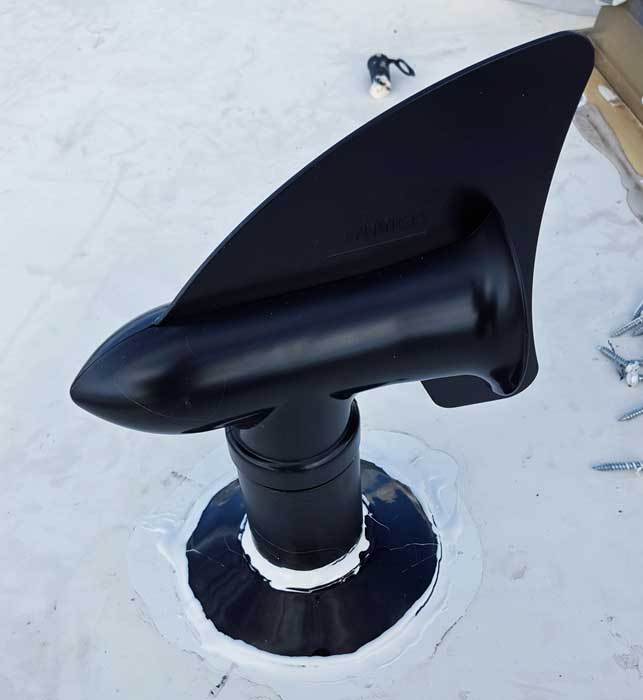
Tuesday, August 28, 2018: I finished the roof work on this broiling hot day. I had intended to work early in the day but other pressing matters took priority so I was working during the hottest part of the day. The installation was easy needing only roof sealant and four screws. I DID shorten the fifty foot RG-6 cable to only what was needed. Fortunately I still own the right tools to put an end on the RG-6 cable from my days of satellite Internet. The Wally receiver is due to be delivered on Friday so I will probably complete the installation on Saturday.
This is our first automatic satellite pointing dish. We have had manual pointing satellite TV in the past and usually found the satellite quickly but the part that always took the longest was the setup. In this case, I just push the button. In previous experiences with satellite TV we got tired of paying the bill long before the two year contract was up. But in this case, we will try the DISH "pay as you go" program and learn if it works for us.
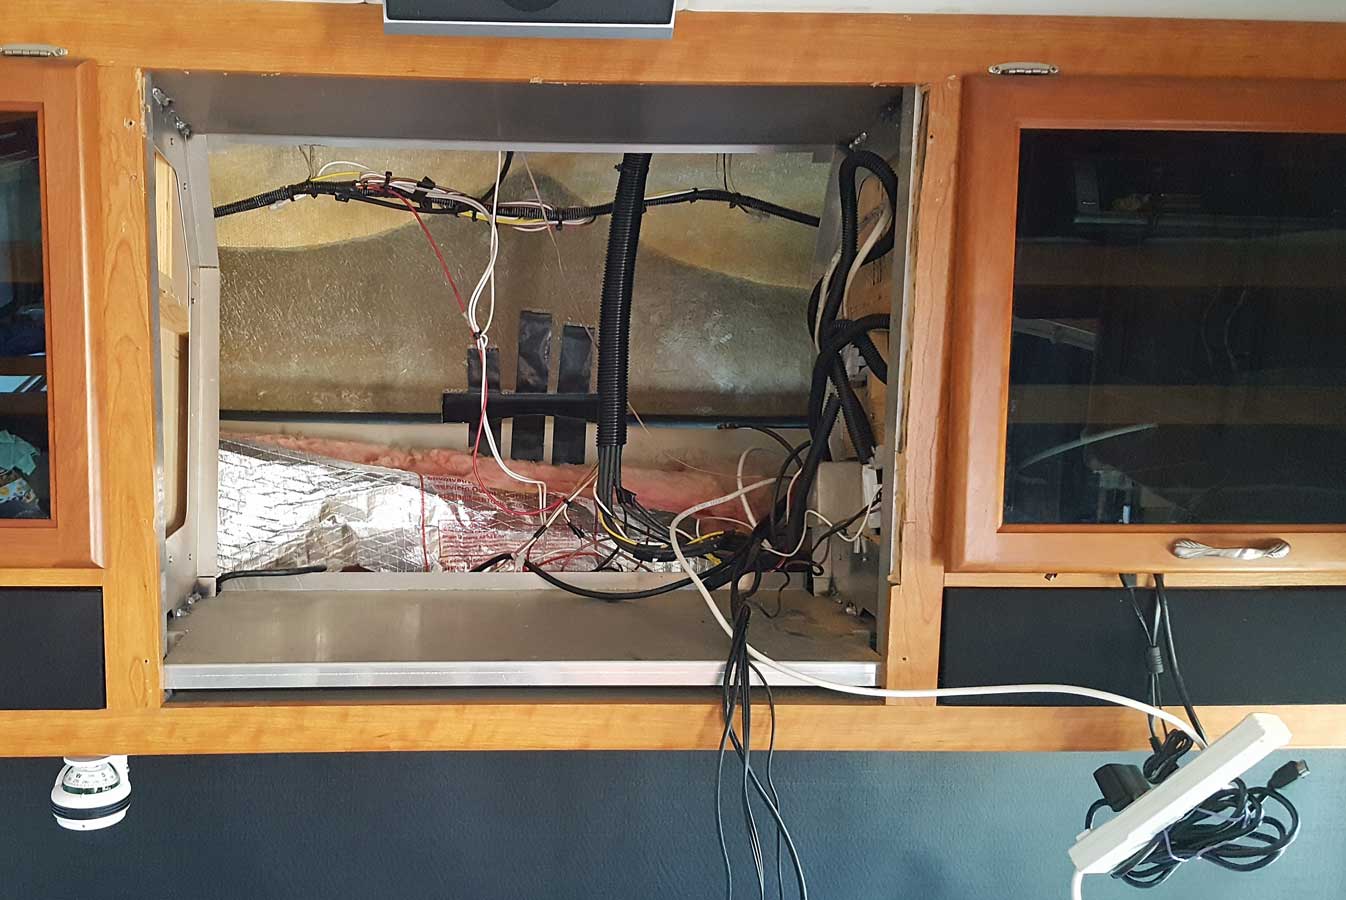
Monday, August 27, 2018: This is the roof of Miss Dory where the previous satellite dish cables exited the roof. Their are two coax cables plus a power cable for the previous dish. We have purchased the King Tailgater Satellite Dish for DISH Network. The new King equipment requires ONLY one coax cable and comes with 50 feet of cable. I am wanting to replace the old cable but use the existing cable to pull through the new cable. My first attempt failed so I connected to the next existing cable and was able to pull the new cable through to behind the TV. I removed the TV to have access to the cables, click the photo to see what I mean. So this mess of wires will be reduced to ONE wire. I will reuse the cable cover to seal the hole in the roof. When I removed the TV, I noticed a digital audio plug so I checked the receiver of my audio sound system and found a digital audio plug so I ordered a cable from Amazon and we will have surround sound in Miss Dory. I will check the DISH receiver to learn if it has a digital audio connection but it still might be best to connect to the TV so I have surround sound no matter the source of the TV signal. Installation will continue. We watch very little network TV except for PBS but we like the fall college sports and professional tennis. Additionally the DISH "Pay as You GO" program will allow us to turn the satellite receiver on/off for the months we want the service.
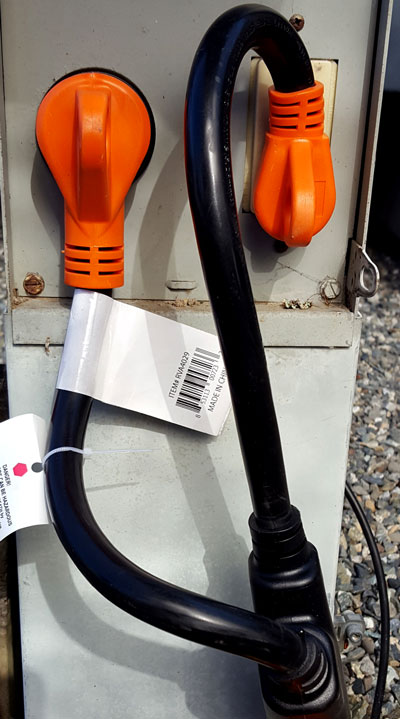
Thursday, July 19, 2018: When in Arizona over the winter I came across this 50amp adaptor cable. Most larger RVs like ours use 50 amp service. If you look at a 50 amp plug, you see four prongs. One is the ground and one is the neutral, the other two plug into 50 amps each, so actually the RV has access to 100 amps. This is similar to a 220 volt circuit but nothing in the RV is 220 volt. Instead, each 50 amp prong is divided into the different circuits in the RV. When you use a traditional 50 amp adaptor you are plugging into a single 30 amp circuit. That means the RV which normally has 100 amp of power now has only 30 amp spread between the two prongs. This adaptor plugs into a 30 amp circuit sending that power down one of the prongs. The other plug is inserted into a 20 amp circuit sending that power down the other prong. Now the RV has a total of 50 amps. 30 amps coming from one prong and 20 amps coming from the other. Not nearly as nice as 50 amps into each prong but 20 amps better than a single 30 amp circuit. This is my first time to use the adaptor. The spot we have at Evergreen Escapee Park has only the 30 and 20 amp circuits. Whoever wired the pedestal did not realize that the grounding prong on a 20 amp circuit always goes down so I had to turn the plug upside down to fit.


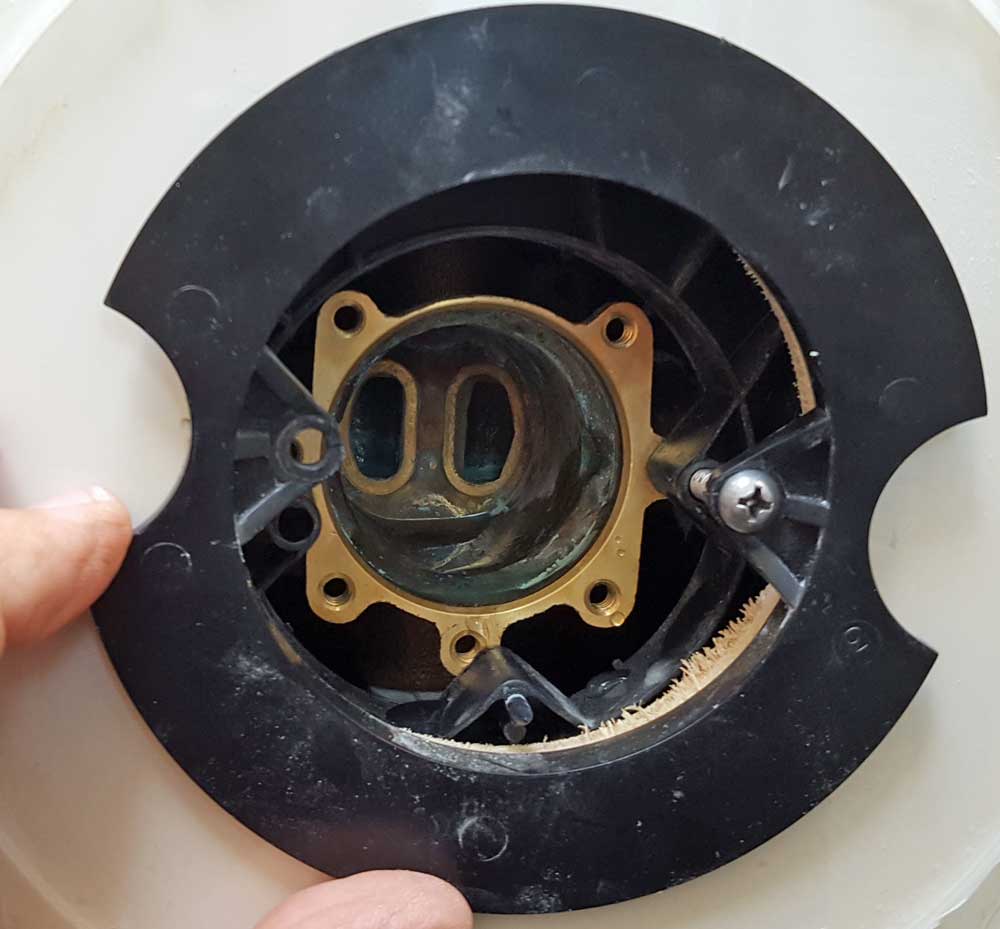
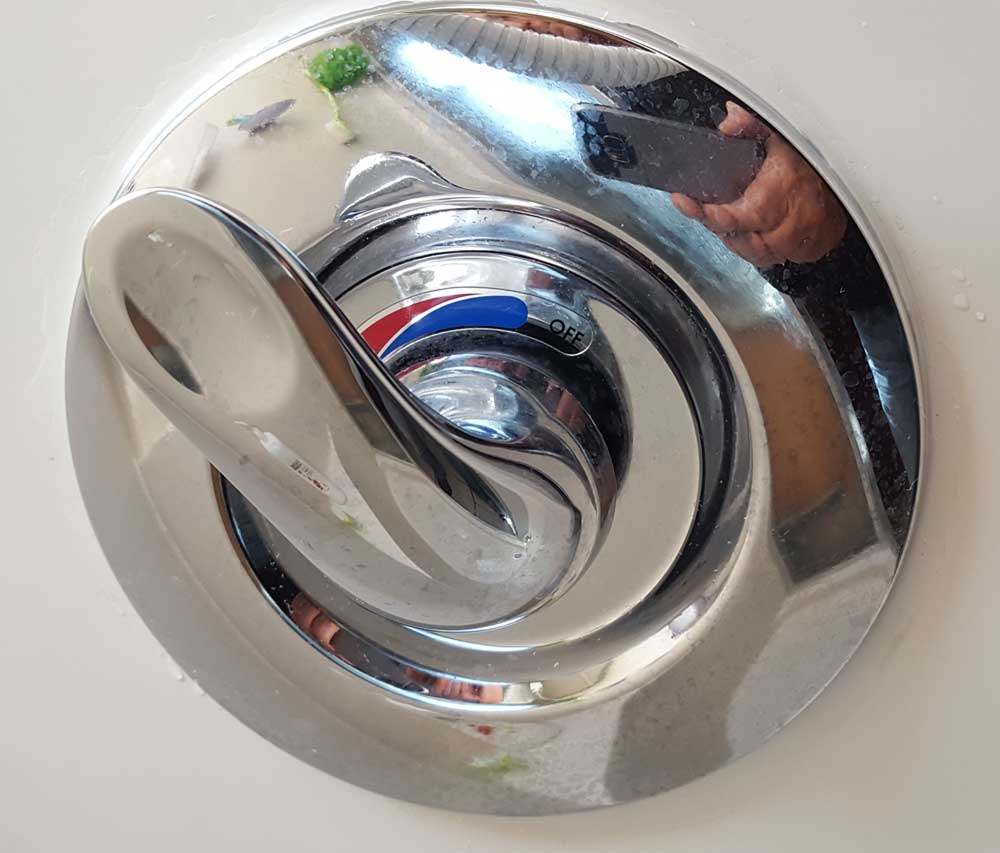
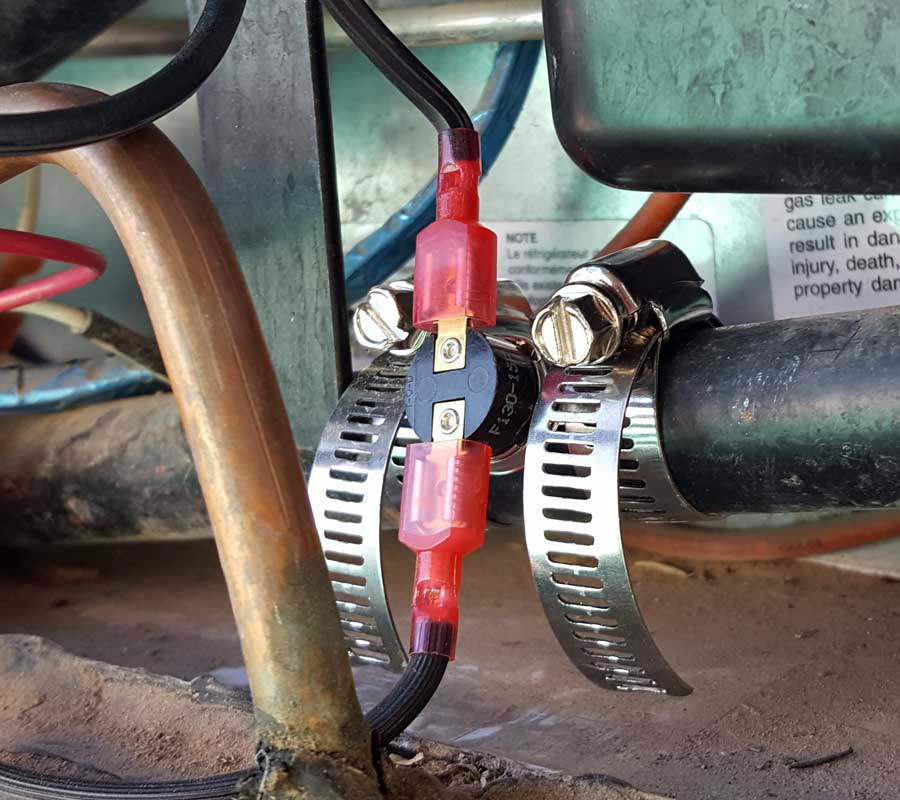
Friday, July 6, 2018: The chassis air conditioning on Miss Dory has not worked for some time. We just haven't needed it so I haven't put much effort into fixing it. I DID purchase the "recharge" kit but found that the pressure reading was too high to recharge. I returned the kit and talked with the manager who told me the most common cause of AC failure was the AC switch. I was thinking of the switch inside the cab. He explained it was located on the low pressure tube and showed me a photo. Click the left photo to see the photo he showed me. So I came home and searched for something which looked like his photo. I found the switch pictured on the right and ordered a new one ($25). Click the right photo to see the new switch. I think I heard the AC clutch engage when I put on the AC. I let it run for a few minutes and the air seemed to be getting colder. We won't know for sure until the next trip that needs AC.
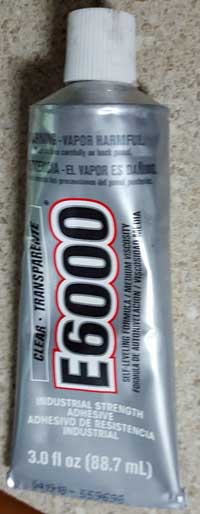
Friday, June 29, 2018: When driving to our camp location in the Cascades we stopped at WalMart in Cottage Grove to get several items but the most important was to replace our tube of E6000 adhesive. We have found it will fix almost any problem. As it turns out, it was fortunate we stopped. After arriving at camp, the left refrigerator door fell off because the bottom pin had broken from the door. I used the E6000 to glue the pin back to the door. Click the refrigerator to see the door laying on the kitchen table.
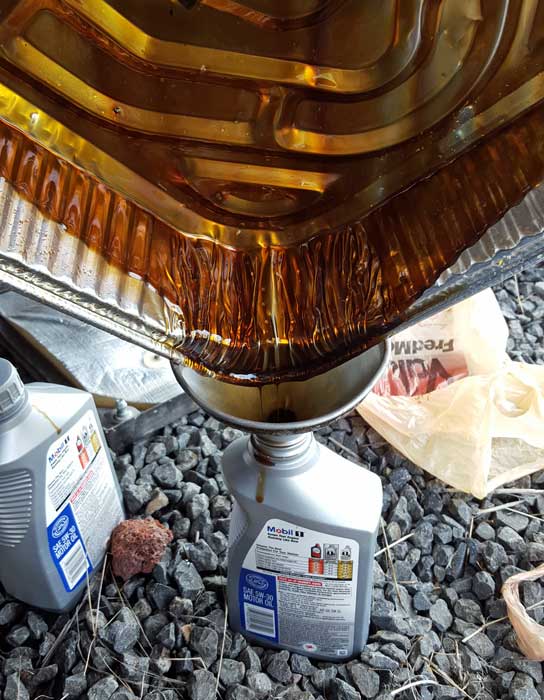
Monday, June 11, 2018: Must get some maintenance of Miss Dory, just an oil change. I use synthetic oil so this must be done only every ten thousand miles. I like going to the local oil change shop although today, the fee seemed to be pretty high.
 |
 |
 |
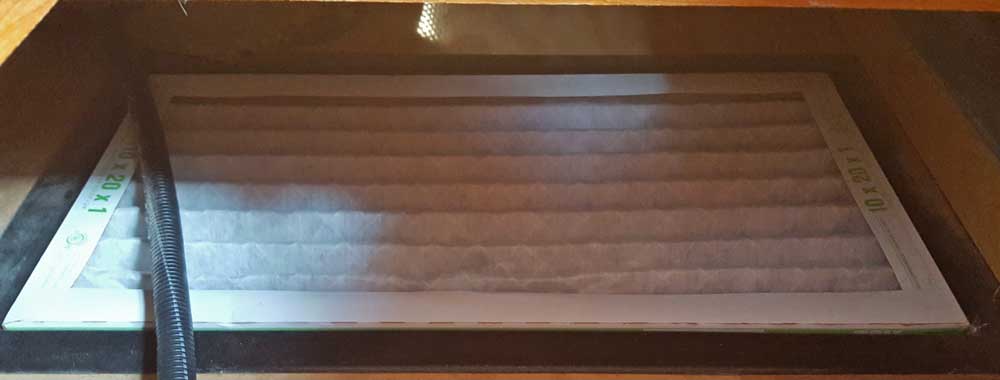
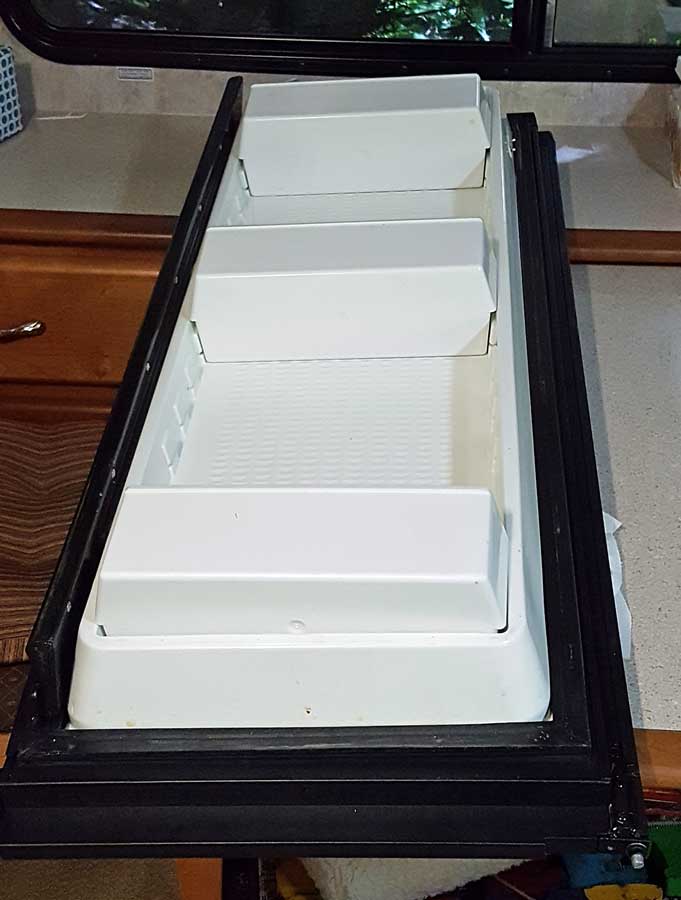
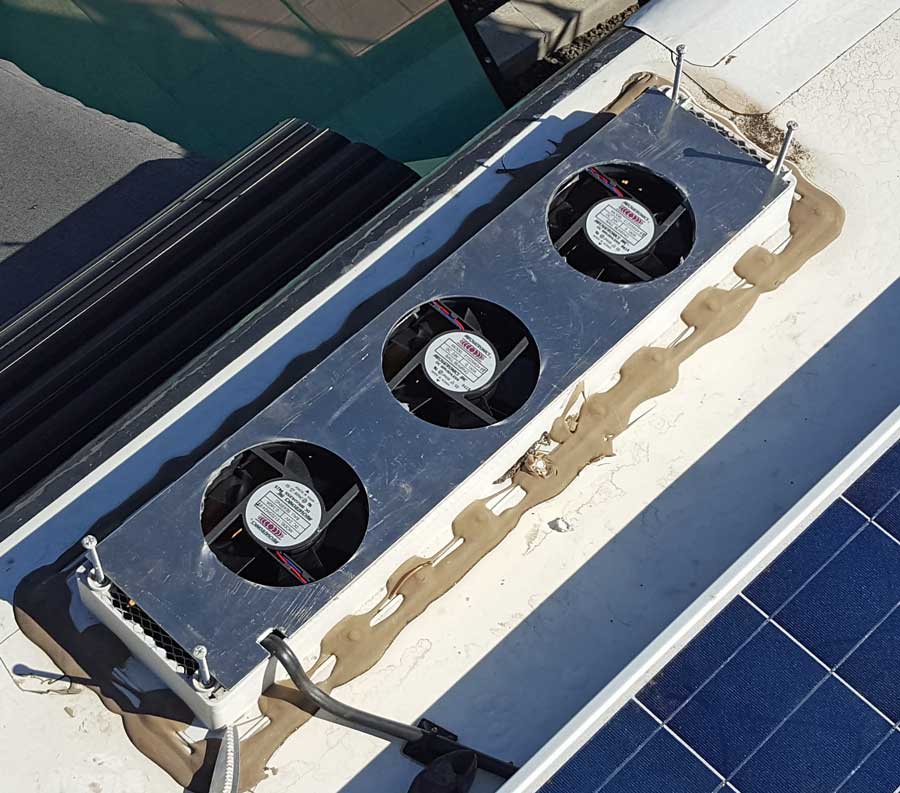
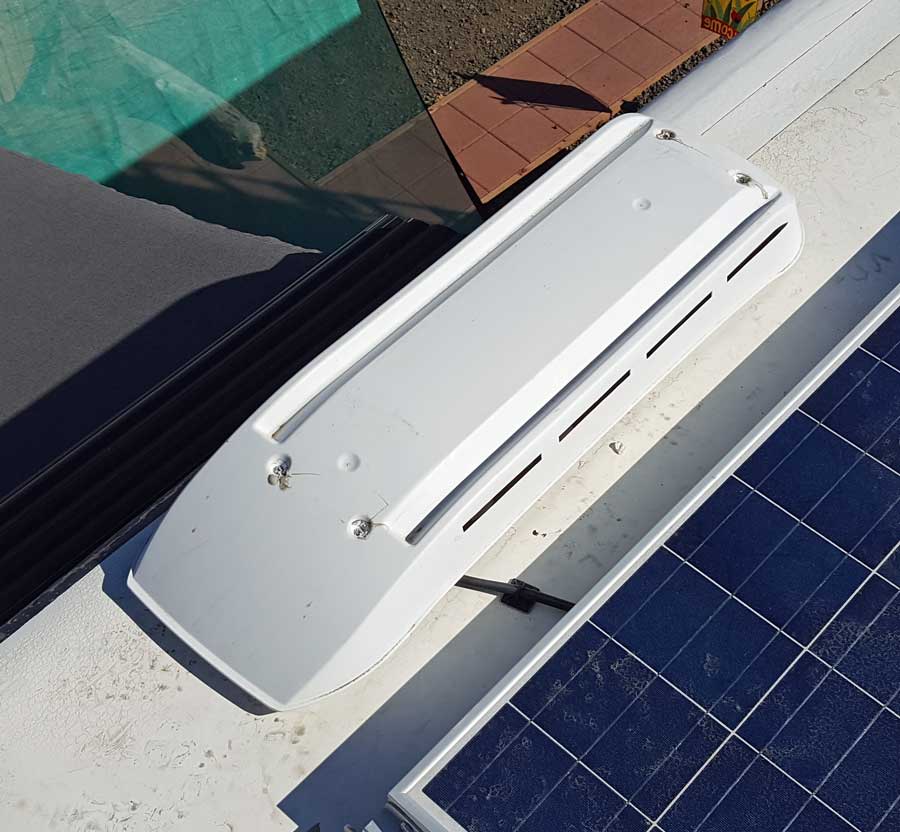
Thursday, April 26, 2018: Miss Dory has a basement heat pump. That means it works for heat and for air conditioning. The heat pump is located in the hatch below the bedroom. The air intake is below the bed. The filters should be changed every 6 months and today was the day. The dirty filter is on the left. Fortunately the filter can be changed easily by lifting the bed. Click the photo for a view of the installation.

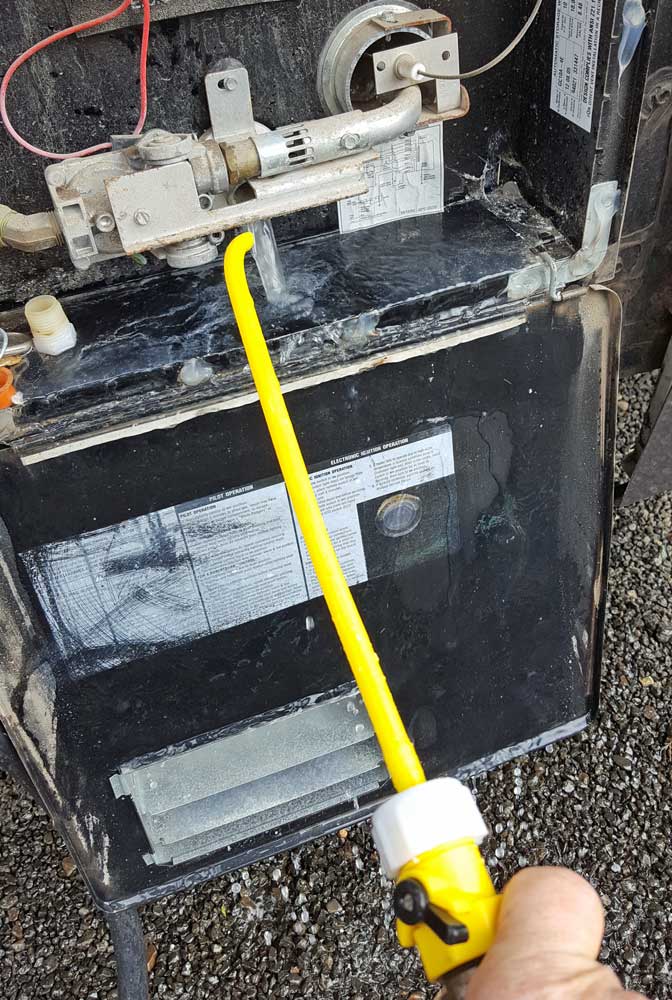
Wednesday, April 18, 2018: I have a long list of things I need to do to Miss Dory before we go on our next adventure. One of those items is to flush the hot water heater. I doubt it has ever been done since most RV owners don't know to flush their heaters. This is a ten gallon aluminum tank heater. It has much less gunk inside as do the 6 gallon steel heaters and no anode rod. I used my heater flushing wand (click the photo to see it) and got milky water for a while. I continued to flush until it was clear. Then I replaced the plug and filled it back up with ten gallons of water. I used my air compressor to blow out all parts of the heater including the burn chamber. The heater will work for many more years.

 |
 |
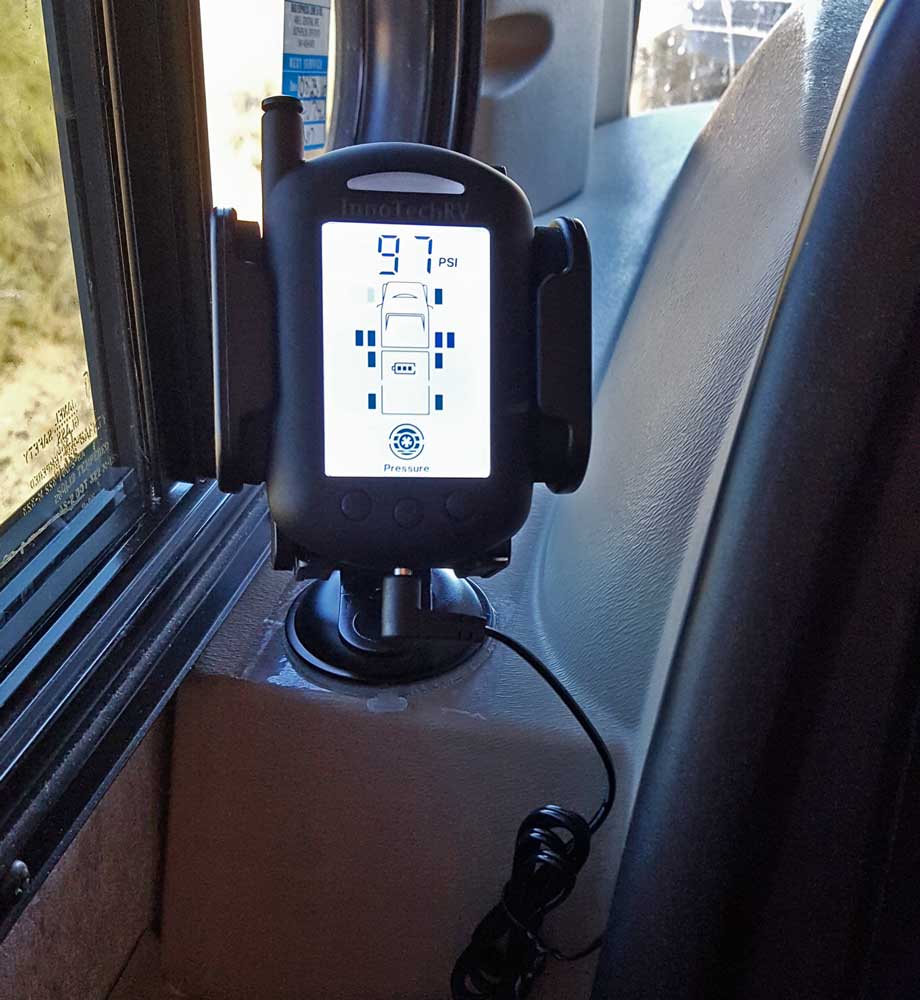 |
 Wednesday, February 7, 2018: Ten years ago I began using a Tire Pressure Monitor System (TPMS) to watch the condition of my tires on the fifth wheel I was towing. That system saved me three times over the ten year life of the system. I figure it paid for itself on the first save knowing that one tire blow out on the trailer cost me $4,000 in repairs. I recently asked a question on a motorhome forum about the need for a TPMS on a motorhome since the Toyo tires I have on Miss Dory are considerably more substantial than any trailer or truck tire. 100% of the comments said, YES! The TPMS is needed on the motorhome. I was especially concerned about the dual tires in the rear doubting that I would "feel" low pressure in any one of those tires. I did my research and found a system priced well with all the features of the new systems. This new system if from InnoTechRV.com, be sure to use the coupon code "SafeTrip" for a discount on any size system. Here are the features that got me to purchase the InnoTech system: 1)I like the size of the transmitters (and the ease of installation). My old system had larger transmitters which caused install problems requiring special installation of valve stems. 2)The monitor shows tire pressure of each tire, with alarms for high pressure, low pressure, slow leak and fast leak. 3)Tire temperature is reported with alarms if the temperature gets too high. 4) You can set two different standard pressures per tire. This is needed to an off road vehicle such as a Jeep. Off road pressure is much lower than road pressure. 5) The transmitters have replaceable batteries which are cheap. 6) The monitor is clear and the perfect size to be viewable yet comfortable on the dash area. 7) The monitor has a rechargeable battery with two charging cords, one to fit a standard 12v outlet and the other to fit a USB port. I purchased the ten transmitter system to monitor all six of the motorhome tires and the four tires on our Forester. The installation was very easy, a two step process. First step is to identify the tire each transmitter is monitoring. I coded each transmitter with a permanent ink, silver marker. The code you see above, MDIR is "motorhome, driver's side, inner, rear". Another example would be MPF, "motorhome, passenger side, front". Labeling is only needed if you plan to remove the transmitters and even then, if no labels, just identify each transmitter again (instruction manual calls is aligning). Step two, once all transmitters are installed, set the tire pressure for each tire. The current tire pressure may not be the exact tire pressure you want in each tire. For example, the tire pressure shown on the tire above is "99" PSI. That tire should have "105" so I set the "cold pressure" to 105. I'll add air when I get the chance to bring that tire to 105. The transmitter won't have to be changed because I've already set the correct pressure. Next, I chose to report as PSI (other scales are available) and I chose to report in Fehrenheit. Installation is complete. Click each photo to see additional views.
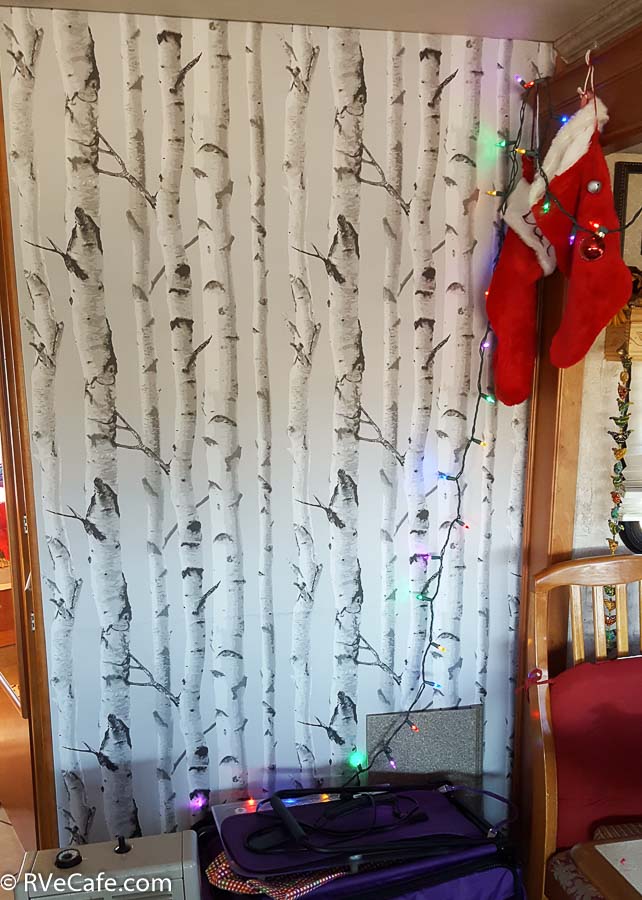
Wednesday, December 13, 2017: Today was a work day inside Miss Dory. This wall originally had mirrors which we removed last June with the intention of replacing the mirrors with a design. We found the Aspen trees at Home Depot a few months ago. We finally got around to applying the paper to the wall. It is sticky back, peel the backing off and stick to the wall. It's not a permanent stick so Gwen could stick then reposition if needed. She did a fine job making sure the seems matched perfectly. Click both photos for additional views. Behind the photo to the right is the final look with Christmas decorations. I'm wanting to add bird stickers to the trees but Gwen has vetoed that idea for now.
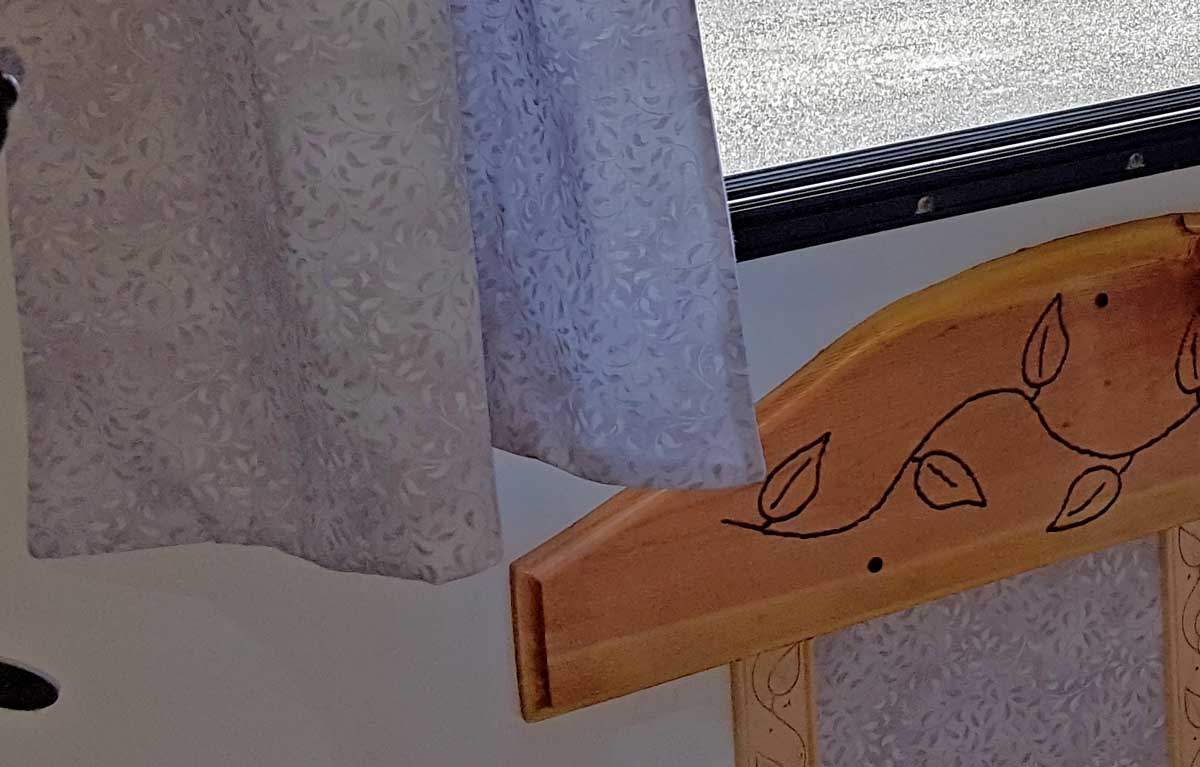
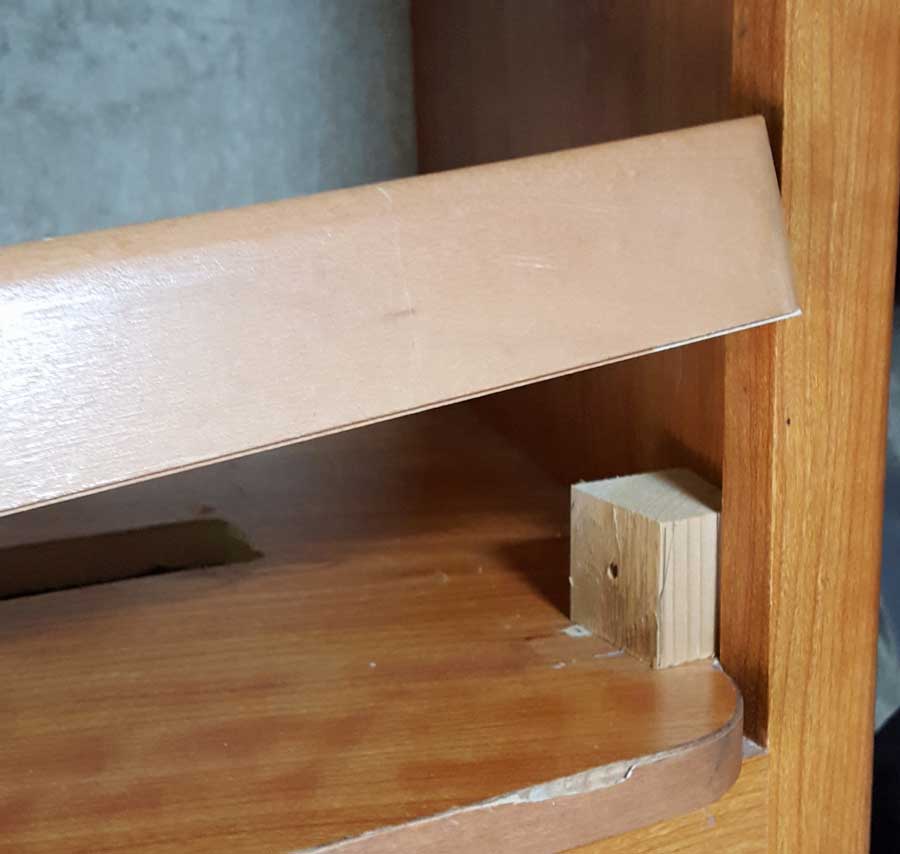
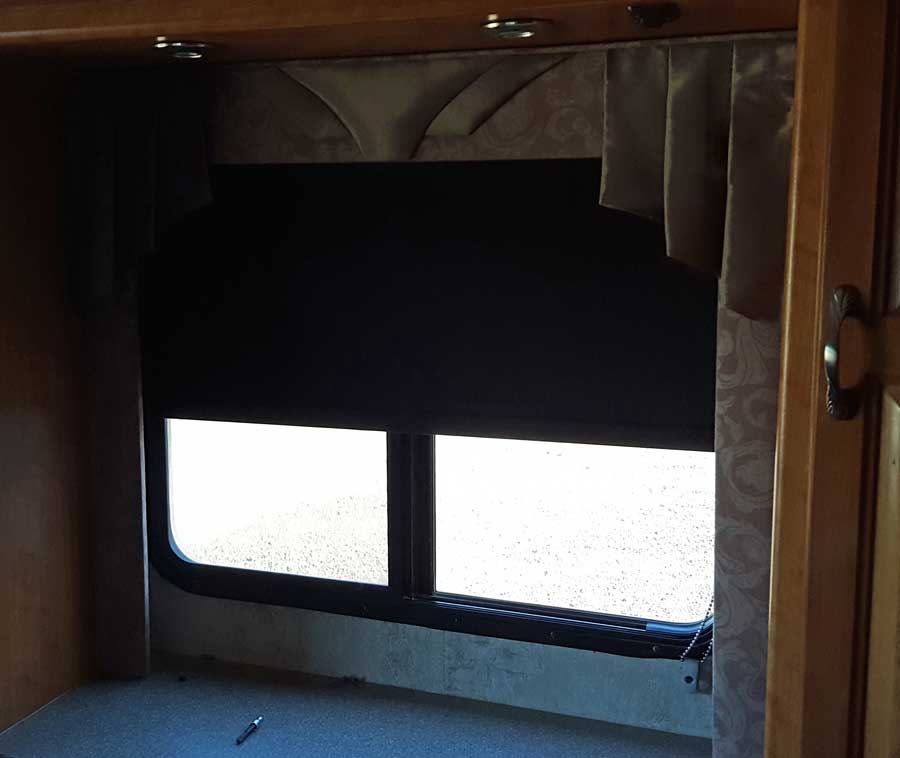
Tuesday, June 6, 2017: Gwen has finished her part of the valence remodel, the curtains. I think Chip and Joanna would approve of this remodel. The curtains stay on the side, we have blackout shades on these windows. The top of the valence is a six inch shelf, large enough for magazines, Gwen's Kindle, my tablet and whatever else might fit. Click the photo for a closer look.
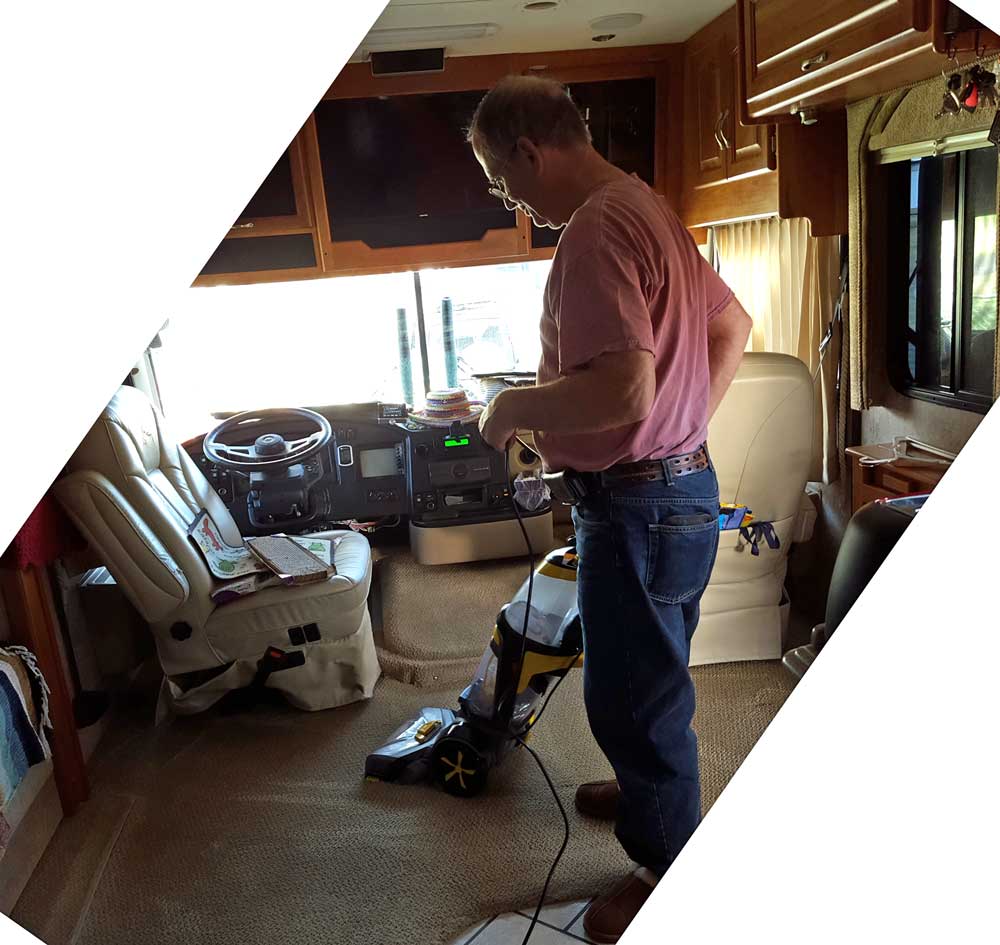
I spent the day, actually, three hours, shampooing the carpets in Miss Dory. Not a fun photo, so no picture of me with the carpet cleaner.
 |
 |
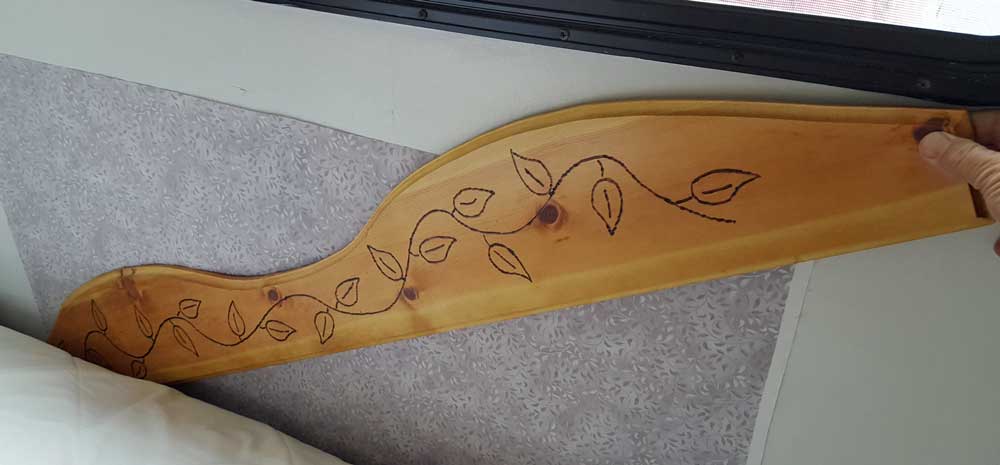 |
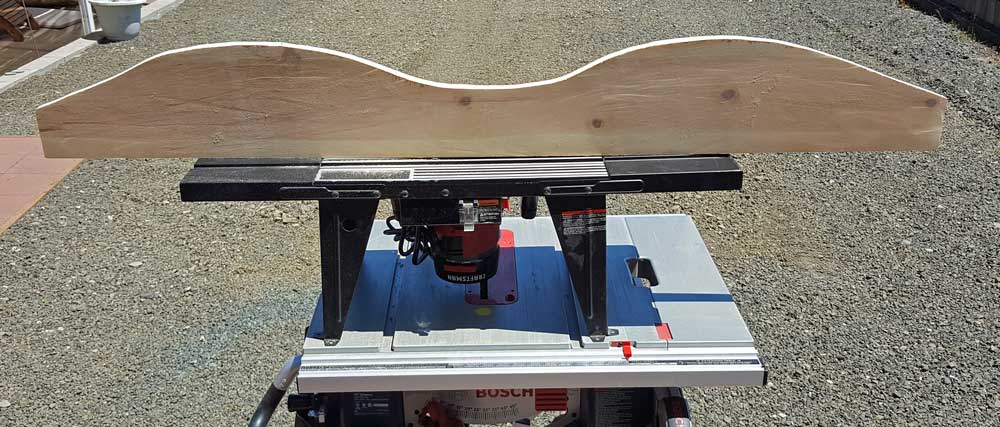
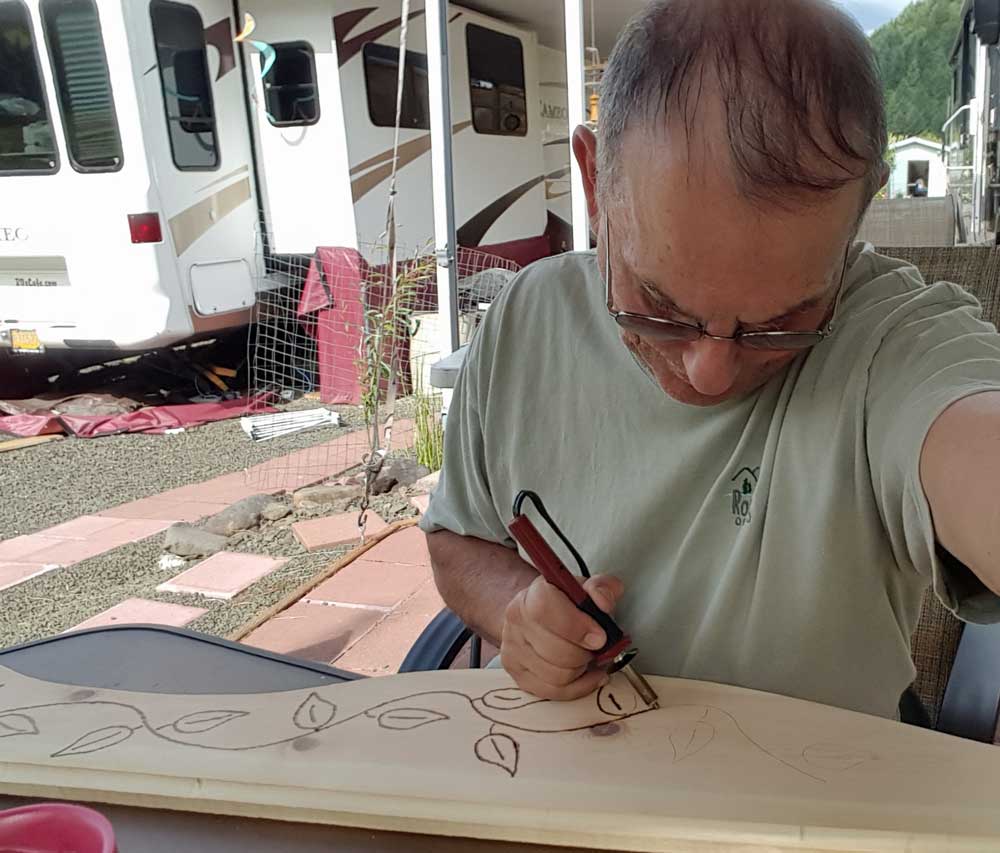
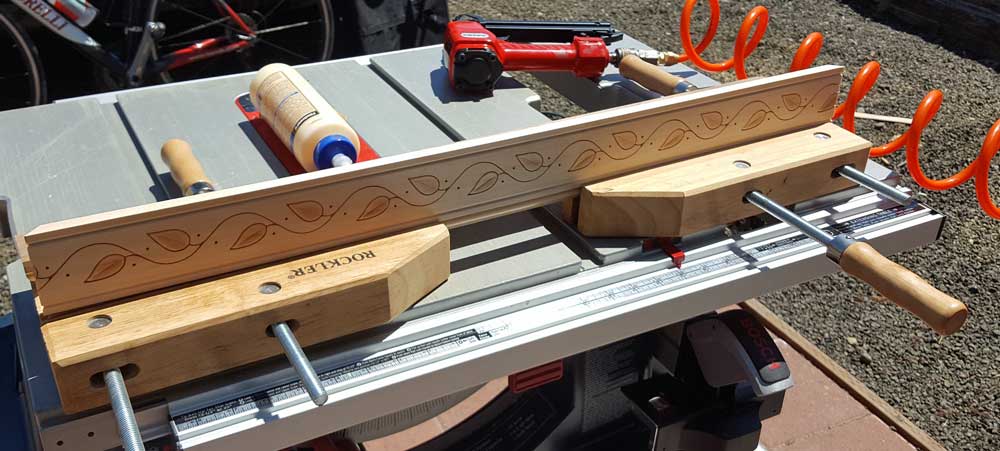
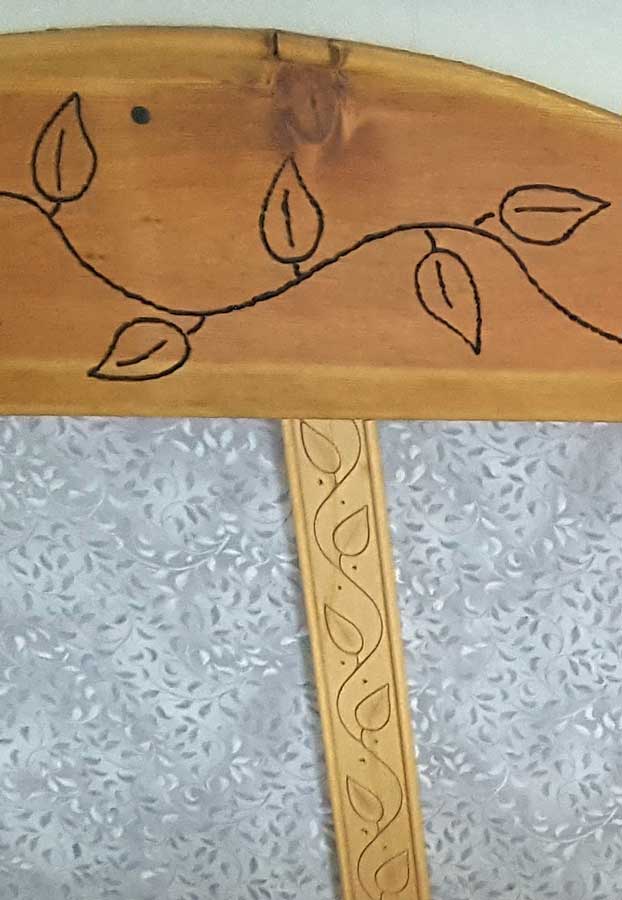
 Friday, June 2, 2017: This was a multi-day project of removing the old headboard, painting the bedroom and preparing a new headboard. I used a similar molding as used on the valences. Gwen wanted a simple wooden headboard. I copied a similar leave pattern onto the headboard then wood burned the design into the Pine. The fabric behind the headboard is the same fabric Gwen will use to make the curtains. It's also a leaf pattern. Click all photos for another view.
 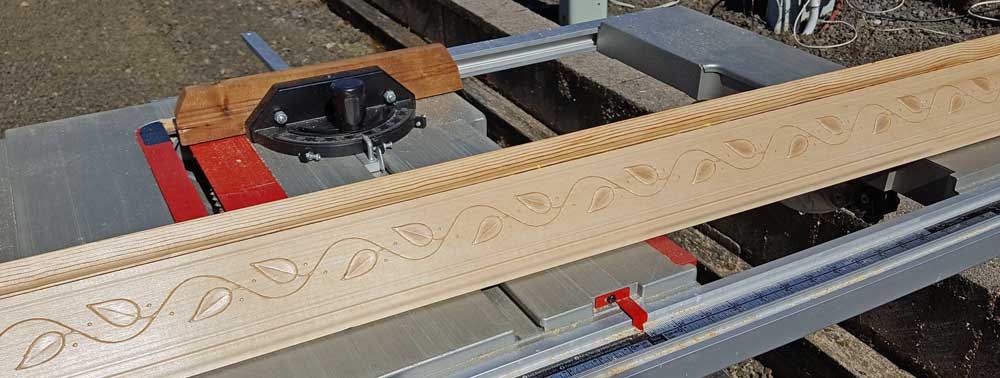 |
 |
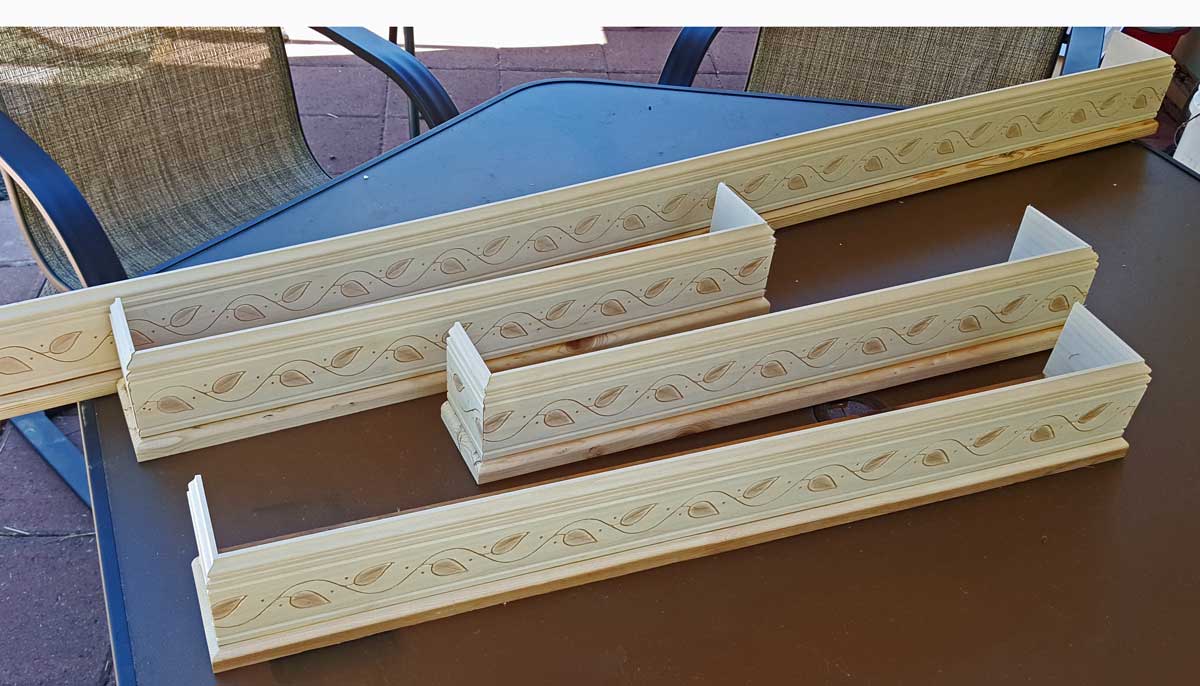 |
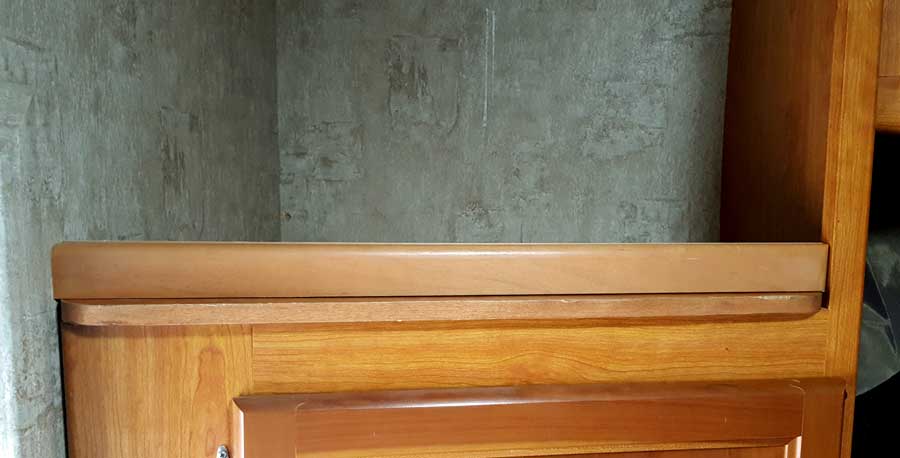
Sunday, May 28, 2017: I began work on this project yesterday. It turned out to be a two day project. We hated the ugly valences in Miss Dory. The made the rooms dark, dreary and old fashioned. We found some molding at Home Depot we liked so replaced the "heavy" valences with this light and cheary molding. I mitered the corners and used pine on top which I had on-hand. We used a light stain to bring out the pattern then put urethane over the stain. Now the project is in Gwen's hands. She plans to make curtains for the window sides. Click on all photos for more views. | 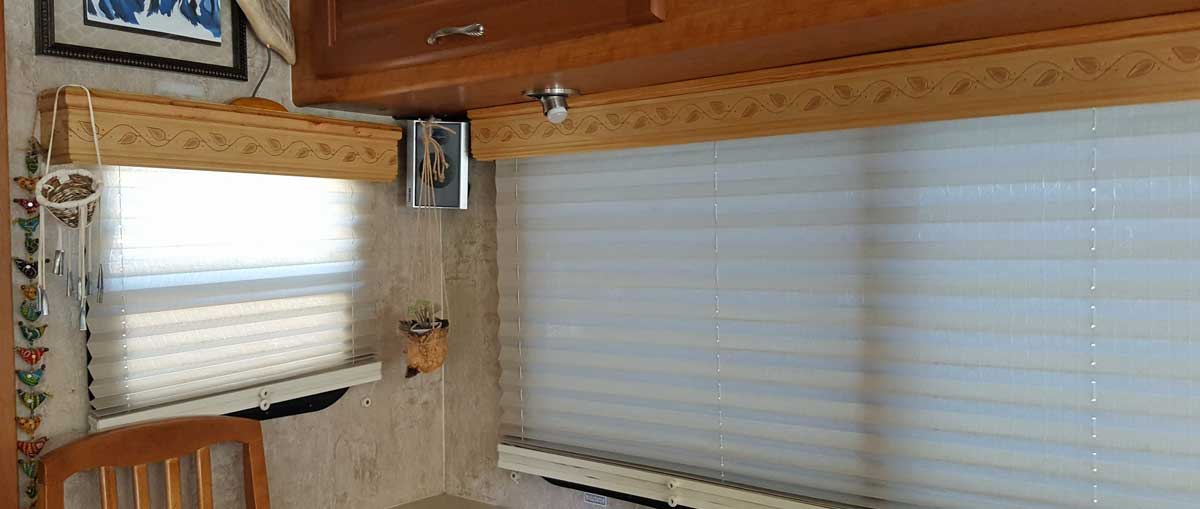 |
 |
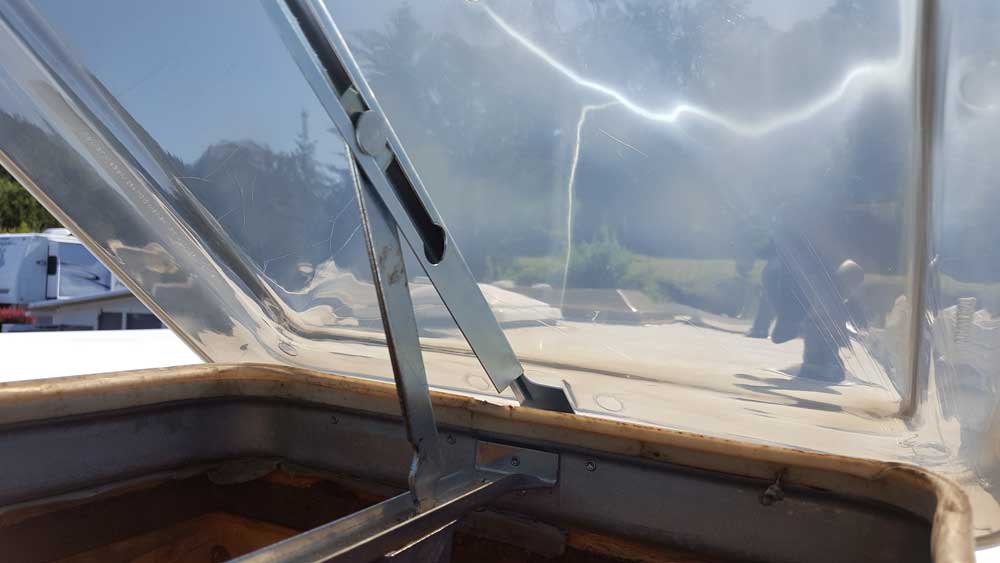 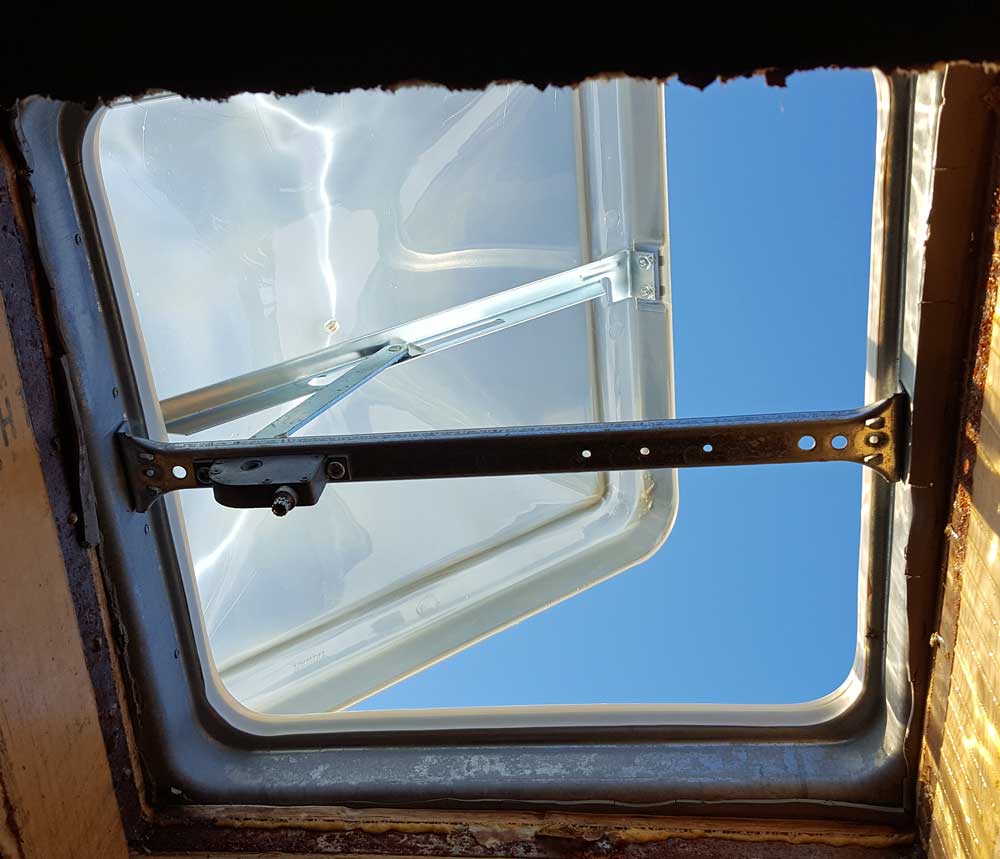 |
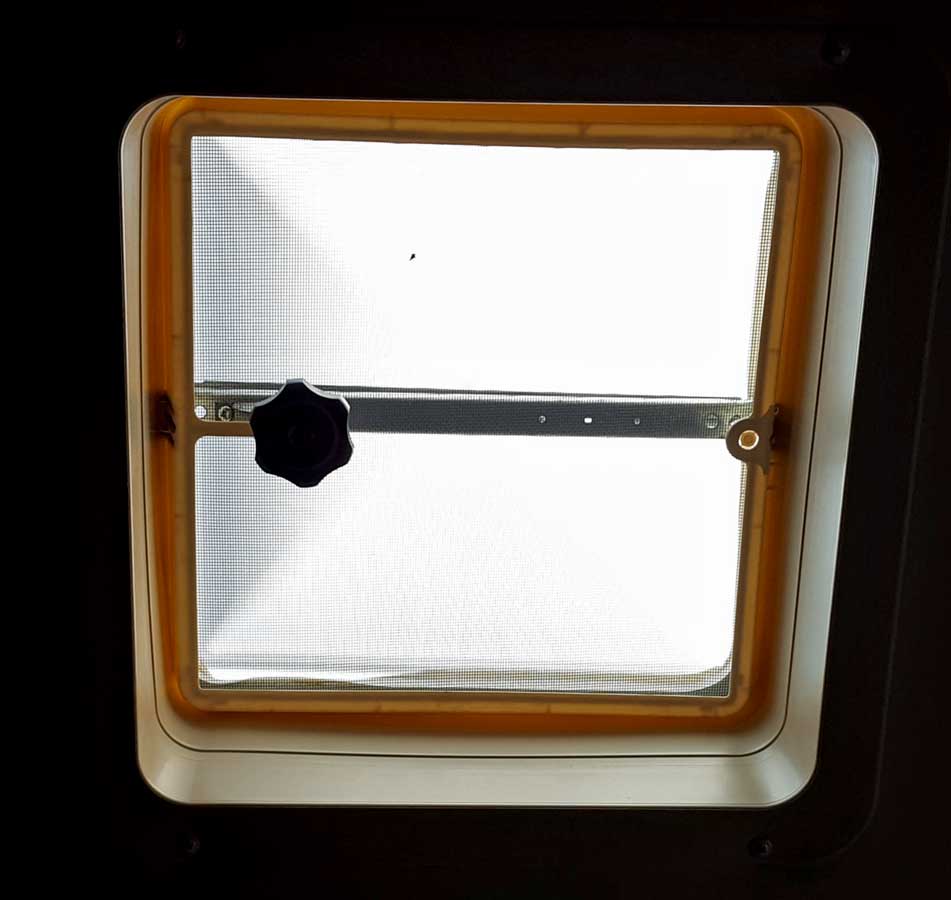
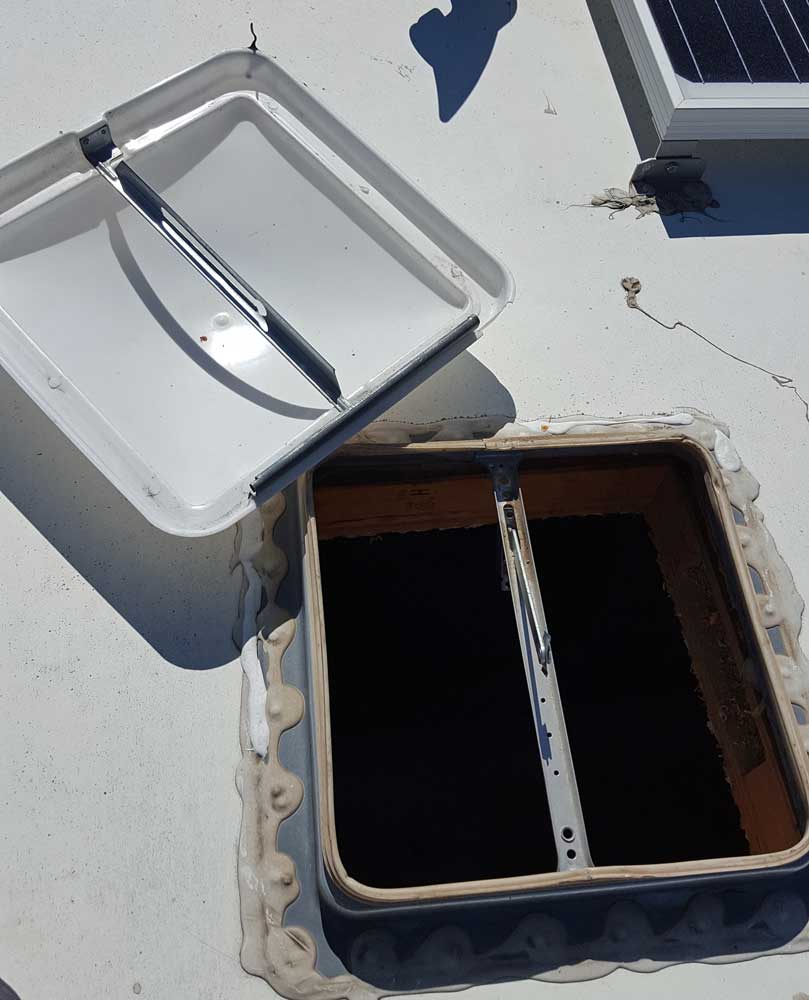
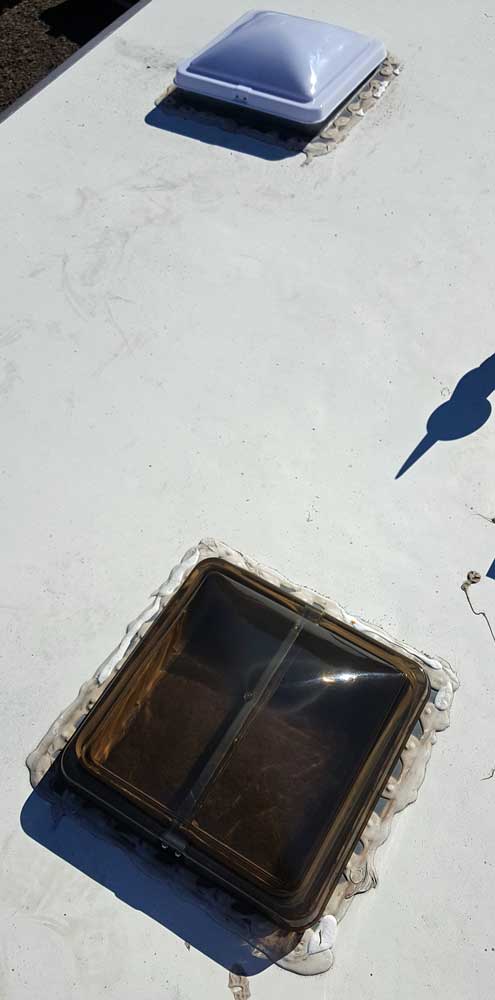 Thursday, May 25, 2017: Two vent lids needed replacing. It turned out to be a bigger job than I figured. The arm which raises the lid had to be removed to fit the hole in the cross bar. Also the gasket material needed to be replaced. The two replacements took about three hours. Click all the photos for more views. |
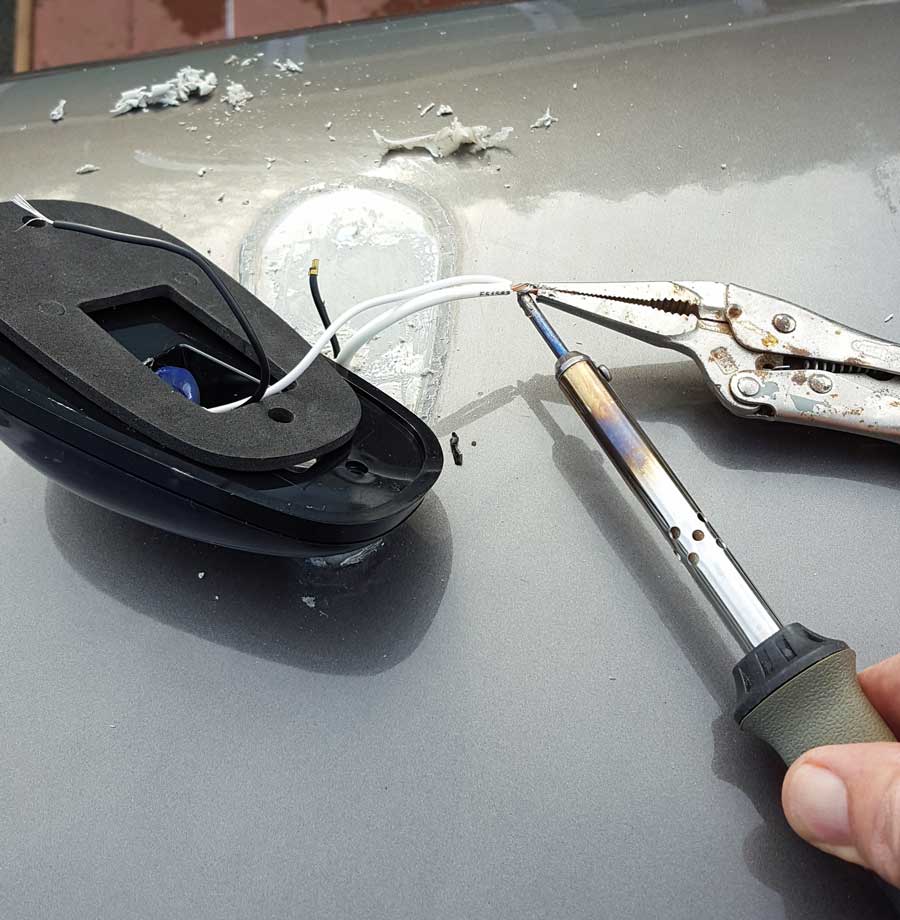 |
Sunday, March 12, 2017: Several weeks ago I noticed that all five of the marker lights above Miss Dory's driver and passenger seats were filled with water drops. I chose to replace the marker lights with LED lights. These new light fixtures are completely sealed so no chance of water leaking inside these fixtures. The hot wire from the old fixture is very short making the connection to the new fixture tough. I decided to solder the connection as well as wire nut. There is enough space under the fixture to fit the two wire nuts. | 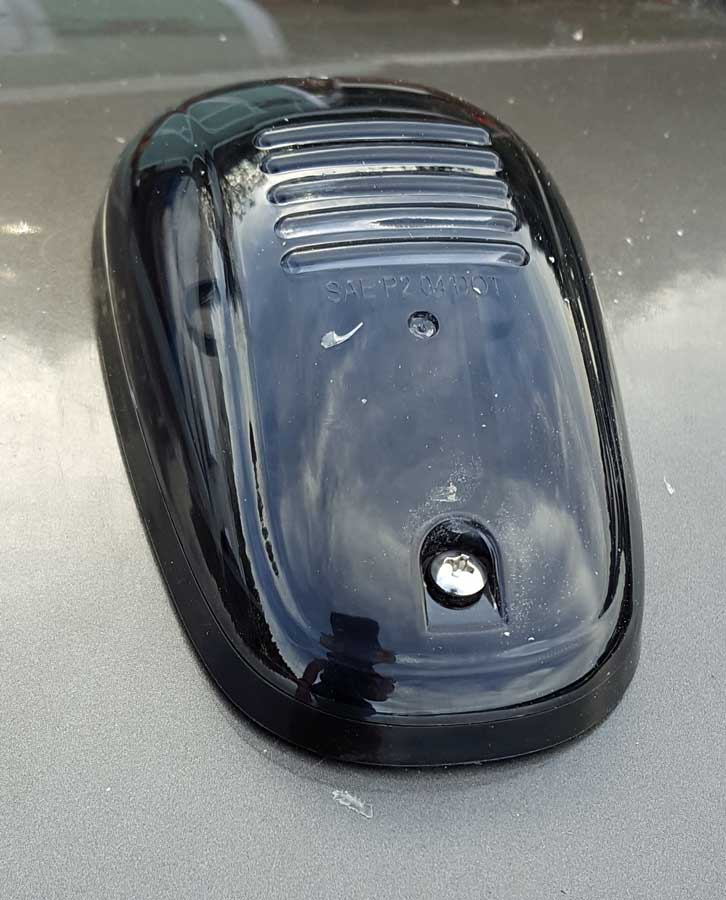 |
Tuesday, February 7, 2017: When we purchased Miss Dory it came with a mirror back splash which Gwen did not like. A few days ago Gwen purchased a "natural rock" back splash which is a peal and stick tile. The total investment was $75 so I've got to do this right the first time. The tough part of this job was removing the mirror and the double backed tape which did not come off with the mirror. The peal and stick tile went on easily. I was worried about cutting the tile but a utility knife did most of the work. The final edge I cut using my tablesaw which worked well, I was surprised. A few days ago I bought and "action camera" like a GoPro but much cheaper. It was rated at 4.5 stars so I took the chance. It came with ALL the accessories, I just had to add a 64GB SD card. Here is a link to the camera. I used the camera for the second time to create a video of this project. Take a look at the HD quality of the video while you watch me complete this project. The video is only about three minutes long for a job which took me five hours. This is only my second time to use this camera and I've gotten much better from the first time. I expect to be an "expert" after I've done this a few more times.
 |
 |
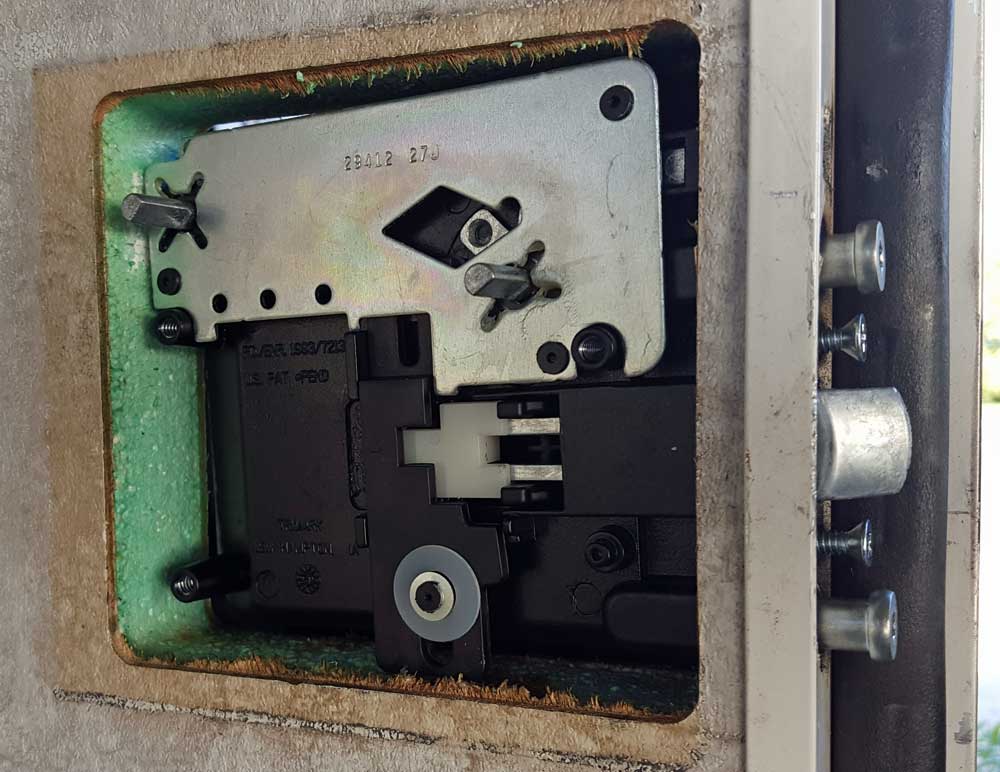 |
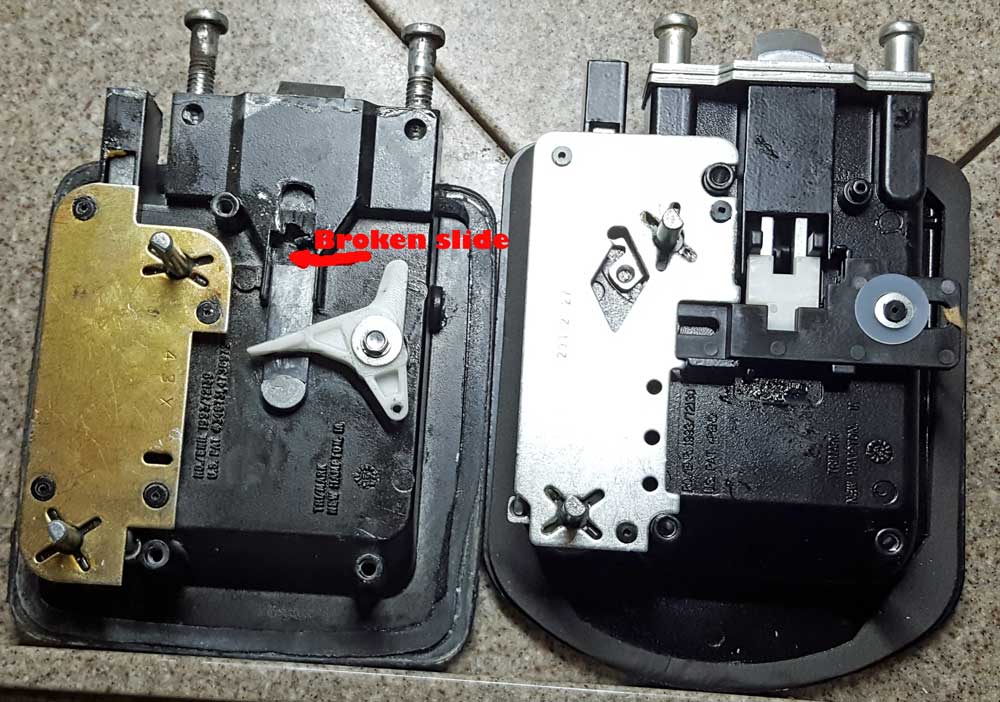
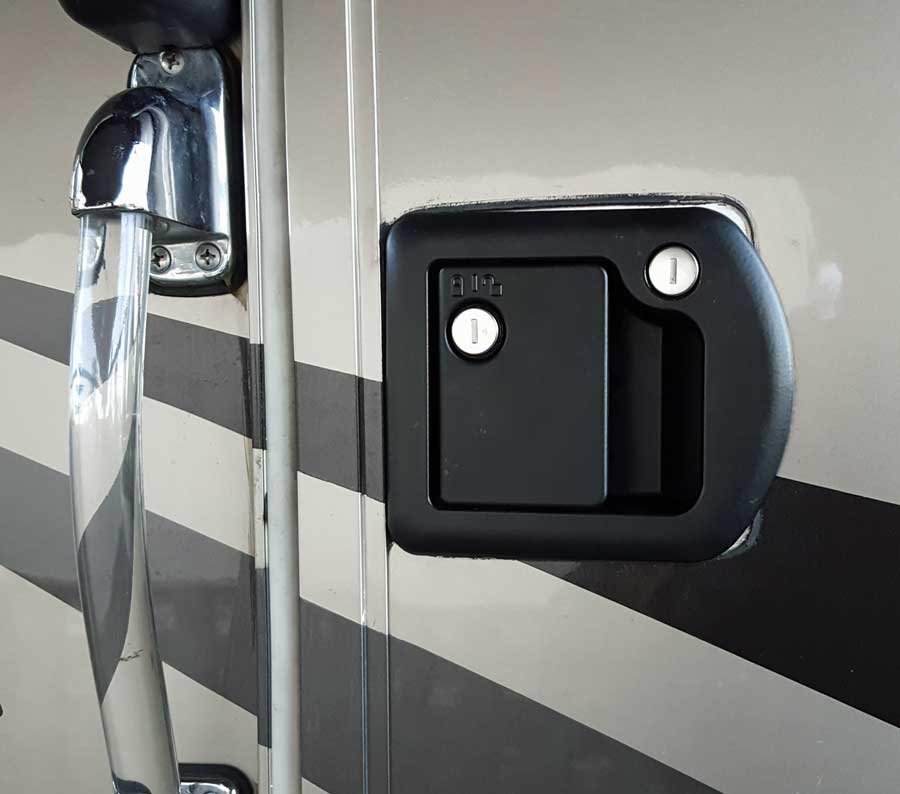
Sunday, October 30, 2016: We had a surprise today when I tried to walk into Miss Dory. The door seemed locked but it wasn't locked. There was no way the door was going to open. Gwen climbed through a window to learn if she could open it from the inside. But NOPE, it would NOT open. I got my tools and climbed inside to take the catch mechanism apart. I eventually learned the latch would not retract. This turned out to be a difficult removal and repair. I'll give more detail when I get the replacement parts.
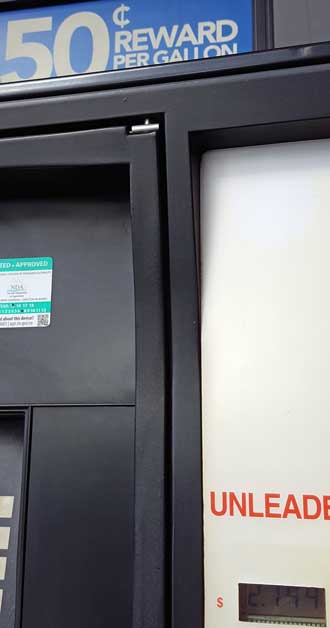 |
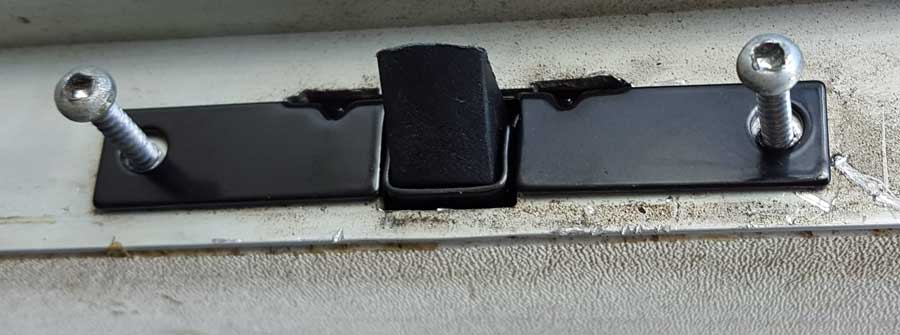
Tuesday, October 25, 2016: Lots of errands today. The first was to move the motorhome from Verdi to the nearest Raley's Gas station because Gwen purchased enough at Raley's grocery to get 50¢ off per gallon limited to 30 gallons. That made the fuel $2.20/gallon and I couldn't fill the motorhome with only 30 gallons but appreciated the $15 in savings. While I had the slide in I replaced another hatch latch which had broken. I took four replacement latches with me to Alaska and didn't use any but have had to replace two since the return. Note the clips on the aluminum shafts. The push nuts are very difficult to replace in this tight space so as I replace latches, I drill the aluminum shaft and insert the locking pins. No problem to replace the pin but impossible to replace a push nut. Click the right photo for a view of the latch which breaks all the time. I need to remember to gently close the hatch doors with the latch in the open position. |
 |
Friday, September 23, 2016: Last May we tried to get the driver's side windshield replaced due to 18" of cracking in the bottom left corner. This time the windshield was sent to a company in Roseburg and they completed the installation in half a day. It was interesting to me that we drove some rough roads in the Yukon and Alaska and the cracks did not grow.
 |
 |
 |
 |
Monday, September 12, 2016: Miss Dory came with a Norcold 1200 four door refrigerator. Before the purchase I searched the serial number and learned it was on recall. Currently Norcold is involved in a class action lawsuit for multiple reasons. I honestly did not expect it to last even a year because our Cameo refrigerator failed at 7 years. However, my friend Steve who is in the park during the summer but an RV mobile mechanic in Lake Havasu during the winter, testified that it is in good shape and should last ten years if I take care of it (never let it run when not level). | 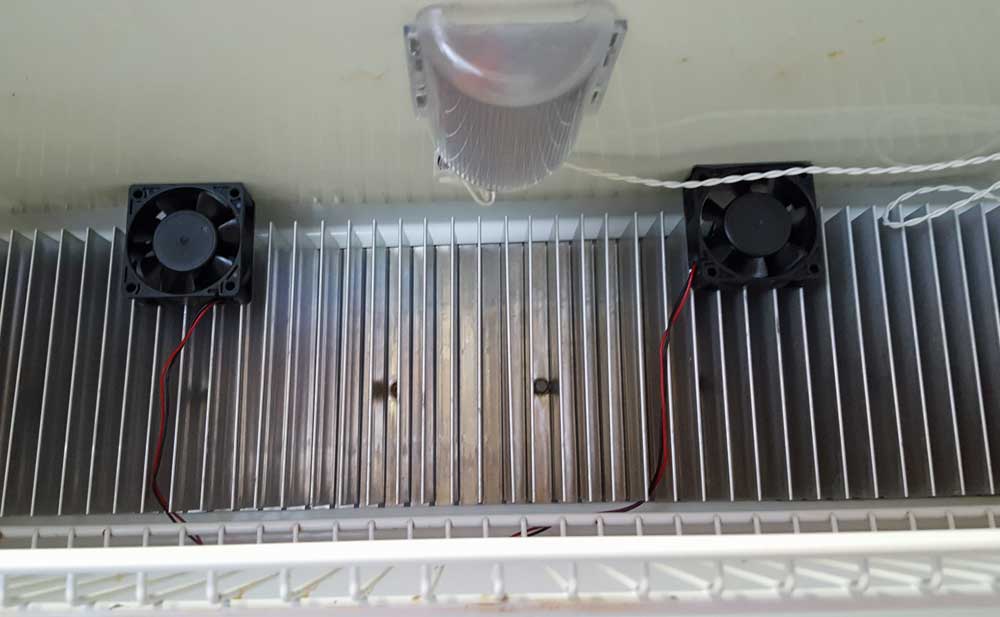 |
 |
 |

 |
 |
Friday, August 26, 2016: This is a busy day with washing the fifth wheel with a pressure washer (click the right photo). While we are away for months, all sorts of things grow on the roof and the north side of the fifth wheel but fortunately a pressure washer takes it all off and it looks like new again.
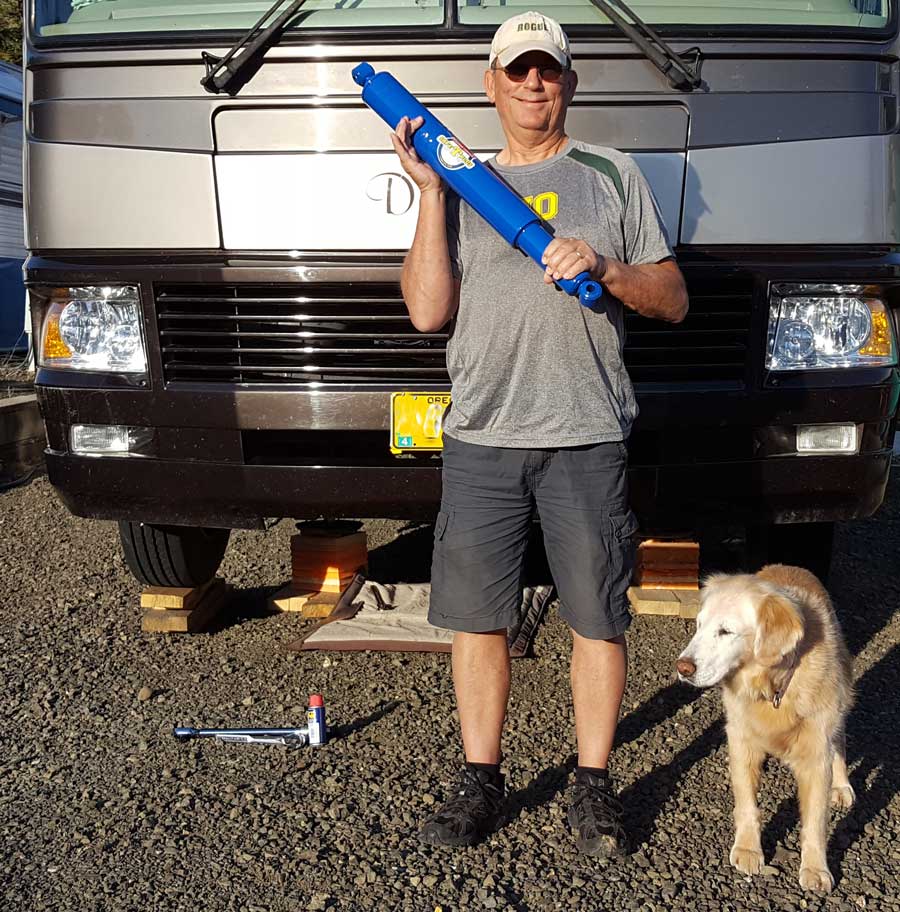
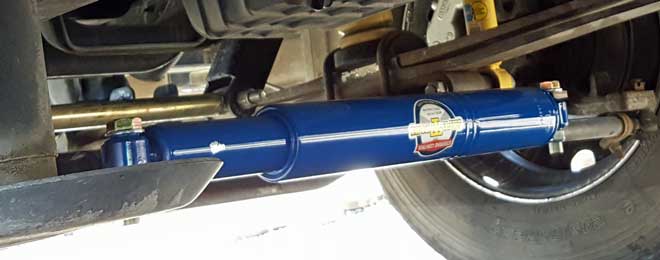
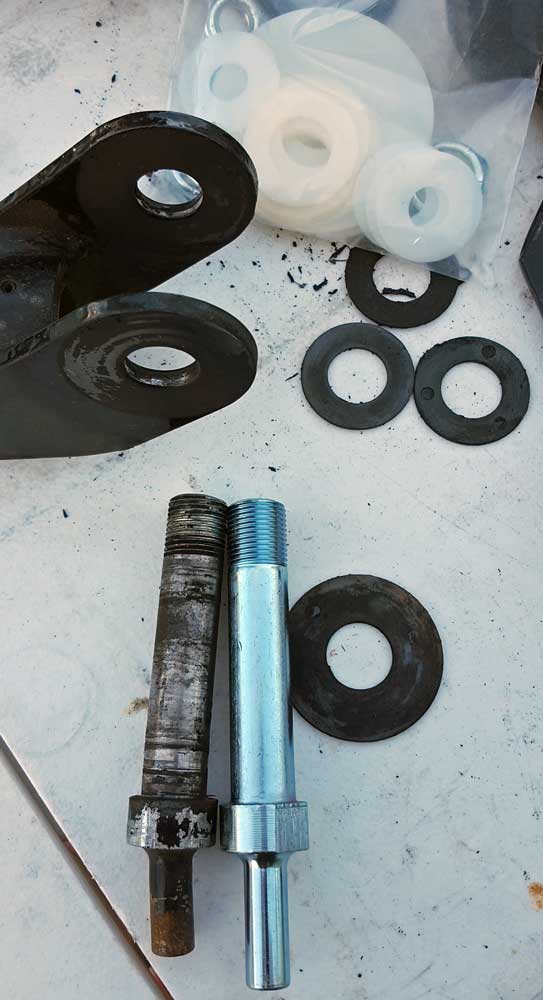
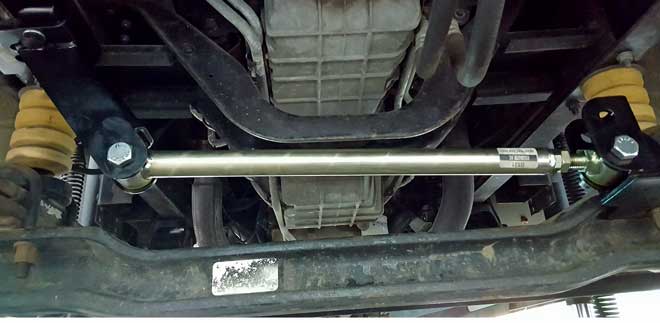
After driving 11,000 miles in the motorhome since the purchase in December, it has been a learning curve to keep it headed down the road in a straight line. It wants to wander so needs continual redirection with the steering wheel. I contacted the Workhorse chassis forum for help and was told to install trak bars which I did before the Alaska adventure. It made only a very subtle difference. The forum continued to recommend the Safe-T-Plus steering stabilizer. It was easy to install and fine-tune. Once tuned, the motorhome now self-centers steering and I drove for 300 yards straight down the road without holding the steering wheel which wasn't possible before. I expect the Safe-T-Plus to stop wandering and bouncing to one side or the other due to potholes or passing vehicles. I'm hoping Gwen will be able to drive now too!
 |
Wednesday, August 24, 2016: Our Dolphin came with a dome satellite dish which actually worked to find ONE satellite but gave very poor reception using our DISH network receiver. I called to talk with Winegard the manufacturer of the dome. After much discussion, it was decided the dome was too old and out of date to work for any current receiver. I decided it would be silly to continue to carry the dome on top of the motorhome. Beware when you purchase a used motorhome if a "dome" is advertised as a "feature" make sure the model will work on current receivers. We carried our own satellite dish which I manually set up but I don't want to do that any longer. Instead, we will learn what is available by simple antenna. I did save the dome and base thinking it would make a great storage unit for something ... I don't know what, yet. Click the photos for additional views. |  |
 |
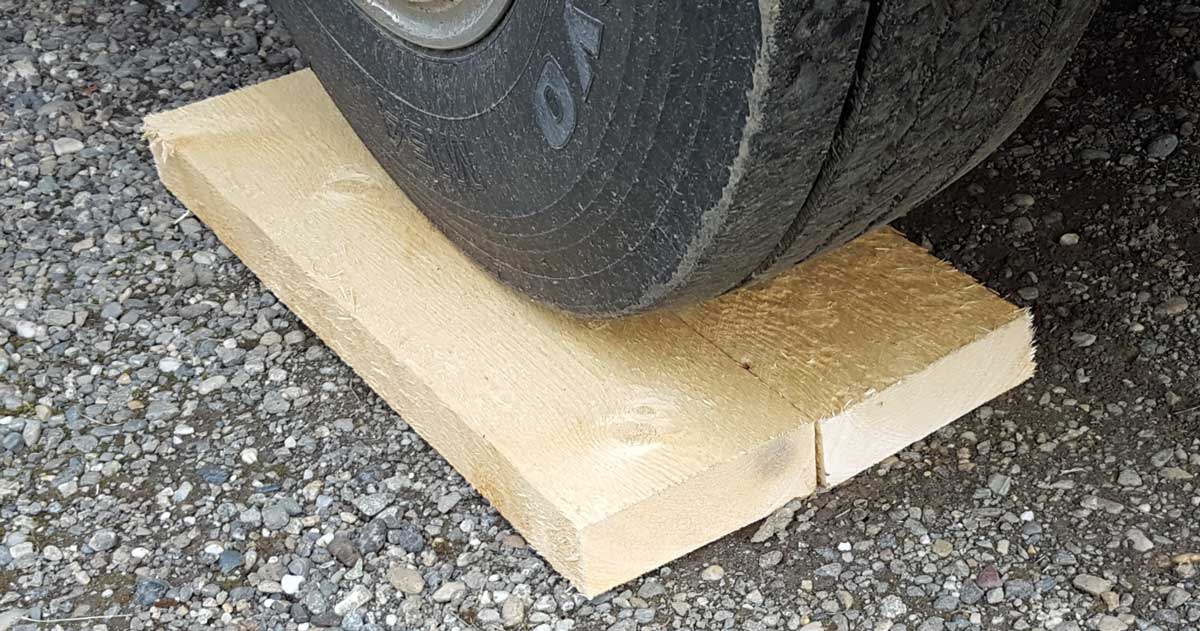 Thursday, July 21, 2016: Today was a "down day" in Seward where we dumped our gray water, caught up on the Webpage, visited with friends so I have this to report from a while back. I have been convinced by several of the Trek guests, it is not a good idea to jack the wheels off the ground for leveling. Instead, one should drive onto blocks to keep the wheels supported before jacking with the hydraulic leveling system. When in Fairbanks, I found a lumber mill selling lumber retail and they had "rough cut" lumber to sell. Once planed, a 2 x 6" board is no longer 2 x 6" but 1-5/8 x 5-1/4". A rough cut board measures an actual 2 x 6" so that's what I wanted. It is stronger, besides being thicker and wider. Rough cut is hard to find but Fairbanks, Alaska has several mills ready to sell to me, happy to find them.
  |
 |
 |
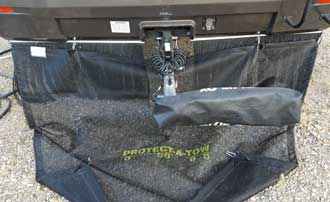 |
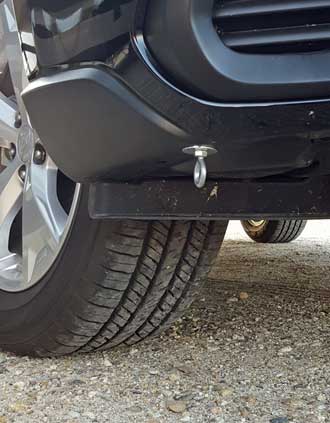
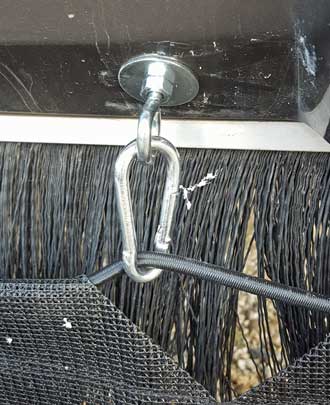
Sunday, June 19, 2016: I ordered and installed a "Protect-a-Tow. Although we have a "brush" guard under the motorhome, rocks still get through to damage the towed vehicle (we learned this when towing the Samurai). The Protect-a-Tow should protect the Subaru from rocks the motorhome may throw but not from rocks thrown by on-coming traffic. We do have a pad to cover the windshield but the rest of the car is at-risk. I'm hoping the motorhome will deflect all debris from on-coming traffic. | 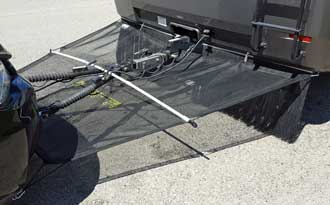 |
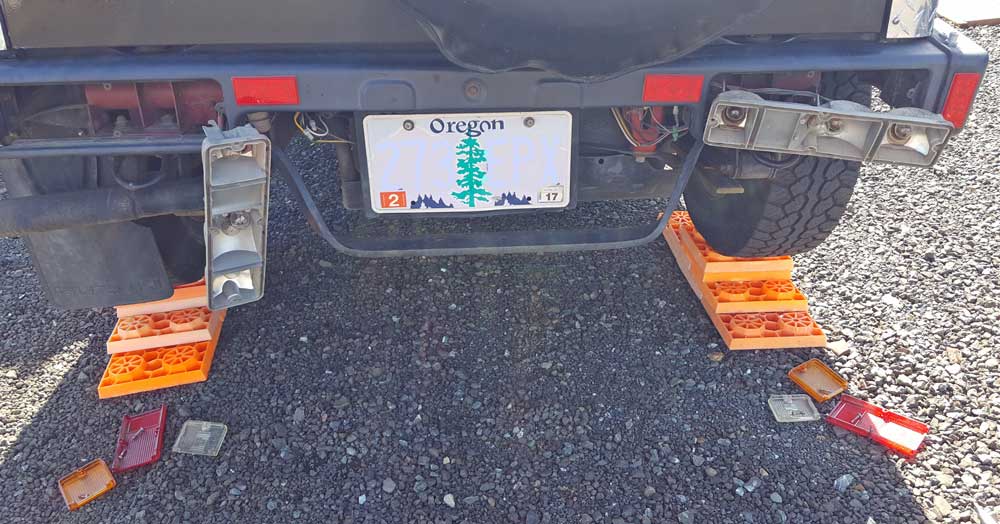 |
Tuesday, May 17, 2016: On our last trip with Lesa and Mark following us, they reported strange things happening with the lights on the Samurai we were towing. I finally got around to investigating the problem with the lighting today. With a few interruptions, it took me | 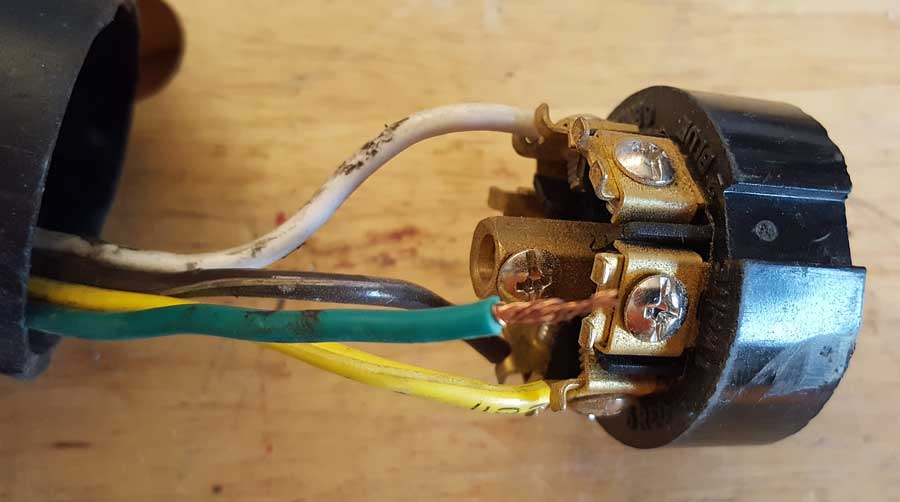 |
| all day to identify the problem. I originally wired the plug to Miss Dory last December when we pickup up the motorhome. It was a quick wiring job but the lights seemed to be working properly at the time. Today I learned that only ONE of the four wires was done correctly. If it ever worked correctly, I'm not sure HOW. It is now wired and working correctly. I also learned today that BOTh the Miss Dory plug and the Samurai plug were either broken or worn out so I replaced both. Click both photos for a larger view. | ||
Friday, May 13, 2016: Our Lazy Daze had a peculiar annoyance, the toilet was installed on top of a wheel well which made it too high to be comfortable. It really needed a stool under the feet or the user would have to be on tip-toes, not comfortable.
When shopping for Miss Dory apparently neither of us sat on the toilet because we did not notice Miss Dory had a toilet on a platform similar in height as the one in the Lazy Daze. But this platform was built to carry a heater hose which made it easy to construct a flip-up step so the user has a comfortable place for feet. When not in use, the support leg is moved to the side and the step hangs down. Click the photo to see what I mean.

 |
 |
 |
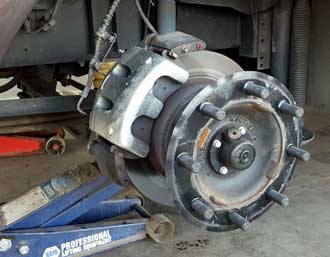
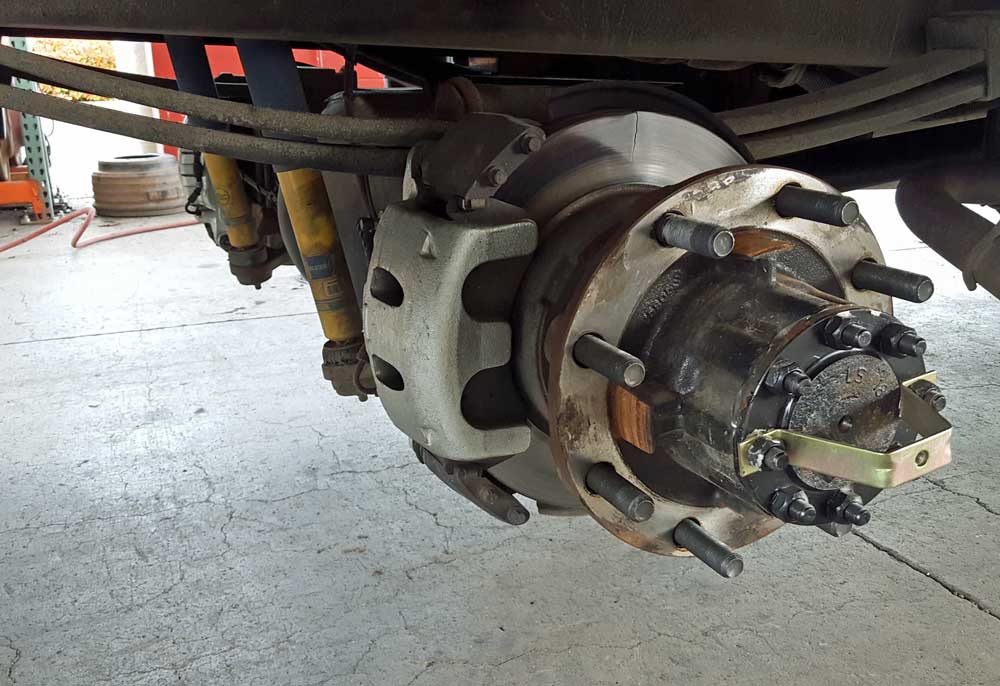
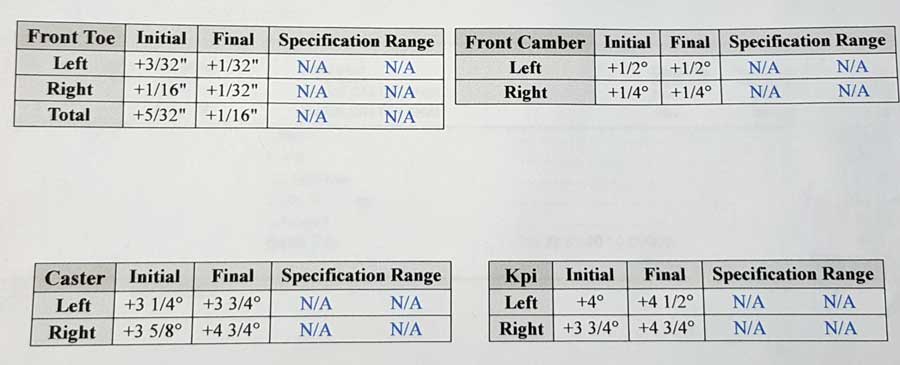
Thursday, April 21, 2016: Today is a busy day for our vehicles in Eugene. While Ebony Shadow gets fitted for towing we've taken Miss Dory to Kaiser Brake and Alignment for a front end alignment. My complaints are uneven wear on the original tires and difficult steering in some road conditions. I had already made an alignment appointment with Les Schwab but both Schwab and my mechanic reported only "toe" could be aligned on the Workhorse chasis. Kaiser said they could align "toe", "camber" and "caster". Kaiser has a lot of impressive equipment. After two hours and two test drives, Miss Dory was given back to us. I could feel the difference right away and on the drive home, Miss Dory felt like a different motorhome. | 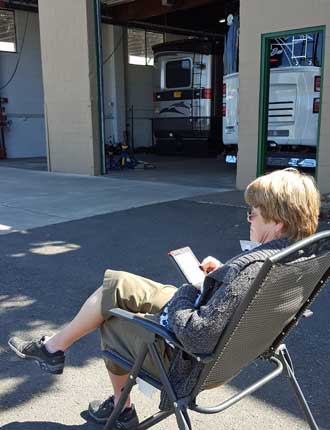 |
 |
 |
 |
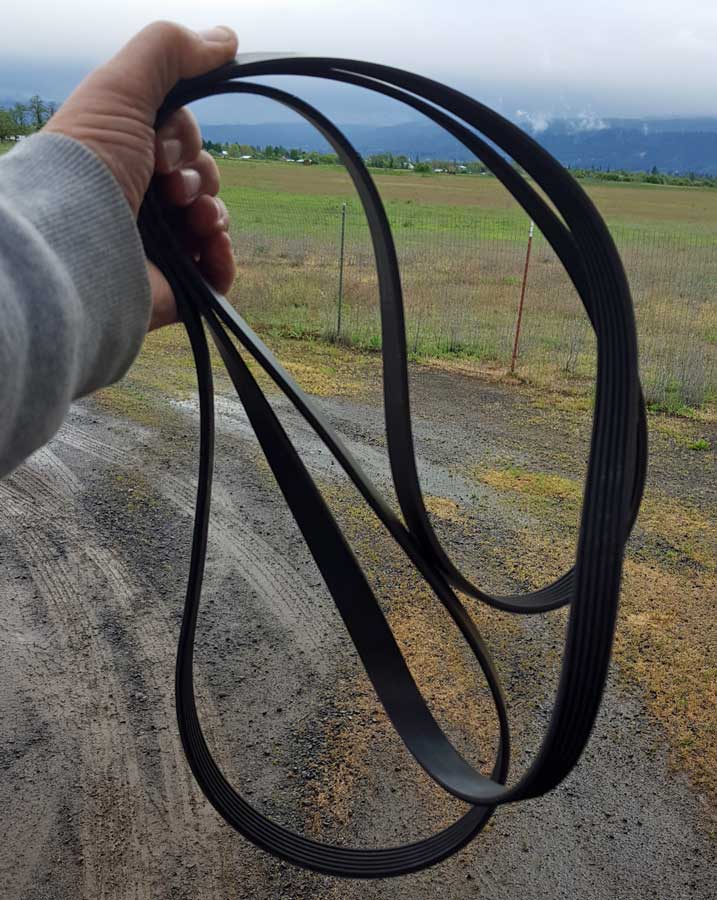
Thursday, April 14, 2016: I'm still in Central Point. The Miss Dory maintenance was finished mid-day. I spent most of the day building a simple Webpage for Dave at Double D Window Tinting in Klamath Falls. Now the ball is in Dave's court, I'm waiting for photos and text for the last two pages. I learned two things today from Oregon Light Truck and RV. I asked how to fix the door jam since the aluminum frame was worn badly and has barely enough metal to hold the jam. I was told to use star washers, change the phillips head bolts to hex head to allow more leverage on the bolt and use Loctite on the bolt threads. The serpentine belt was replaced. I was asked if I wanted the old belt. "No", I answered. Katie told me I should keep it as an emergency spare, especially for the Alaska trip. "Good idea, I'll take it.", I said. |
 |
 |
Wednesday, April 13, 2016: Gwen drove Ebony Shadow while I drove Miss Dory from Klamath Falls to Central Point, Oregon. We have made a list of maintenance items for the very excellent mechanics at Oregon Light Truck and RV in Central Point. We've known of a brake recall since the purchase of Miss Dory but saved the work for Oregon Light Truck. We also got very few maintenance records so must assume the transmission fluid has never been changed so that must be done. Then there are a few minor things like the windshield wipers not turning off when they get wet (yes, that's funny) and replacement of the serpentine belt and the hydraulic jacks alarm when we hit a bump in the road. Well, this will take two days so Gwen has gone on to Sutherlin while I stay with Miss Dory in Central Point (it's a two hour drive between the two). This rig must be in tip-top shape for a trip to Alaska this summer. Click the photos for another view. | 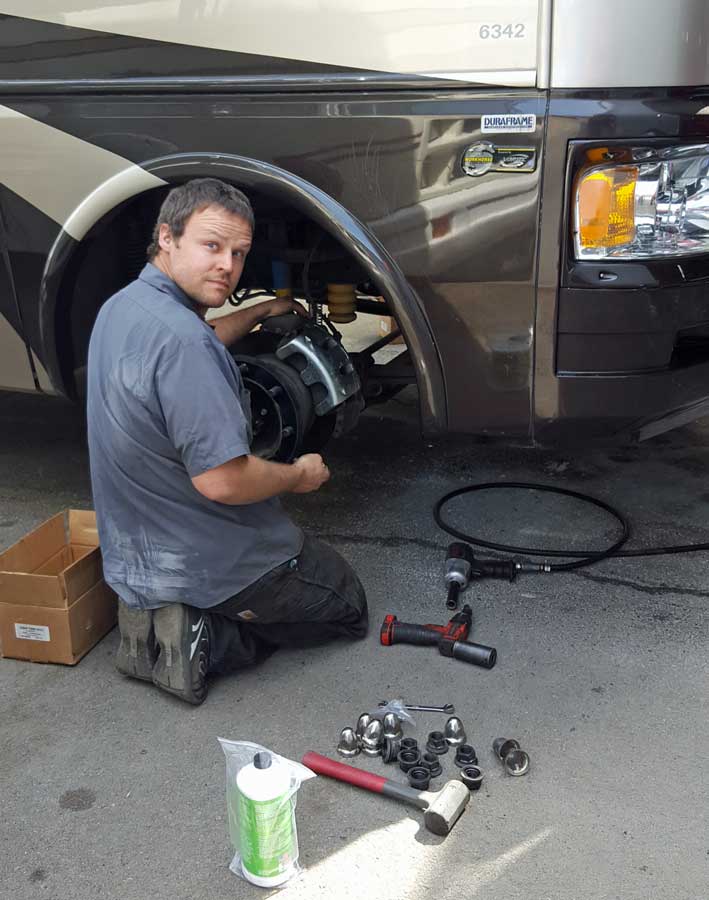 |
 Monday, April 4, 2016: Tomorrow I plan to drive to Sutherlin, Oregon in the Samurai, basically to get the Cameo ready and to bring our Prius back to Klamath Falls. I've made a maintenance appointment for Miss Dory the middle of next week and I want Gwen to have the "good" car to drive home to Sutherlin. Also, we are in the process of selling or trading the Prius for a vehicle we can tow easily behind Miss Dory. Of course, the Samurai is ideal for towing behind the motorhome. It's lightweight, holds two occupants and our dog easily, gets good fuel mileage, it's reliable even though it's 29 years old, and is inexpensive. We intend to tow the Samurai to Alaska this summer, we wouldn't want to tow a new car on a trip with so much potential for damage. So why not stick with the Samurai? Well, it is very uncomfortable, has NO safety equipment (like air bags), and will do the speed limit on a freeway only with a tailwind.
So ... on my TO-DO list before driving to Sutherlin is to shampoo the carpets in Miss Dory. Lesa happened to buy a new carpet cleaner for her own house so I will be the first to use it. Click the photo to enlarge.
Thursday, March 31. 2016: Today was tax day for us, I worked on our 2015 income tax and finished the forms. What a relief.
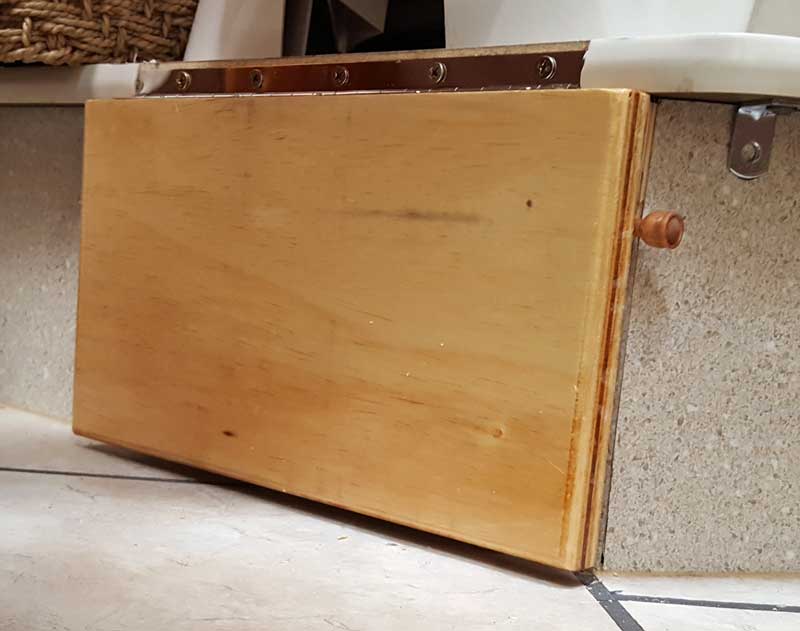
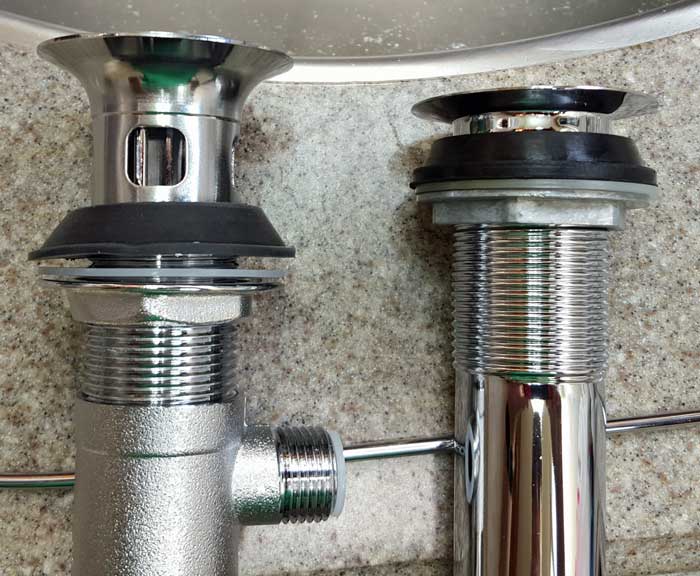
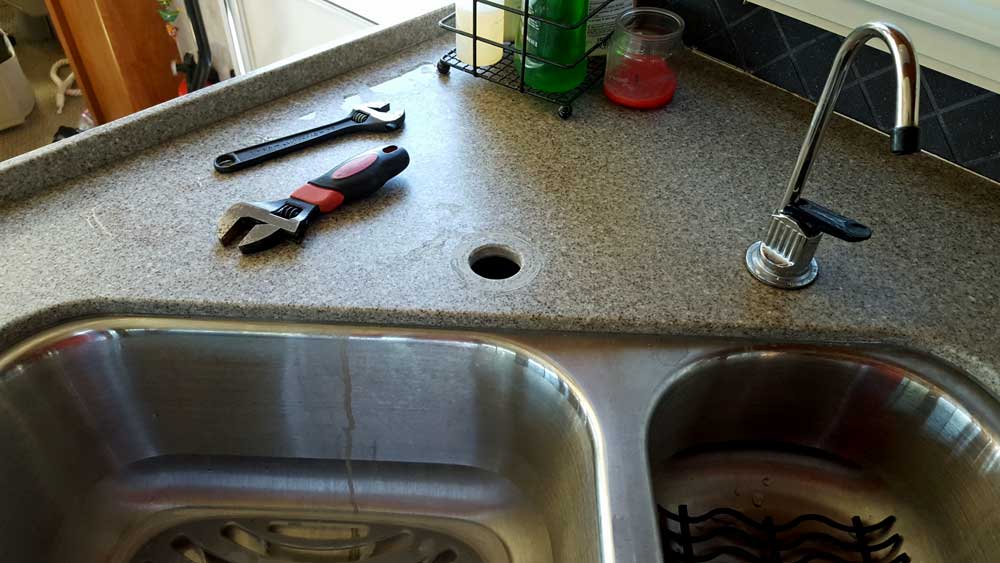
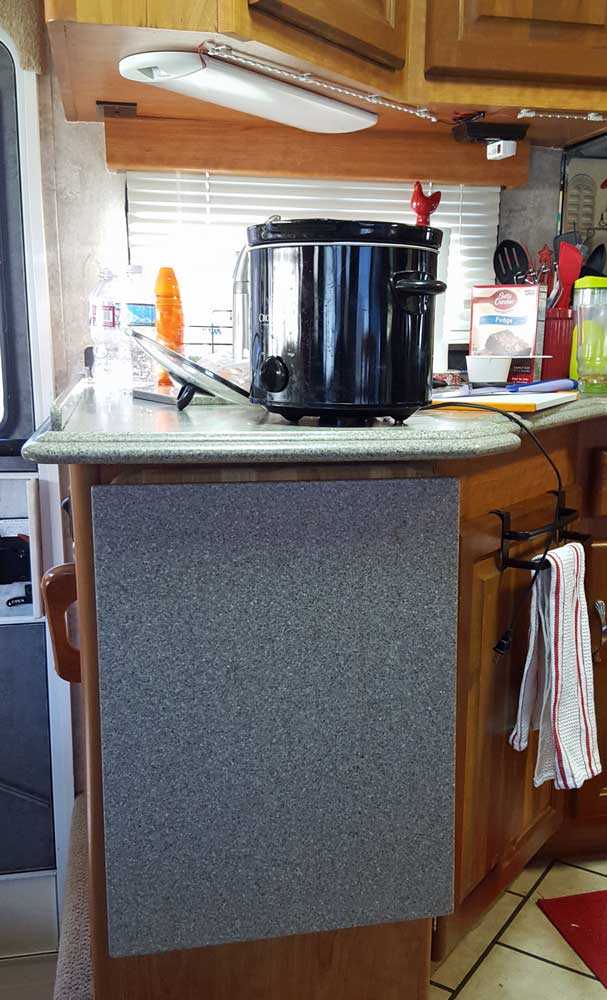
When we purchased Miss Dory we noticed the wooden cutting board which swings up at the end of the Corian countertop. Apparently the original Corian extension must have broken and was replaced by what the previous owner had on hand. I was surprised to find a countertop service store in Klamath Falls with a piece of Corian matching Miss Dory's counter exactly. The store cut the Corian to size and gave me instructions of how to attach. I was instructed to use silicone on the cutting board, place the Corian onto the silicone then add weight overnight. That seems to work, as Gwen suggested, "we will know after hitting our first bump when traveling". Click the photo for another view.
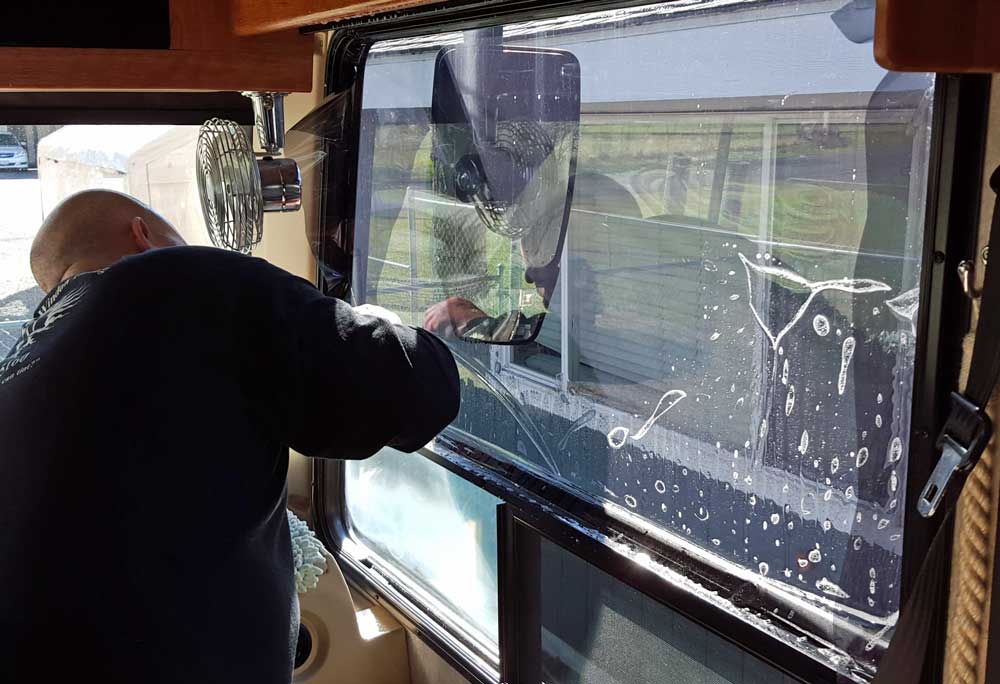 Wednesday, March 30, 2016: One of the unexpected expenses for Miss Dory is the window tinting. Virtually all of our previous RVs had well tinted windows so we know what we want. Unfortunately Miss Dory came with tinted windows but a very light tint. We want both privacy and heat reduction from our window tinting. We called our favorite window tint store in Roseburg, Oregon and he would be happy to do it for us. However, while we are camped in Klamath Falls, Dave was recommended to us from Double D Window Tinting. He was able to fit us into his busy schedule. After listening to Dave explain the different window films we decided on a film which cut the heat transfer by 90% and blocked the view from the outside. One of our restrictions on choice had to do with the double pane windows in our rig. Some of the films would heat the glass on a double pane window so were limited to the lighter tints. Others were reflective and had no such restrictions. There are positives and negatives to window films. One of the negatives is a reduction of brightness inside but the sacrifice is worth the heat reduction and privacy. Click Dave's photo for another view.
 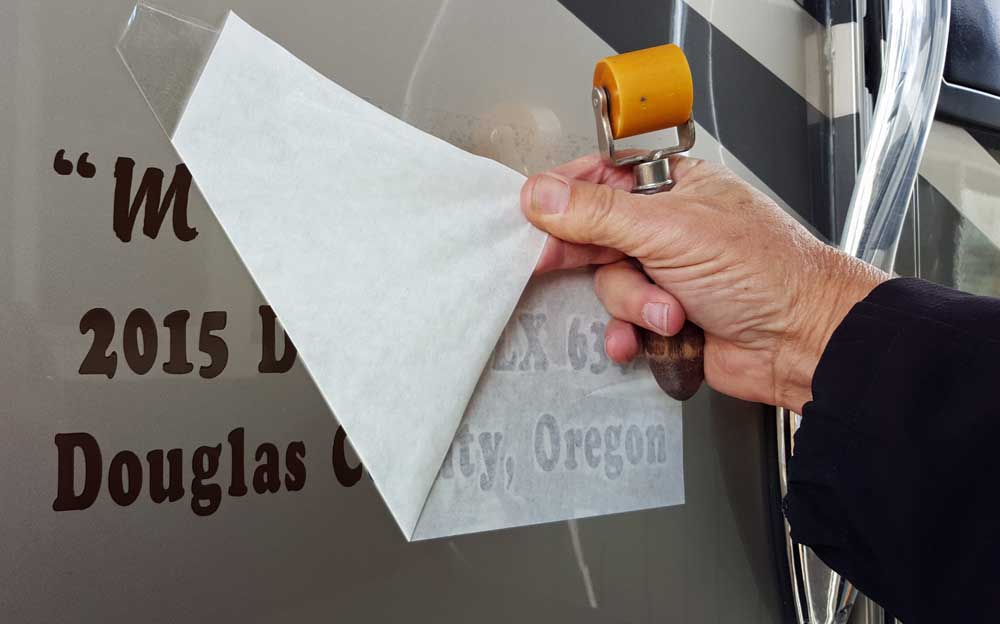 |
Tuesday, March 29, 2016: Cross off another item on my To-Do-List. We've given names to all our RVs and I like putting official looking vinyl lettering onto the RV for more than one reason. Here is the last RV we added lettering. I missed adding lettering to the Lazy Daze because we owned it for such a short time and because we just couldn't come up with a name we liked. "Miss Dory" was named by Gwen and her daughter and I agreed to "just get-er named". I suppose we can always give her another name after we learn more about her personality. Lesa, Gwen's daughter says "Dory" is the name of a Dolphin cartoon character. Do you see another reason I put the lettering onto Miss Dory? Click the photos for another view. | 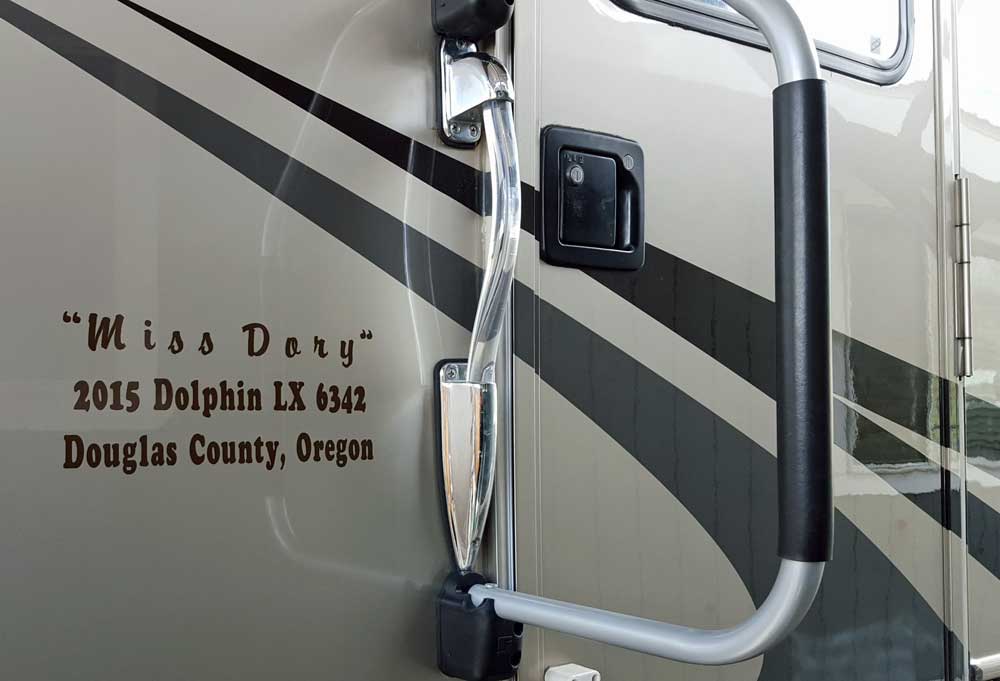 |
 |
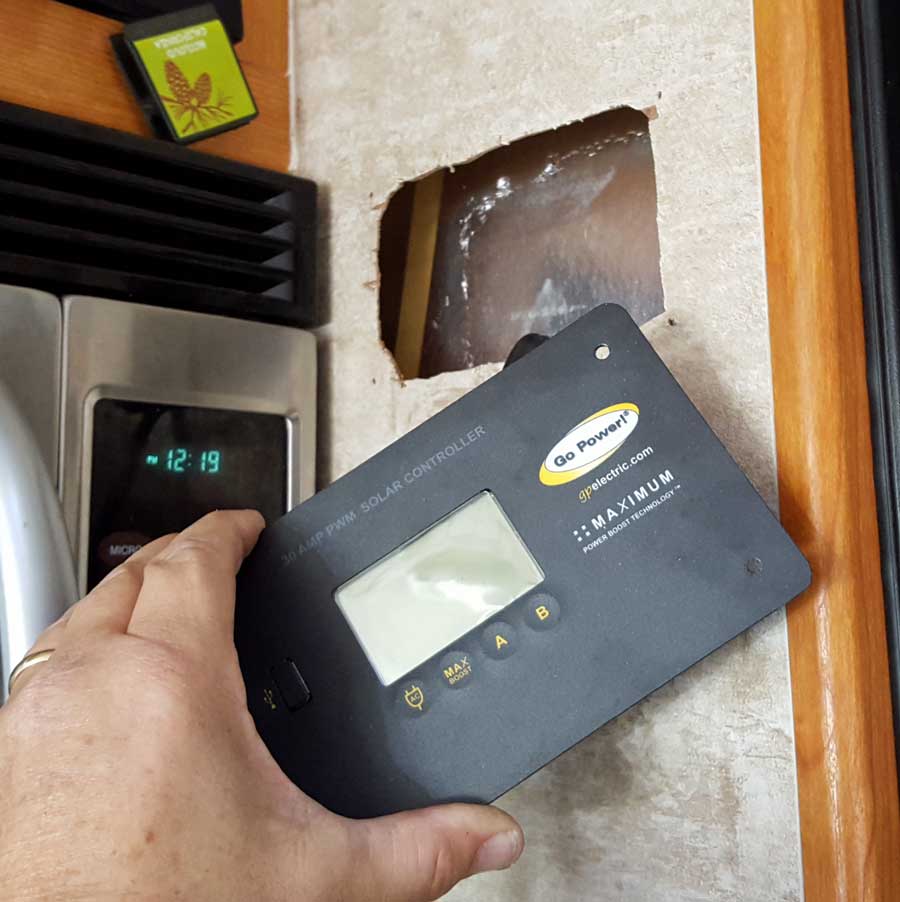
Friday, March 25, 2016: On my To-Do list is to improve the wire size on my solar charging installation. Last January I installed my solar charging system but the wire size has been bothering me ever since. The solar parts provider talked me into #10 wire for a pretty long run. I knew I should have used larger wire (#8) but he insisted the #10 was fine. To be fair, I DID get a full charge everyday, normally before noon. If that's the case, why make the change? Well, I never saw 100% of the amps coming from my solar panels I should have seen, I was seeing about 90%. I won't know if the larger wire will make a difference until I can point the panels directly at the sun. | 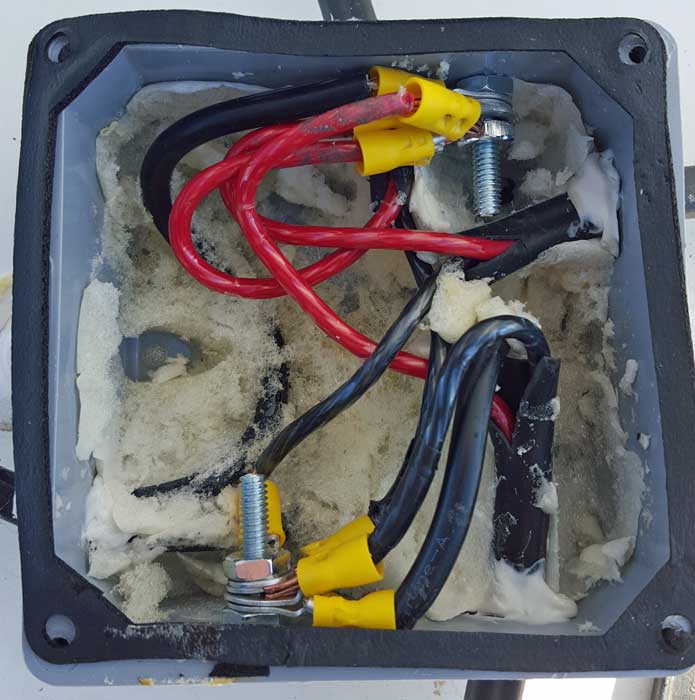 |
| Additionally, I never liked the idea of wire nutting the panel wires in the combiner box. Again, the solar parts guy told me to do it. Later, when helping Gary and Jeanne with their solar charging system, we were shown a different method to combine all the panel wires. It involved adding crimped wire loops to the end of each wire then combining all onto a single bolt for positive and single bolt for negative. So I removed the wire nuts and combined as I did with Gary and Jeanne's system. It wasn't hard work but time consuming so it took all day. Click the photos for additional views. | ||
 |
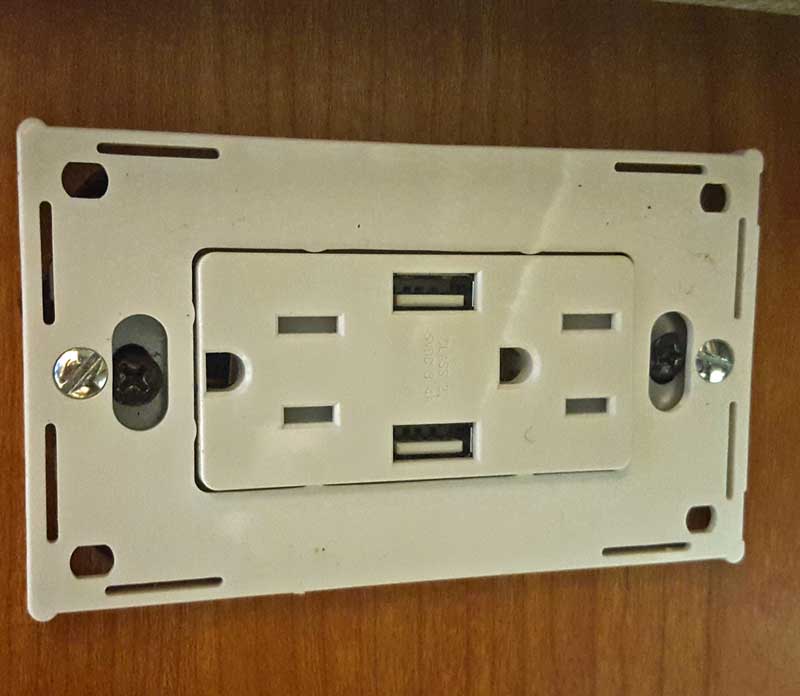
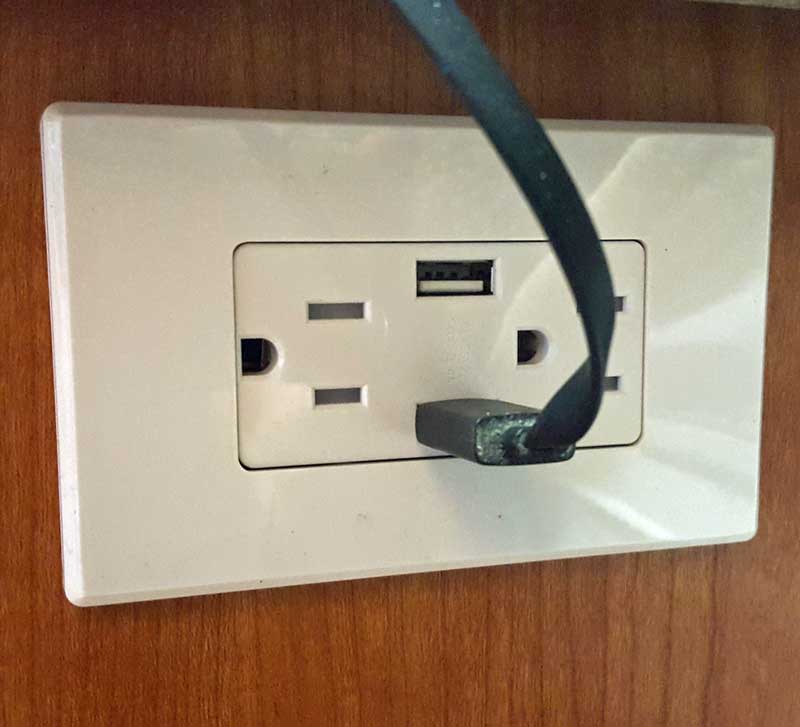
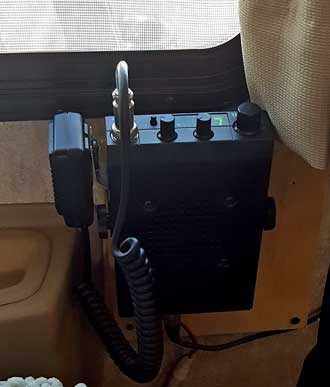
Friday, March 18, 2016: Finally installed the Satellite Radio receiver (it's a long story). Miss Dory came with a high quality Jensen radio with a 10 disc CD changer, however, it's ten years old so no Bluetooth. Without Bluetooth we can't wirelessly play music from our phones nor can we answer or make phone calls through the radio. So I decided I'd get an Alpine radio just like I did in the Lazy Daze. I visited a local sound shop in Klamath Falls and made a deal for them to install the Alpine radio with a new satellite receiver installed behind the radio. I've always chosen my external radio because it has a special feature making it possible to "rewind" a radio broadcast. I learned the new satellite receivers are now able to "rewind" so chose the "cleaner look" of a hidden receiver. Overnight I remembered that I MUST be able to listen to satellite radio via Bluetooth so I returned to the shop to be sure I | 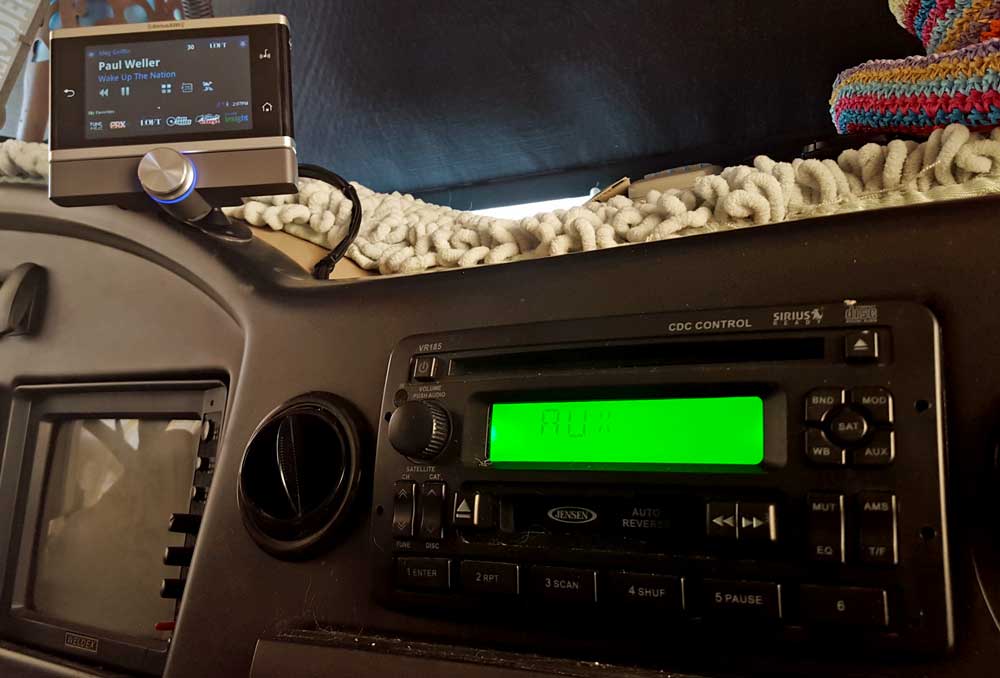 |
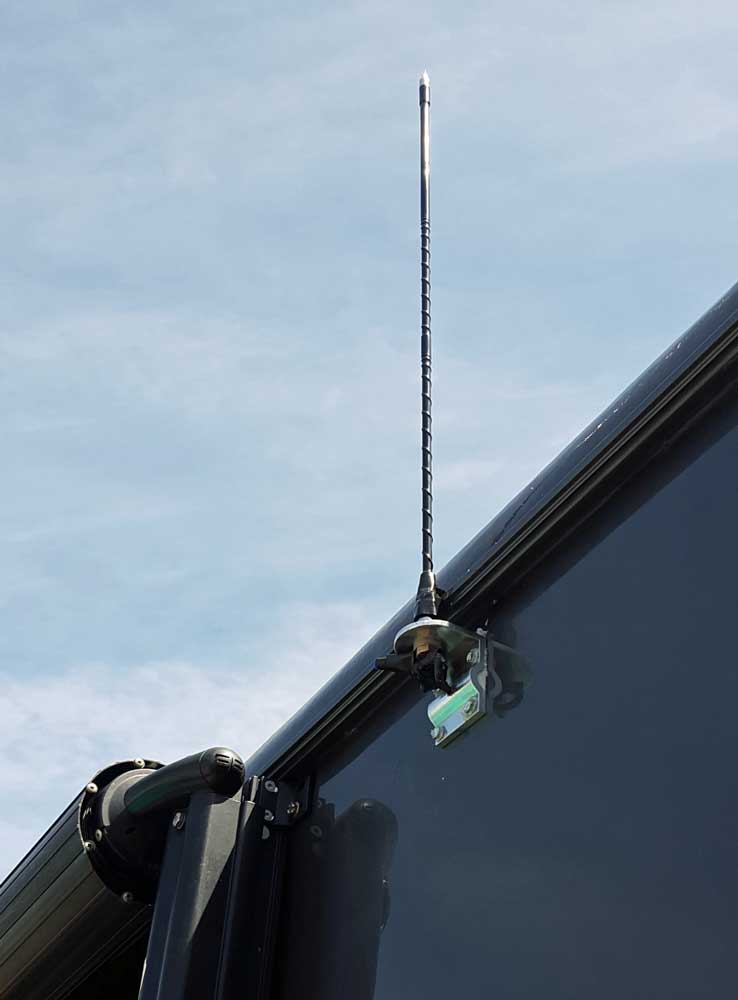
| could do that with this new receiver. I couldn't. It was decided my external receiver would have to be installed so I could use Bluetooth. The original installation fee was to be $80 which was barely tolerable, now the shop wants $150 installation fee to install the radio AND my external satellite receiver (I paid $50 to install both in the Laze Daze last year). "I'm not paying that!", I said. "I'll install the satellite receiver myself." Now the shop decided they would charge $60 (including parts) to install the Alpine radio. So I made another appointment for the radio installation. I ordered the parts I needed for the satellite receiver installation on Amazon. Those parts arrived today. In the mean-time, I decided to KEEP the Jensen radio system and postpone the benefits of the Bluetooth radio. I CAN play music from my phone and from Gwen's MP3 player, wired, not wireless so I'm only losing the radio phone call application. I cancelled the Alpine radio installation. I had a plan to install the satellite antennae on the roof but discovered I was getting good reception inside since I don't have a metal roof. Due to the size of the plug, I would have to drill a 1/2" hole in the roof which I hated to do. I found a path to the top of the motorhome next to the windshield then installed the antennae next to the ceiling fiberglass. The receiver shows three bars of reception. I hope I'm not sorry I didn't go to the roof, it would mean doing all my antennae work over. The receiver is installed and working well. Click the photos for additional views. I stepped out of Miss Dory for only a minute and Gwen changed the station to COUNTRY! "I didn't install this receiver to play COUNTRY!" That's the text message I sent to my friend Gary. "Next time install the Jazz/Classical ONLY receiver!", he replied. "You mean, Jazz/Classical/ROCK/Blues receiver, right?", I answered. We agreed! (Note about the photo of the power plug: I chose NOT to hard wire power to the receiver. I just didn't want to take the chance with the power cord knowing I'd have to order another if I screwed up.) | ||
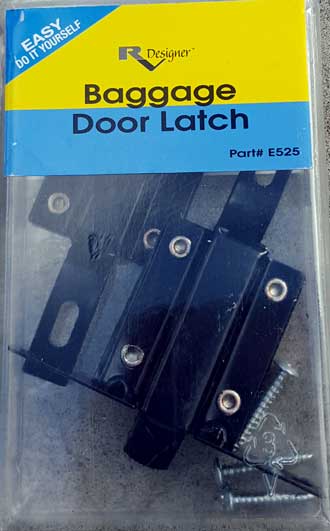
Thursday, March 17, 2016: Today I washed all the road crud off the Samurai and Miss Dory. I didn't take a photo of myself at work so I'm posting a photo of Baggage Door Latches.
Last December when we purchased Miss Dory the dealer had to replace two broken door latches before delivery. While in Arizona, we broke another door latch. Apparently, the door latches are easily broken so I purchased two to have on hand. I think that's called, "being proactive".
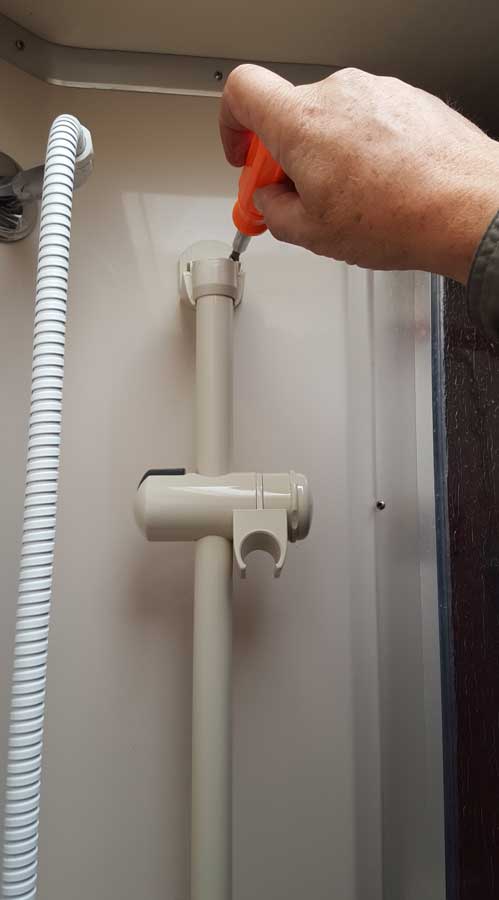 |
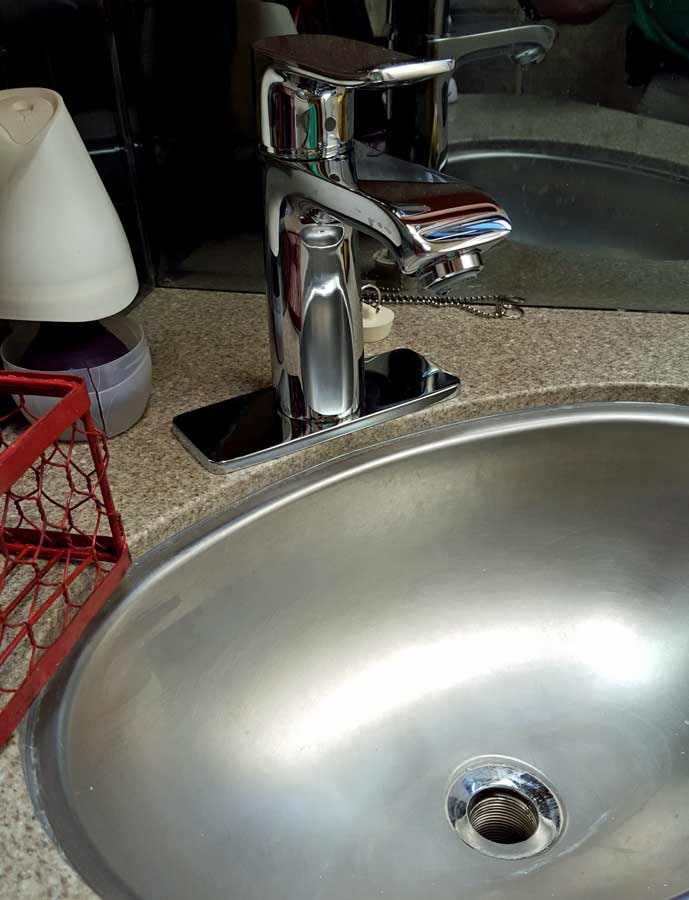
Wednesday, March 16, 2016: Gwen says, "We've got to have the adjustable showerhead like we had in the Lazy Daze." Now that we are in Oregon and we DON'T PAY SALES TAX, I've begun to order things on my to-do-list. Today, I install the showerhead rod. We both like it! Click the photos for other views. | 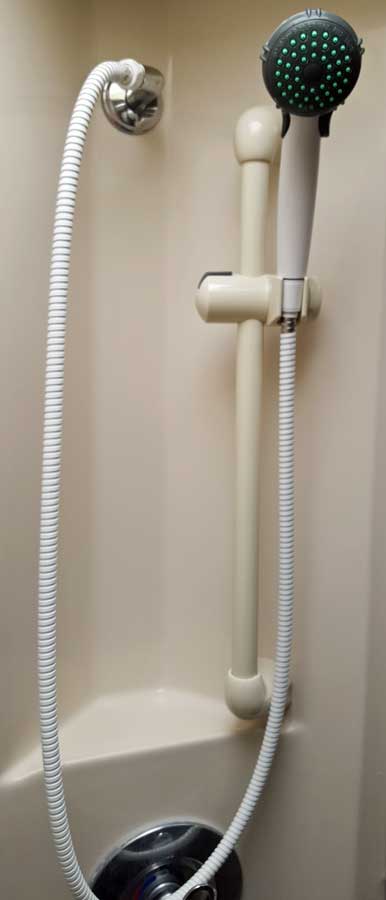 |
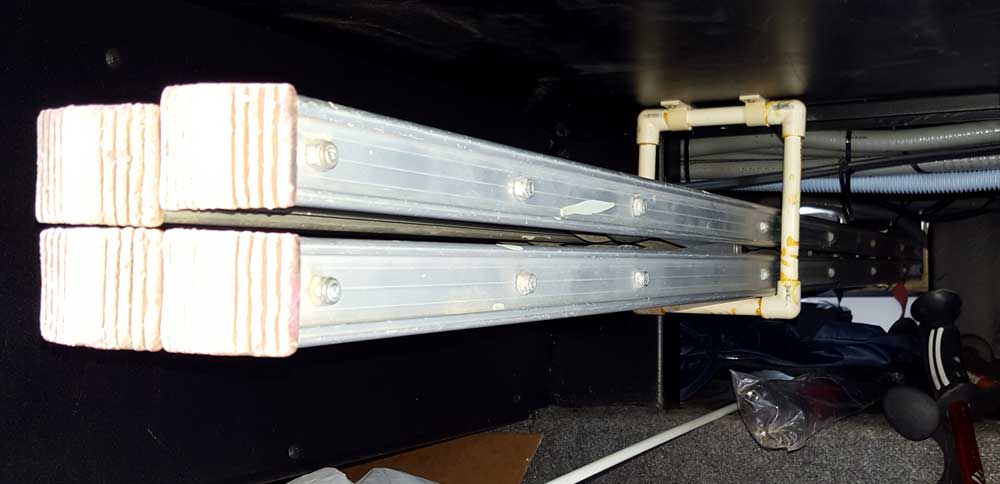
Tuesday, March 15, 2016: Fortunately, Miss Dory has basement hatches with an open shelf between both sides of the coach. This allows me a place to put my folding step ladder. However, I want to save space in this location for other things so I decided to make CPVC hangers for the ladder. This is not the first time I've done this. I use CPVC because of the strength of the pipe, the small size of the pipe and the ease of assembly. It's not easy to find, just ask a clerk for "CPVC". Now the shelf is still available for other things. Click the photo for another view.
 |
 |
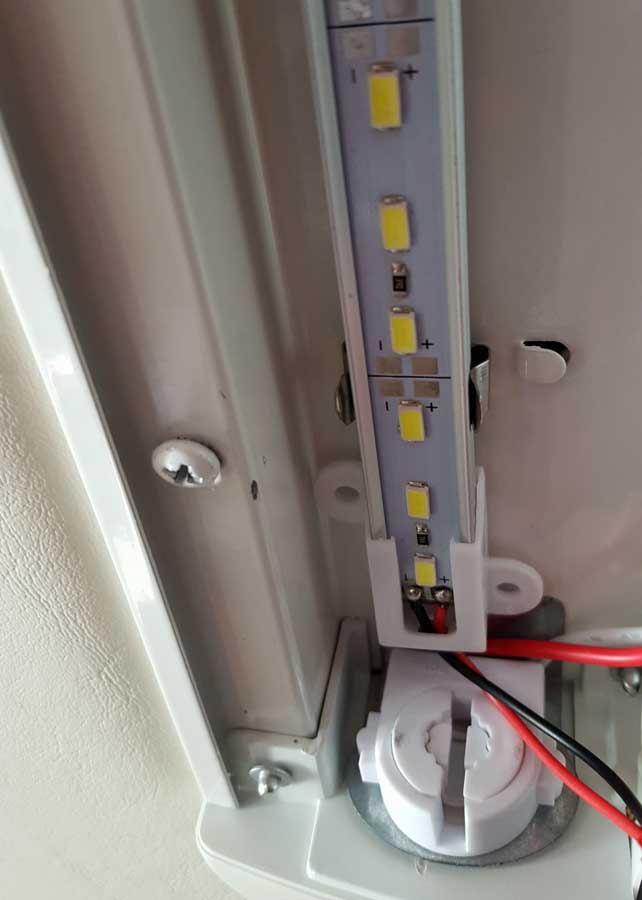 |
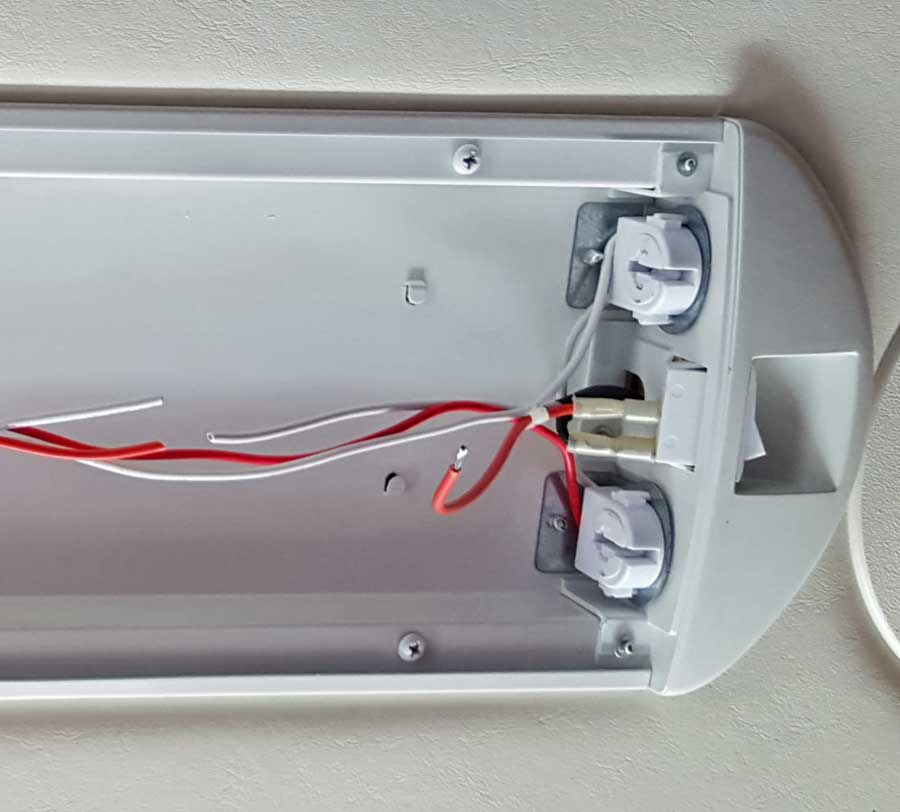
Saturday, January 16, 2016: This was LED light day. I removed the LED lights from the Lazy Daze to place them into Miss Dory. I have the under-the-cabinet, over-the-sink strip lights which you can see here. And I have the one (very expensive, $60 per tube) tube LED, one tube replaced two florescent tubes. In the case of the strip lights, I clip the wires to the ballast and use the switch for the florescent fixture to switch the strip LEDs. In the case of the tube LED, again the power wires to the ballast are clipped and redirected directly to the tube LED. I became | 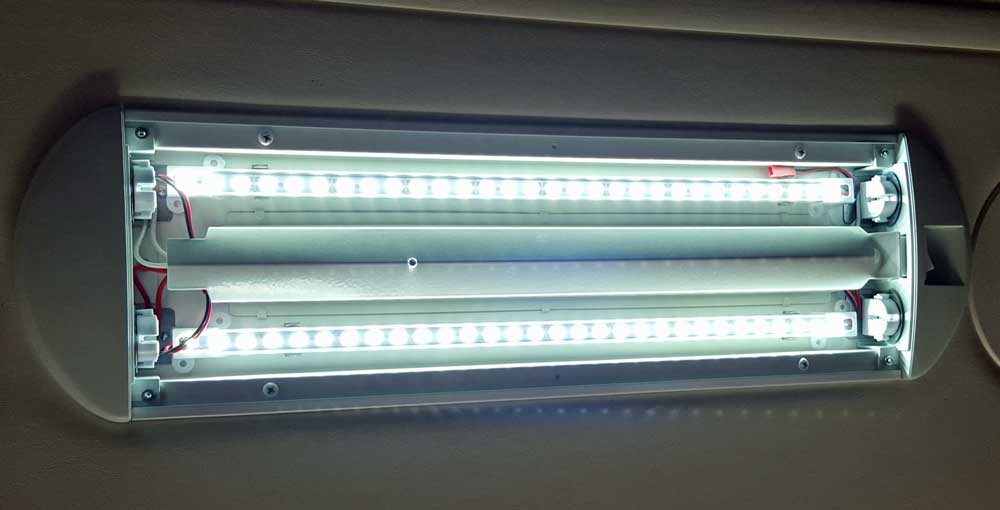 |
 friends with the gentleman selling the gooseneck reading LED light. He was very kind to send me some LED florescent replacement bars which I installed for the first time in Miss Dory. Again, power was provided to the bars by clipping the power wires to the ballast. A very handy plug with attached wires was provided. This I wire nutted to the power wires then plugged into the LED bar (very easy). I could have screwed the LED bar to the florescent fixture but decided to use the clips provided to just snap the bar to the fixture. Again, very easy. The rest of the installation was to replace the metal guard in the center and the light cover. Click all the above photos for additional views.
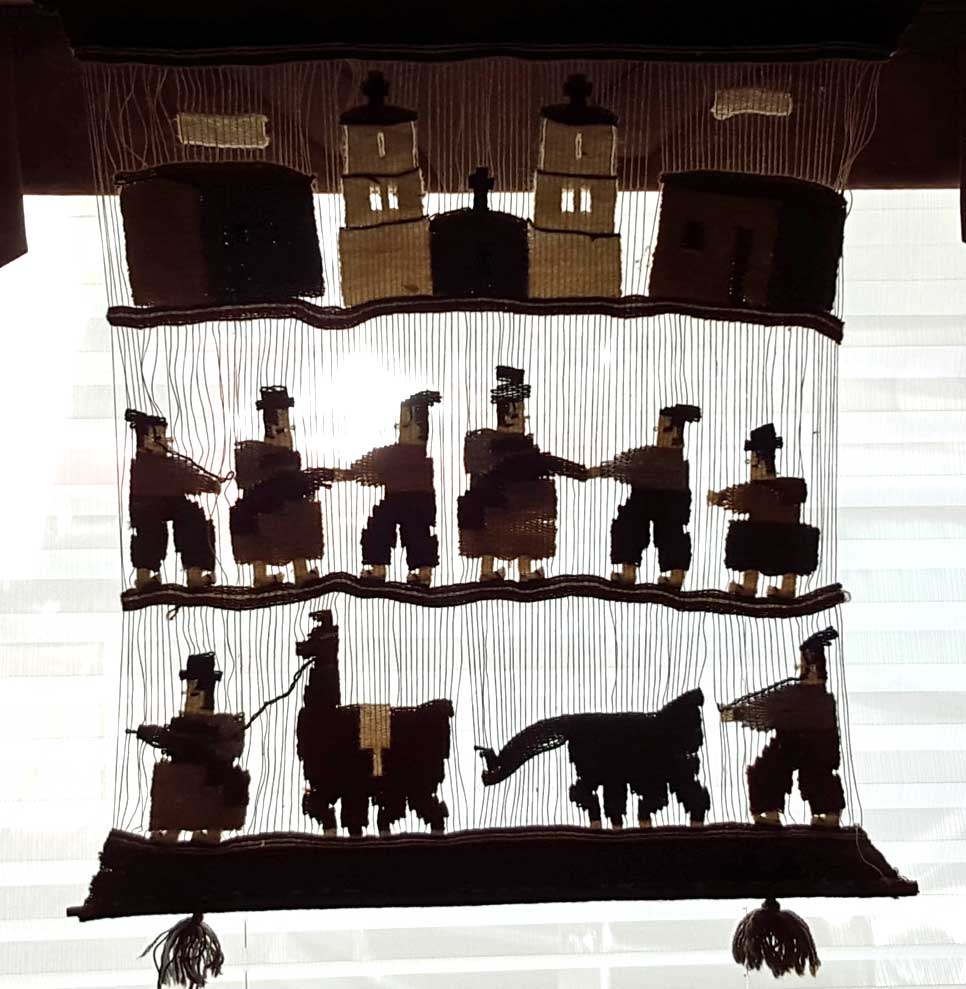
Sunday, January 10, 2016: While shopping in a nearby "trading post" I came across this wall hanging. The clerk said it was from Ecuador. It is obviously a hand weaving. The price was only $10.50. I have mixed feelings about that since I know the artist did not receive much for their work. I have proudly hung the scene in the rear window of Miss Dory. I did an Internet search for imports from Ecuador and other countries and found 10,000 Villages. Click the photo for a closer view.
 |
 |
 |
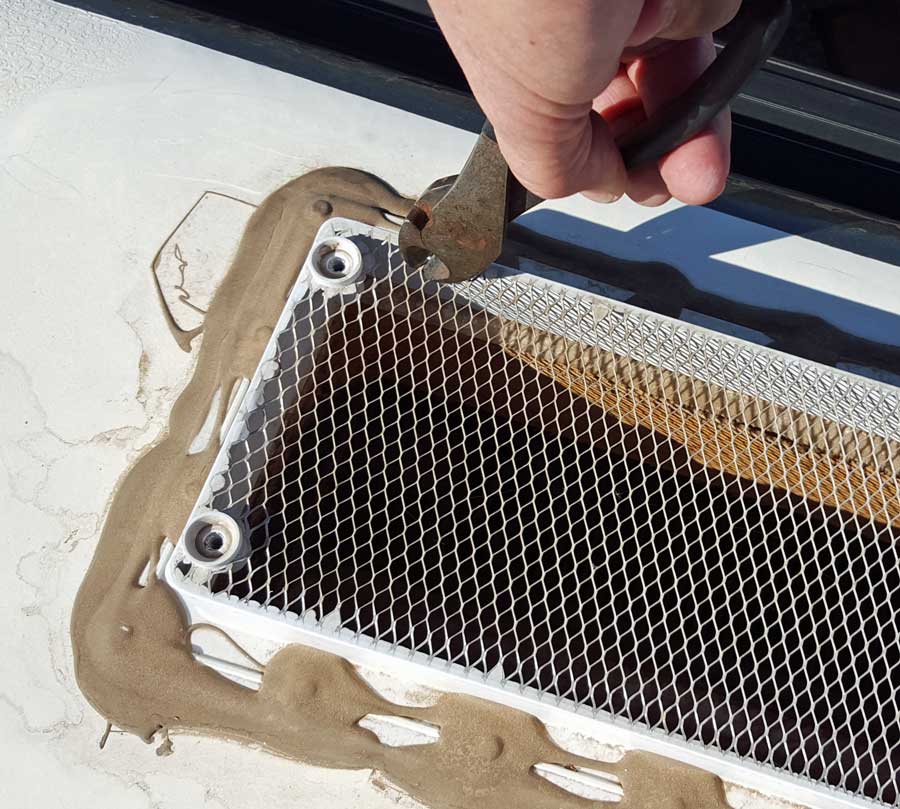
 Tuesday, January 5, 2016: Pretty good overcast today but I still finished the solar panel wiring. Doug, the fellow who sold me the parts wanted me to just wire nut the panels together without a connector box but I decided I wanted the connector box. It fit nicely beneath the panel next to the refrigerator vent and has a waterproof cover. I also found the self sticking wire secure squares just like the square which were on the Lazy Daze. No screws needed with these and they help to make everything very neat. Click to see the panels lowered and job complete. Next, I must replace all fluorescent and incandescent lighting and we will be ready for desert camping again. Yes, when you click the photo you might notice that both holding tank vent covers need to be replaced, hopefully that will happen soon, the covers will arrive tomorrow but rain is forecast for tomorrow.
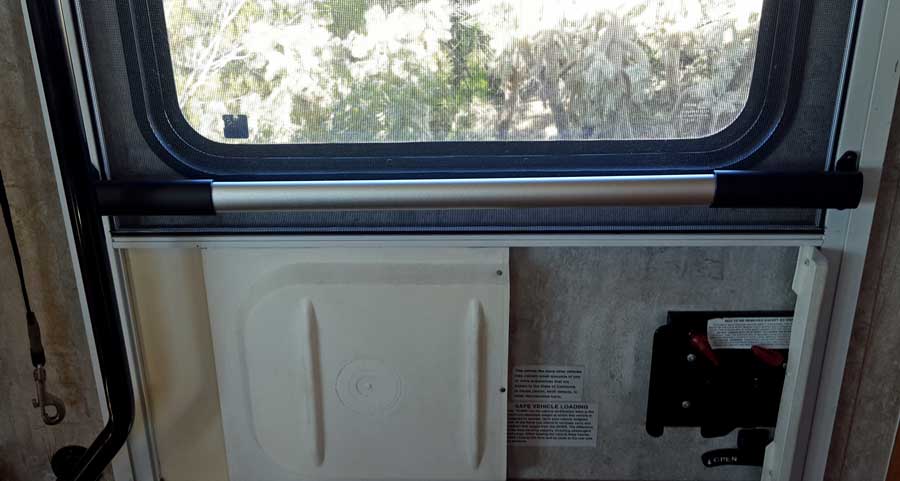
Monday, January 4, 2016: I began the day hoping to finish the solar installation however, the noon time prediction of rain was off an hour so the rain came an hour early so I abandoned the roof and switched to another project. I installed what we call a "crash bar" onto the screen door which makes it much easier when entering/leaving the coach. We first learned of the "crash bar" when attending a Lazy Daze rally. So we ordered and installed one in the Lazy Daze. We enjoyed the crash bar so much, it was one of the first things we decided to install in Miss Dory. Click the photo to view the installation.
 |
 |
 |
 |
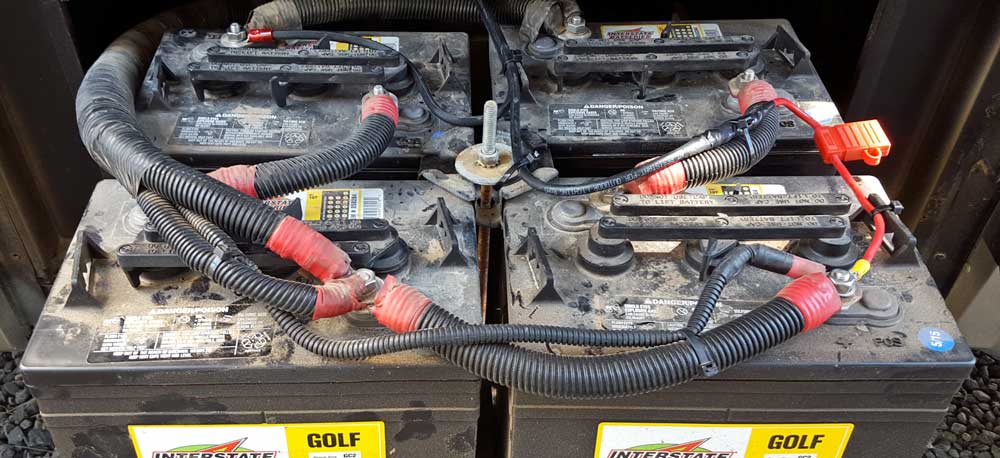
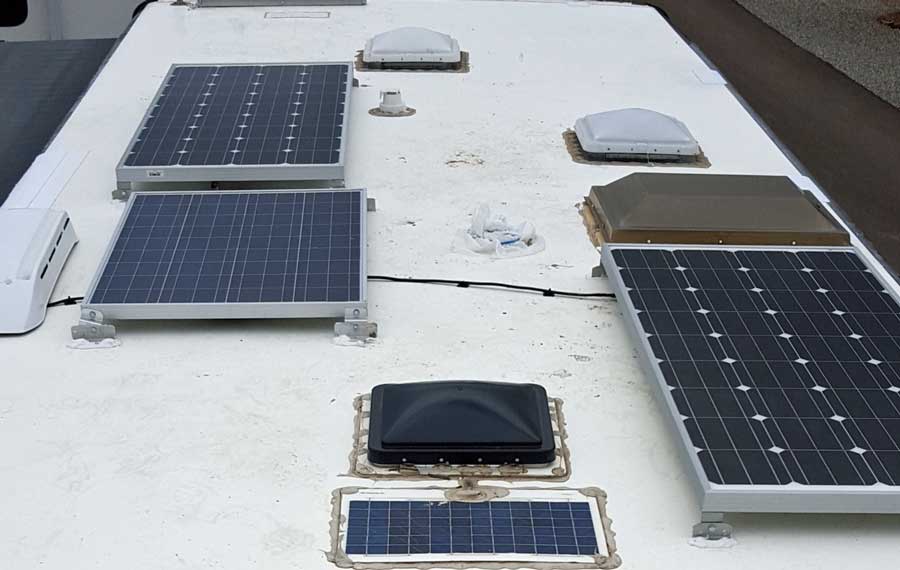
Sunday, January 3, 2016: I continued with the solar installation today. My first solar installation was in 2009 in the fifth wheel (about three times what today's solar costs). That solar was moved to the Alumascape in 2013. My third solar charging system was in the Lazy Daze which came with 300 watts of charging installed. The solar system I've chosen for Miss Dory will have 420 watts of charging for the four batteries already installed. Miss Dory also came with a 2000 watt Xantrex inverter so my only expense comes from the | 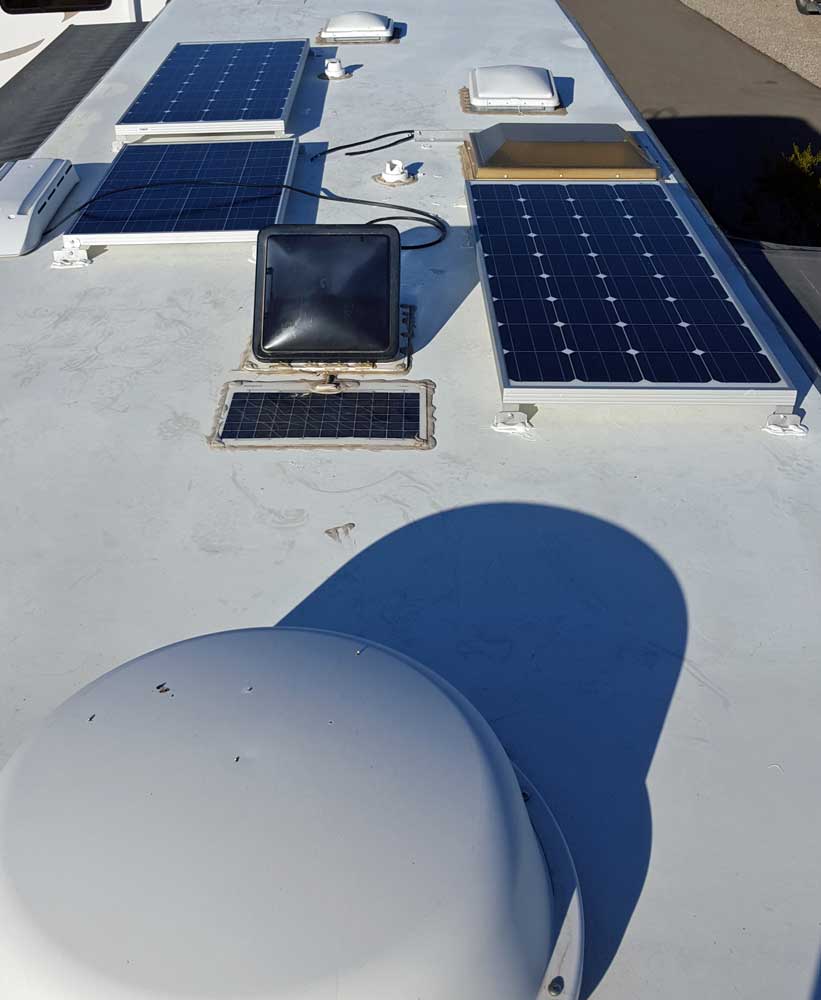 |
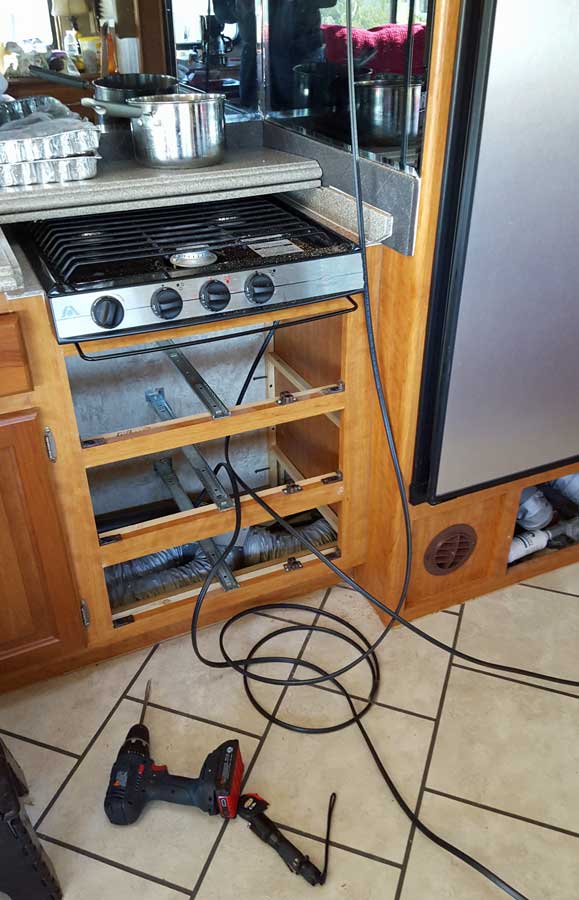
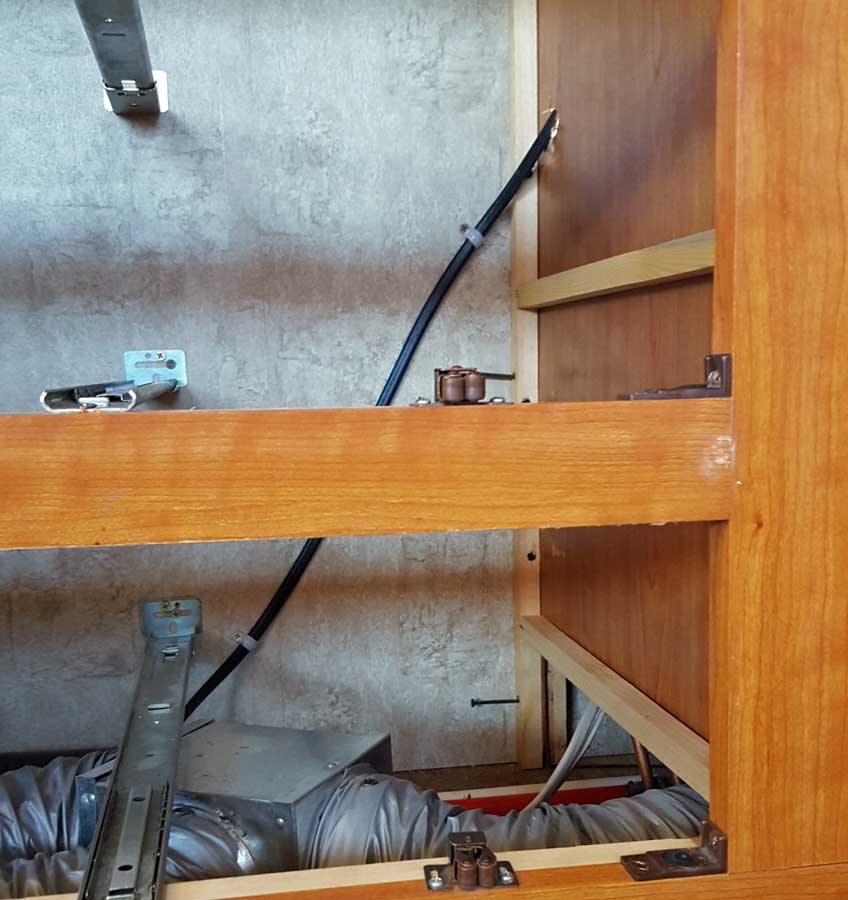
| panels, charge controller and wires. Total expense so far, $900. Compare that to the cost in 2009. I'm not done with this installation. Everything is done except the wiring of the panels on the roof, I hope to complete that tomorrow. Even though this is my fourth solar installation, there were still some firsts with this install. I have never come from the roof through the refrigerator vent into the refrigerator compartment. I watched a YouTube video showing the solar wire going through the refrigerator vent and learned to clip the screen rather than drill through the sidewall of the screen housing. I want the shortest route possible from the roof to the batteries to avoid voltage loss. The roof wire must first go to the charge controller THEN to the batteries. So the logical charge controller location is the side wall of the refrigerator. I discovered a bundle of wires already traveling through the backside of the storage compartments moving toward the battery compartment. I passed my solar wire into the backside of the cabinet under the stove then into the compartment below where I joined that bundle of wires. What I did today was to secure the panels to the roof. They are installed to allow them to tilt toward the driver's side or passenger side of the coach so during the winter months, I must park facing either east or west to point the panels to the south just like my other installations. Click all photos for additional views. | ||
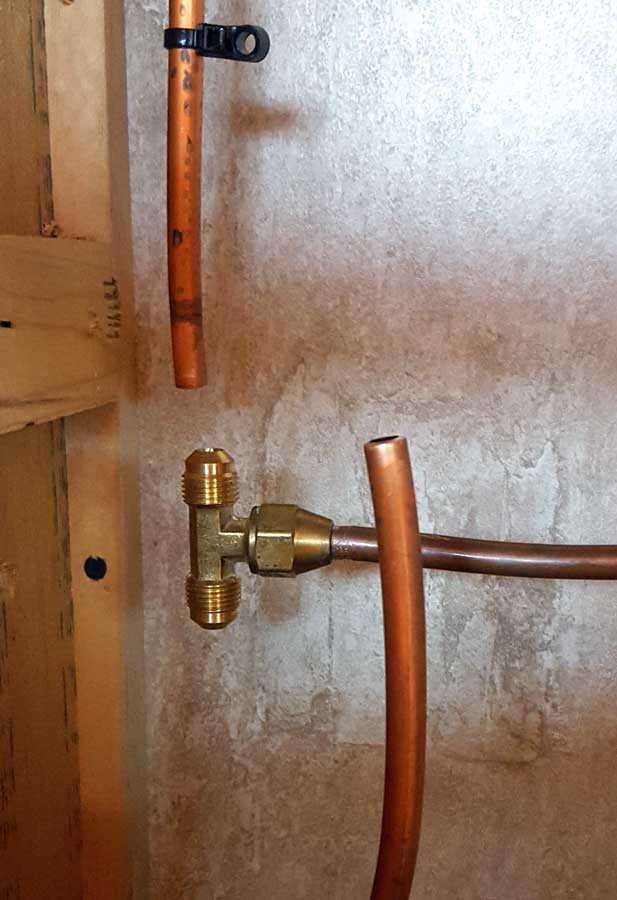 |
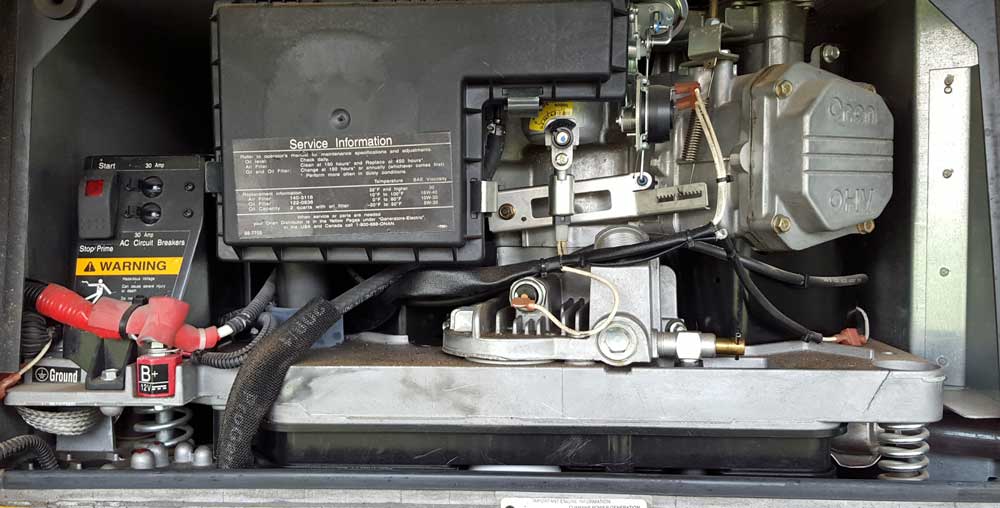
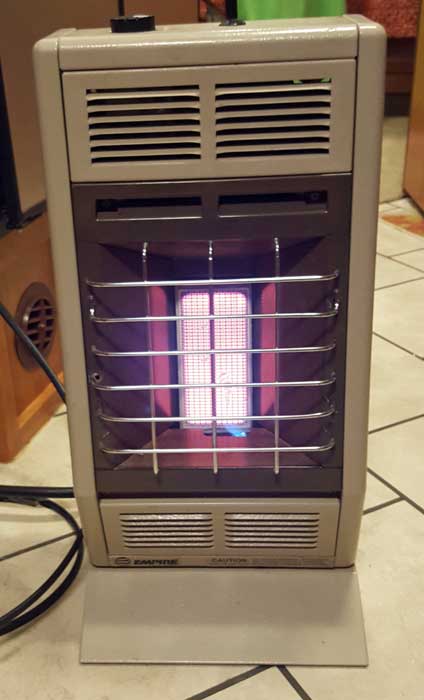
Saturday, January 2, 2016: I worked the entire day installing solar wiring but had to delay because I needed a 7/16" drill bit which was back in Sutherlin. I did purchase a bit later but during the delay I installed the propane line needed for our stand-alone propane heater. We need this heater when boondocked, the furnace pulls too many amps from the batteries. The easiest access to propane is the copper line leading to the stove. The line I'm installing is the same line I installed in the Alumascape then transferred to the Lazy Daze. The heater is a 10,000 BTU heater which was fine for the Alumascape and Lazy Daze but it may come up short for Miss Dory since it Miss Dory has a lot more cubic feet to heat. On the plus side, I believe Miss Dory has more insulation so we'll see how it goes. Click the photos for additional views. The wires to the left of the photo are for the solar installation. |
 |
