|
|
Changes to the Cameo |
|

|
| April 29, 2007: Top priority for the new Cameo is to move the cat litter box and food to the basement and give the cat access to the basement from the living area of the RV. We had accomplished this in the King of the Road through the cold air return of the furnace. |
 |
|
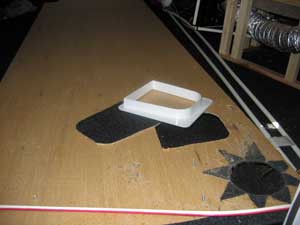 |
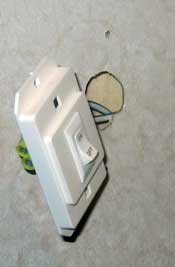
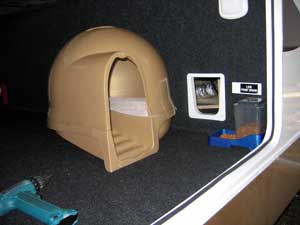
We discovered the cat has access to the basement through the cabinet that contains the garbage can. But the low point access hole is too small for our fat cat. We bought a cat door to install in the basement wall which separates |
|
| the storage area from the plumbing and wiring. I used a sabre saw to cut the hole. The cat door is press fit and stuck to the wall with double back tape. The cat dome and food is now located in the basement. |
 |
|
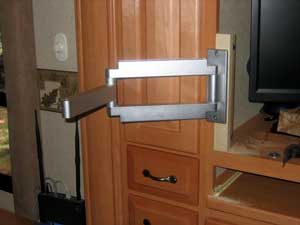 |
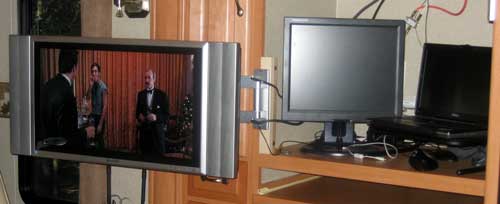
May 1, 2007: The third priority, after moving the deck to match the Cameo, is to get the LCD TV off the theater seating (Cameo's term for the two matching recliners) and mounted to the entertainment center. We need two computer workstations in the Cameo, one for Gwen and one for myself. I will be using the entertainment center for my workstation. For that reason, |
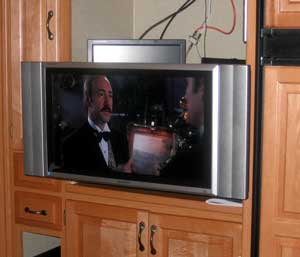
| we never intended to use the "TV hole" for a television but for my computer monitors. This is similar to what I did in the King of the Road. I had to put a supporting block behind the TV support bracket. This block will be hidden behind the TV most of the time. If you look closely, you'll see the computer router in the bottom left corner of the above photo. Once I get electricity into the cabinet space below my computer monitors, the router and modem will be moved into that cabinet and out of sight. The LCD TV can be located to the left when I'm working at the computer workstation. Everything is currently temporarily located so you |
|
|
| see all the TV and computer wires behind my monitors. Cameo provided molding to hide all the wires but I won't be installing it until everything is in its final location. The photo to the right shows the LCD TV located in front of the workstation when Gwen and I are using the theater seating to watch TV. Yes, these are scenes from In the Garden of Good and Evil which I was playing while testing the new DVD player which came with the Cameo. |
 |
|
 |
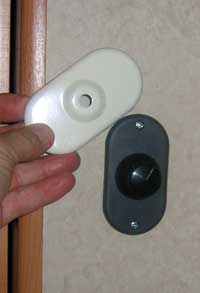
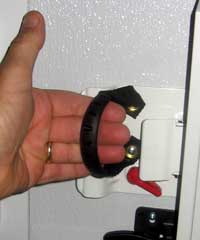
May 2, 2007: While visiting the Escapade we were able to browse the many RV parts and accessory vendors. One of those at the show was Coil n' Wrap which we discovered last year. They always have many handy items an RV can really make practical use. Most of the items have to do with Velcro but Ken carries or manufactures a variety of items. The entry doors of an RV are often hard to open due to the compact |
|
| handles on both sides of the door. Ken offered the paddle handle pictured above for the exterior door which makes opening the door very easy. The paddle is not only larger than the standard door handle but also give additional leverage. For the inside of the door, I installed a strap handle with rubber grip. This is also larger than the standard and is easy to grab quickly (say if the wind catches the door) to help pull the door closed. |
 |
|
|
|
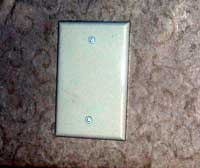
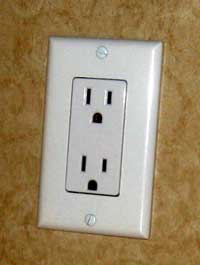
| May 3, 2007: I'm in the process of making the entertainment center into my computer workstation as well as the place for the TV and surround sound equipment. I discovered that the top self of the cabinet below the location where a TV was to be installed was prewired for the installation of a fireplace. That wiring is protected by a cover plate shown in the photo, above left. This will be a great location for much of my Internet equipment since it is a dedicated 20 amp circuit. I installed the 110 volt receptacle shown above right. This looks like a lot of wires and equipment. It really is lots of wires but none of the equipment uses much power. I've installed a high-end surge protector and all equipment plugs to it. |
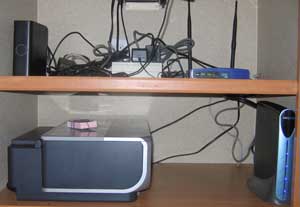 |
My external 250 gig hard drive is on the left, network adaptor for the printer is next. The white box is the surge protector and the Linksys router is on the right. On the bottom shelf is the printer on the left and the Satellite Internet modem on the right. I will be adding a sliding tray for the printer to make access easy. |
|
|
|
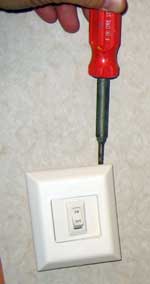
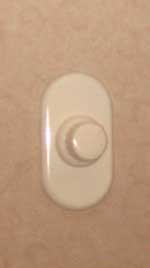
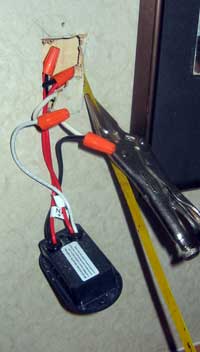
| May 4, 2007: The next project is to change the two toggle switches which operate the two halogen lamps above our heads while sitting in the bed. The toggle switch is either on or off and the on position is entirely too bright. The Cameo bedroom comes equipped with 6 halogen lamps located in the ceiling and operated by a single dimmer switch. We love to be able to dim the bright halogens. Unfortunately, Cameo did not install dimmers on the reading halogens over the bed so I ordered the dimmer switches from Carriage to exactly match all the other dimmers in the trailer. The toggle plate just snaps off revealing the screws to remove the switch. Only the black wire is switched (the positive 12 volt wire) which makes sense, however the dimmer must connect to |
 |
|
|
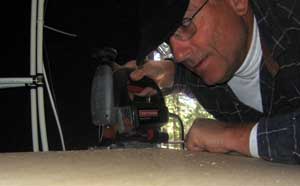
| both the positive and negative wires. I cut the white wire to be able to connect to it. I used a 12 volt circuit tester to locate the incoming positive and negative wires to match the labeled wires on the dimmer switch. Wire nuts were used to tie the correct wires together. Unfortunately, I did not have a tool to enlarge the hole for the new dimmer so I manufactured one using vise grip pliers and a hacksaw blade. It cut best on the pull stroke so I put the blade in the pliers so the teeth are pointing toward me. The dimmer switch is black but came with a white cover plate and a white knob. Both reading lights can be adjusted to a comfortable brightness. It also allows Gwen or I to add a small amount of light to the room if we get up at night without disturbing the other sleeper. |
|
|
|
|