|
|
Changes to the Cameo
page 3
|

|
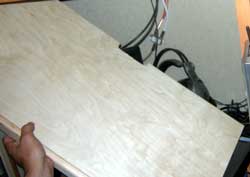
| May 16, 2007: Moving toward finishing my computer workstation project from the entertainment center, I need a shelf to sit above the monitor. This should be a simple project but as it turns out, it still took more than two hours. |
 |
|
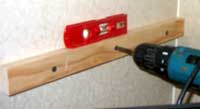 |
I originally thought of installing adjustable shelf supports, then changed my mind and installed fixed shelf supports. I found a very nice piece of Birch plywood for the shelf. It is light weight |
|
|
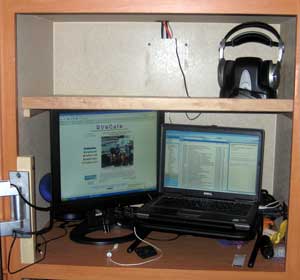
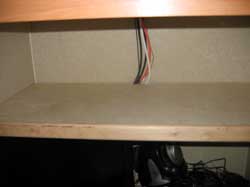
| and finished nicely. I add a piece of Maple to the front edge of the shelf for extra support and to give a finished quality. Cameo had supplied a 4 foot long wall piece to cover cables, I cut this to fit above the shelf and help hide the TV and computer cables. I have one more project to |
 |
|
| complete this computer workstation. That project is to build a sliding tray for the printer in the lower part of the cabinet. The printer tray will have to wait for another day. |
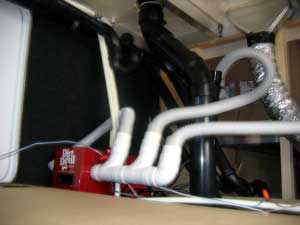 |
May 18, 2007: After removing a basement wall, the central vacuum system becomes visable. Only three intakes are installed. One for the vacuum dust pan where a broom is used to sweep kitchen floor droppings into a dust pan shaped recepticle under the stairway. One for the living area and one for the basement area. Click the photo for details. |
|
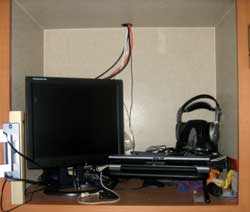
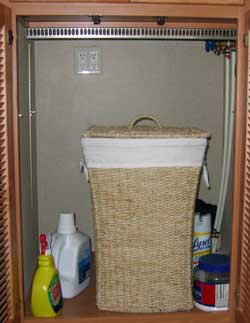
| May 19, 2007: This weekend will be a weekend of new shelves. The first shelf is inside the cabinet intended for the washer/dryer. We don't plan to purchase a washer/dryer in the near future and I want to make use of the four outlets in this closet. We are always looking for places to recharge phones, batteries, wireless headsets, walky-talkies and more. This would be a great place if it had a shelf. Pass your cursor through the photo to see the self installed. I plan to put some sort of finished edge on the shelf but Home Depot did not have what I was looking for. Perhaps ACE is the place? |
 |
|
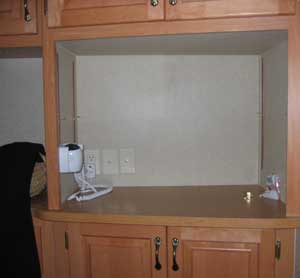 |
May 20, 2007: There is an open cabinet in the bedroom where Cameo expected me to install a TV. I think it's a waste of space and have already ordered an LCD TV to install on an articulated arm. I think this cabinet space should be enclosed with cabinet doors which I've already ordered from Arkansas using the Internet. The cabinet needs a shelf too. Pass your cursor through the photo to see the shelf installed. The power and satelite TV connection is in this space, I've drilled a hole in the shelf to pass cables for the LCD TV. |
|
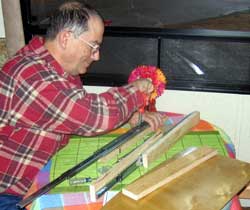
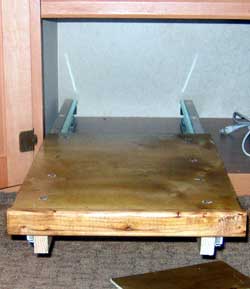
| May 23, 2007: This is a two evening project. I purchased 18 inch, full extension drawer slides to make a full extension tray to carry the computer printer from the cabinet into the room for use. Don't tell Gwen I assembled the slide at the dining table, she would NOT approve. An 18" full extension slide means, all 18" of the slide with extend so you can get at the back end of the tray when pulled forward. |
 |
|
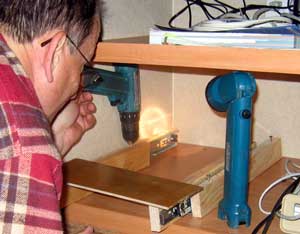 |
I used the flash light so I could see to the back of the cabinet to screw the mounting brackets to the cabenet shelf. This is the lower shelf, not all that convenient but really the only place in the trailer to mount the printer permanently. These slides are intended for side mount to drawers so the drawers will full extend. I'm modify their use as a tray for the printer. |
|
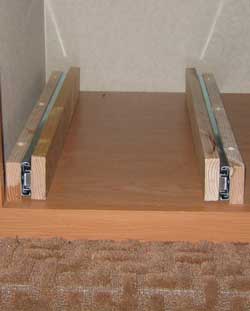
| Pass your cursor through the photo to see the full extension slides in use. Tomorrow night I will install the tray and printer to the slide mechanism. |
 |
|
 |
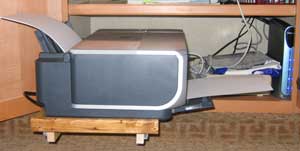
May 24, 2007: I manufactured the tray from 1/4" Birch plywood I discovered at Home Depot for $6.29 per 2 x 4' sheet. I'm always trying to save weight, this plywood was strong and lightweight. I added a piece of Maple to the front of the tray to keep the printer in place and as a grip to pull the tray forward for use. I used only screws to secure the tray to the rails so I could easily remove the tray to make adjustments in the tray position if needed. When you pass your cursor through the photo below you'll see the operation of the printer tray. The tray allows the printer paper supports and operations to be |
|
| accessible. The wire dangling from the upper shelf is only temporary. The printer is connected to our network so is usable from any location. Gwen can even be outside at a picnic table and send a command to the printer to print a document. |
 |
|
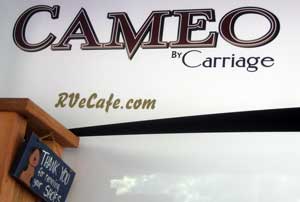 |
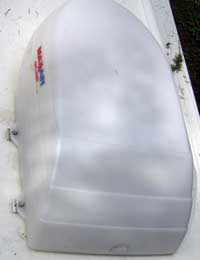
May 28, 2007: Today I finally personalized the Cameo. It is now the official RVeCafe Mobile . I used precut vinyl lettering just as I did for the satellite dish. Swing your cursor through the photo to see the rear of the Cameo. |
|
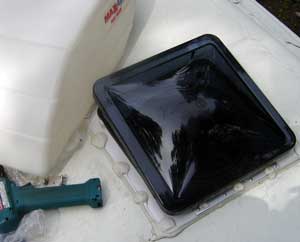
| May 29, 2007: I removed the vent cover from the King of the Road with the intention of installing it onto the Cameo. Today was that day. This is a MaxxAir high velocity vent cover so I've installed it over the Fantastic Fan which came installed in the Cameo kitchen. |
 |
|
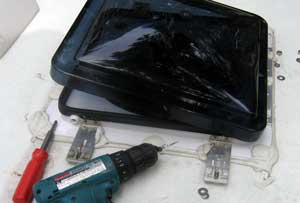 |
Each bracket is installed with two screws directly into the side of the vent. These have to match the cover perfectly because the cover holes are a circle not oblong. |
|
| The cover fits over the bolts exactly and are secured with a nut and lock washer. Fantastic Fans does not recommend these covers claiming they will cut the efficiency by 20%. I agree with the 20% loss however we run the fan at low speed at least 90% of the time so I doubt the 20% loss will matter in this case. The advantage is the ability to leave the vent open in the rain with an additional advantage of protecting the vent lid. |
 |
|
| |
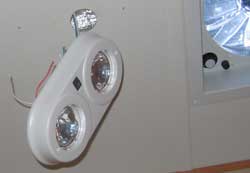
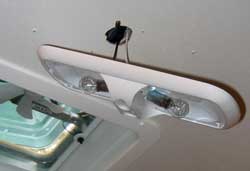
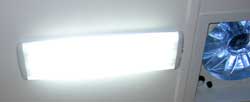
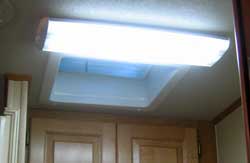
| June 8, 2007: During the Arizona trip, I purchased flourescent light fixtures to replace the incandescent fixers in the King of the Road. Before trading the KOTR, I removed the flourescent fixtures and returned the incandescent fixtures. Now I've installed two of the flourescent fixtures into the Cameo. They produce more light, are cooler running and use less voltage. I have two more fixtures and will probably install them in the basement. |
|
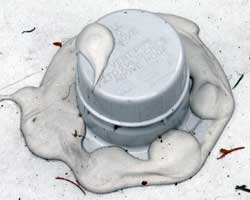
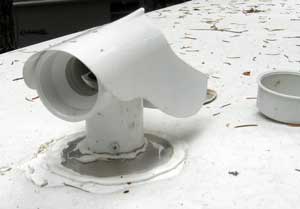
| June 9, 2007: I have the time today to put the Extreme Vents onto the Cameo. These were removed from the King of the Road back in February. I originally purchased them during our first Escapade. |
|
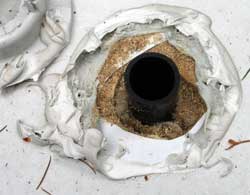
| The stock vent cover is easy to remove. These sell for about $3 at an RV store, so I don't consider them to be very good quality. There are 6 screws and caulk holding them to the roof. It was easy to clear the caulk for access to the screws, then the base pops off. The aluminum flange and Extreme Vent are sealed to the roof with Dicor caulk. Two screws secure the Extreme Vent to the ABS vent pipe. These are about $45 each but help to keep the two holding tanks well aerated. |
|
| Return to Page 2 |
|
|
|
|
|
