|
|
Changes to the Cameo
page 2
|

|
Completing the Computer Workstation
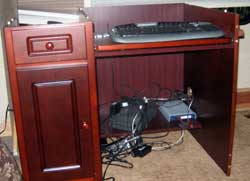
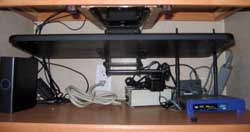
May 5, 2007: The Cameo F35SB3 has a nice little entertainment center on the kitchen side of the trailer. We need two computer workstations in our trailer, one for Gwen and one for myself. We use the entertainment center as the location of the surround sound system (as Cameo intended) and for the LCD TV mounted to a swing arm. Cameo also installed a laptop tray below where they intended the TV to sit. I have a wonderful, moveable keyboard tray which I've brought over from the King of the Road. I'm mounting this tray in the top of the first shelf below the laptop tray. A support board must be installed first for the keyboard track.
|
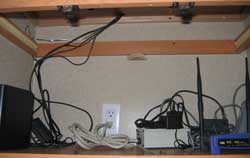
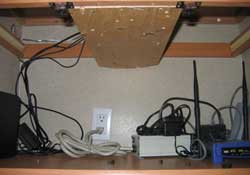
| Mounting the keyboard tray here means I must open the cabinet doors for access but I really need to do that anyway since I have a lot of Internet and network equipment on |
 |
|
 |
those shelves and it will help to keep them cool if the doors are open.
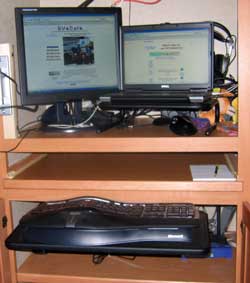
Now the keyboard is sitting on the moveable tray. You may not notice that the tray not only slides in/out of the cabinet but also raises and locks at a height which I like. It will also tilt to the angle I like. |
|
| Of course, I always had the option of using the Cameo laptop tray as a keyboard tray. I don't like the height of this tray for the keyboard and it is a perfect height for a desk top. Installing the keyboard below this tray allows me to use the keyboard, then if I need to write or have need for a desktop, I can extend the laptop tray even if the keyboard tray is already extended. I then have a clean desktop for figuring. |
 |
|
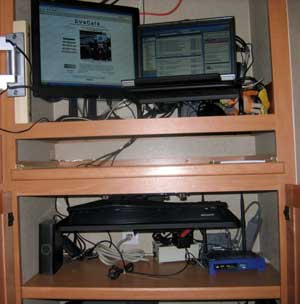 |
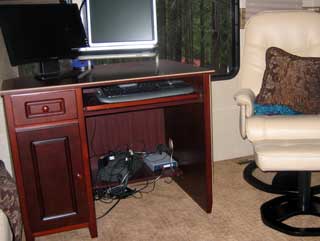
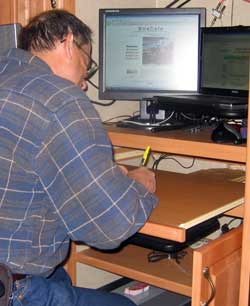
My workstation is nearly complete. I want to add a shallow shelf above my two monitors to help hide the wires and give a space to set my wireless stereo headphones. I also need to install a moving tray for the printer which sets on the bottom self of the computer center. Pass your cursor through the photo to the left to close the cabinet and view the center when not in use. |
|
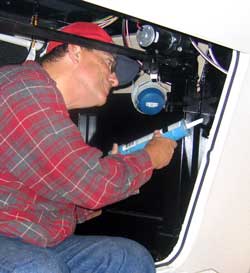
| May 6, 2007: I learned while climbing through the basement storage compartments that every hatch door frame has been set into a hole cut unto the side, end or front of the trailer. The frames are sealed on the outside but there is no seal on the inside. In some cases, there are gaps as large as 1/2 inch between the frame and side of the trailer. I decided these frames needed to be sealed from the inside to protect from weather, insects and dirt, plus add strength to the frame/trailer connection. I bought two tubes of sealer but found that it will likely take as many as four more tubes. |
 |
|
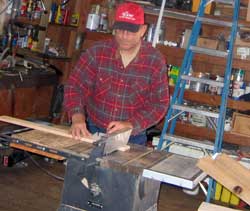 |
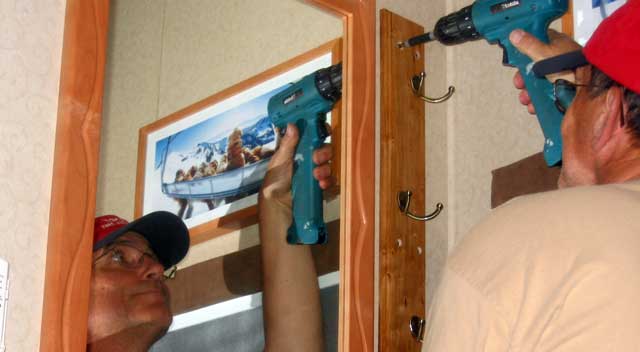
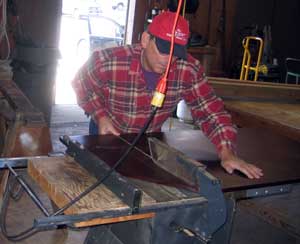
May 9, 2007: When we sold our property last October, we sold the garage where I kept all my stationery shop tools including my table saw. I found a piece of Maple, probably the only piece in all of southern Oregon. It's 6 inches wide and 7 feet long. I need it to be 3 inches wide and 3 feet long. To do a good job, I need a table saw and found one in the resort shop. I'm saved! It actually had a sharp blade |
|
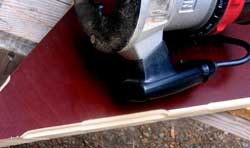
| able to do a clean cut. I cleaned up after myself hoping I'll be allowed to use the shop again. Next, the edges must be routered to give a professional look. I did that back at the trailer with Morgan looking on. The board is sanded then finished with a stain/varnish combination. I counter sunk the screw holes then screwed the hat rack to the wall. I easily found 3/8" Maple screw hole buttons then sealed the screw holes. |
 |
|
 |
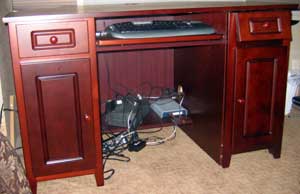 |
May 12, 2007: Before delivery of our new Cameo, we purchased a small corner desk from the Internet. We measured carefully knowing this small desk would fit perfectly into one corner of the back window. For that reason we asked Carriage to not install a couch in the back window but to deliver one Euro-chair instead. |
|
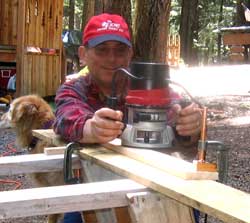
| After delivery, we assembled the desk and found it was really too big for the area. It is a very nice desk which we chose with a Mahogany finish because we have so much Maple in the living area. The desk is assembled in modules so it became apparent that we could cut the top and drop either pedestal to make the desk into a single pedestal desk. Today is the day to make that change. I used the shop table saw to cut the right side of the top. |
 |
|
 |
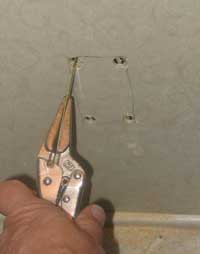
I used this now scrap piece and put four edges on it then took to Gwen to give her five choices. Do nothing, or one of the four routered edges. Click the photo to enlarge the view to see her choices. She chose the simple rounded edge. My intention was to stain the edge to match but she likes the white edge, so I'll stain with a light finish. She likes the new size which gives a more comfortable feeling for the rear of the trailer. The two pieces of electronic equipment under her desk are her UPS (uninterruptible power source and surge protector) plus her large capacity external hard drive for her laptop. |
|
|
| May 13, 2007: One of the major changes I'm anxious to make is to add another circuit to the bathroom dedicated to a small wall heater. This would allow us to heat the bathroom without having to heat the entire trailer using electricity. We usually have an electrical connection when we are not traveling and we don't pay extra for the electricity. So a second reason to add an electric heater to the bathroom is to heat the trailer with free electricity. This is a two day project, |
 |
|
 |
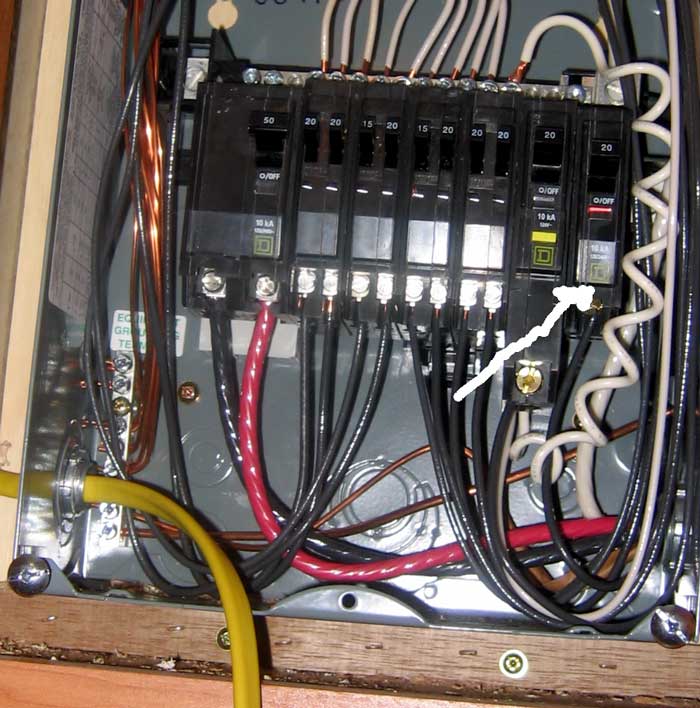
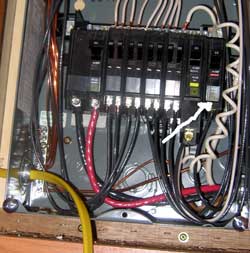
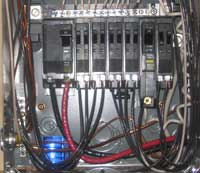
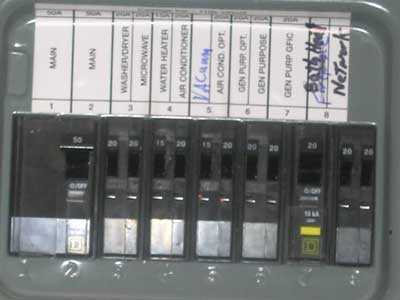
the first half today and the rest tomorrow. There is no room in the breaker box for another breaker but one breaker, the last one to the right (click the above photo to enlarge) can be removed and replaced with a split breaker. This is the "fireplace" breaker (we have no fireplace) but I rewired it for our computer network. Now I'm going to pull it out of the box and replace with a split breaker allowing two 20 amp circuits rather than the one. The toughest job is to get the Romex from the |
|
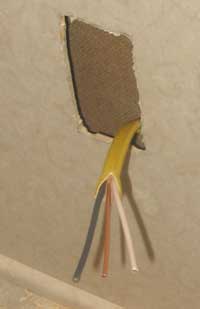
| circuit breaker box into the bathroom. I found that the Romex can pass through the left wall then drop into the basement. From there, it's relatively easy to get it into the bathroom wall. Pass the cursor through the above photo to see the hole cut into the bathroom wall for the receptacle. All of this has been very time consuming because basement walls had to be removed and I had to climb into tiny spaces to retrieve and pull the wire. Finally, the hole is drilled into the bathroom wall and the wire is pulled into the hole ready for the receptacle. |
 |
|
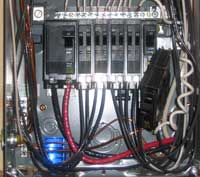 |
May 14, 2007: I'm completing the dedicated circuit for the bathroom heater today. You can click the photo to the left to enlarge. These are Square D circuit breakers, the same brand and style found in my home before I sold it. They release from the top so pulling on the top drops the circuit breaker off the power bar. I unscrewed the black wire and reconnected to |
|
| the new split breaker on the right switch. Then attached the black wire for the new bathroom circuit on the left switch. You can click this photo also to enlarge. The bottom of the breaker snaps first, then push the top of the breaker onto the power bar. This is a 50 amp panel and much easier to work on than the 30 amp panel in my previous King of the Road. |
 |
|
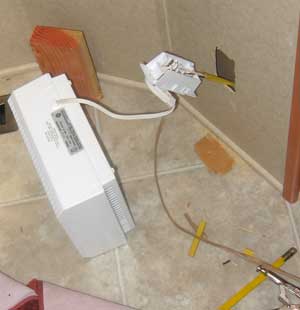 |
I wanted to test the outlet before install the back of the box. I flipped the switch, and the heater turns on. Hurrah! Pass your cursor through the photo to see installing onto the wall mount. This heater was designed to mount over an existing recepticle. In this case, no cover plate was needed for the recepticle because the heater fits directly over the outlet without a cover. The kit also include a locking bar which fits into the unused outlet while the heater plug fits into the other outlet. |
|
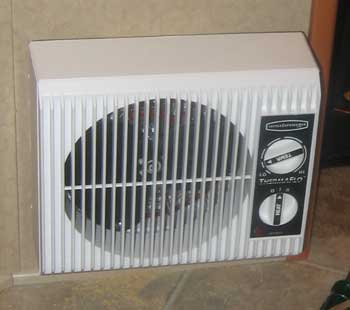
The heater does not touch the floor but hangs from its special wall mount. It has two power settings for 1,000 and 1,500 watts and a built in thermostat which will automatically hold the bathroom temperature at a comfortable level. The heater also has a very quiet blower.
The circuit breaker box cover is replaced with "Bath Heat" and "Network" for the last two breaker switches. |
 |
|
 |
| Return to Page 1 |
|
|
|
|
|