 |
Replace the Brake on the Main
Fifth Wheel Slide |
The slide brake for the main slide on my King of the Road fifth wheel does not seem to be working properly. While traveling down the road the slide will slowly work its way out from the main trailer body. This last 2 hour trip, the slide extended about |
 |
|
 |
 |
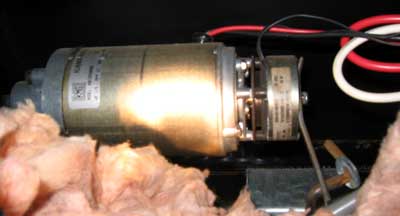
three inches before I stopped to power it back in. When talking to the service manager at King of the Road, he suggest the motor brake mechanism may be broken and instructed me how to find it. I cut a large enough hole in the plastic covering on the bottom of the coach to see the motor and brake above. The brake is the unit on the right of the motor. |
|
|
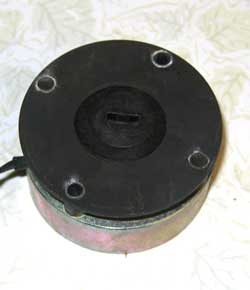
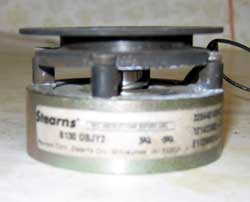
It is held to the motor by two screws which were easily removed. The center screw connected to the manual release arm also had to be removed. The wires were disconnected from the wire nuts also powering the motor. |
 |
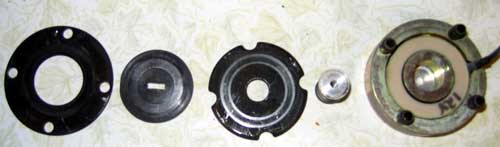 |
| The brake unit itself is easily disassembled. We suspected that the plastic disk (second from left) might be broken. The brake is always engaged by a small spring (2nd from right) pressing against a metal plate (center) which traps the plastic disk between the plate and cover. The plastic disk fits over a key on the center shaft of the motor which should stop the motor from moving. When the motor switch is engaged, power goes to the electromagnet pulling the plate toward the magnet, compressing the spring and releasing the plastic disk allowing the motor to turn, driving the slide in or out. I'm not seeing anything wrong with any part of the brake, except that it is not working. The service manager and I have decided to replace the brake mechanism hoping that some "unseen" problem will be solved with a new brake. Once I have the new brake installed, I'll report on success. |
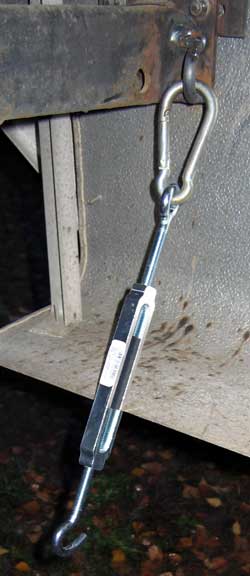 |
November 30, 2005: UPDATE: I talked with the KOTR service manager more about this problem. A replacement brake was going to cost nearly $100 with shipping charges and since I could find nothing wrong with the current brake, I chose NOT to replace the brake. I reassembled the old brake, re-installed it and to my happy surprise it seemed to be working much better. In fact, I had to pull the trailer to the welder for the "brace project" and the slide did not move from it's location. While at the welding shop, I decided to make sure I would no longer have trouble with a "slipping" slide. I had the welder create two loops then weld them to the slide frame and to the "I" beam of the trailer frame. The photo at left shows the loop |
| |
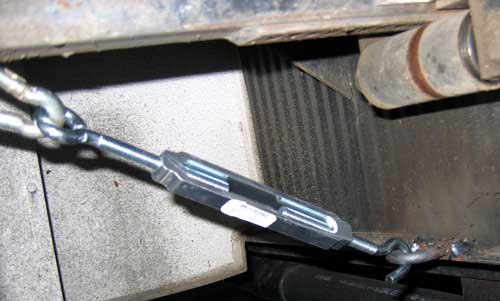 |
| connection to the slide frame. The photo above shows the loop connection to the "I" beam. The slide is locked into traveling position with a turnbuckle. When I disconnect the turnbuckle from the "I" beam, I can leave it hanging from the slide frame. It is easy to reach through the wheel well to reattach and tighten. The welding fee for this was $18 including the cost of the loops. Now, I must remember to release the turnbuckle BEFORE attemting to roll out the slide. I created a sign which must be lifted to operate the slide switch. This is similar to the sign I created for the brace project. I may not actually need this turnbuckle lock since the brake seems to be working now but this will take all the pressure off the brake and allow me to relax while towing the trailer. |
 |
|
|
|